Workflow Major Minor (Help Page)
Roles
The roles participating in workflow major minor are: OFFICE, EG CHAIR, EG and QG CHAIR.
Office starts Major Minor Release
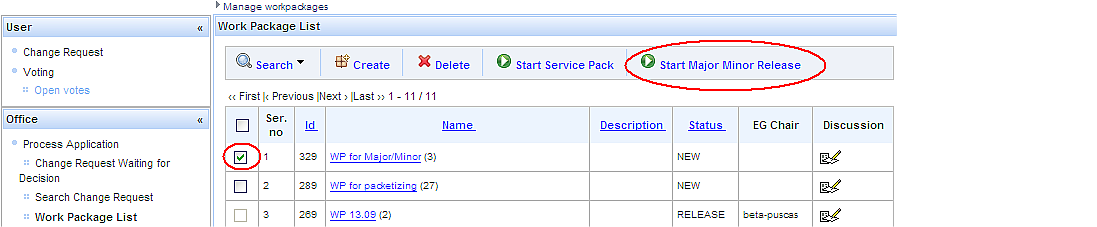
Step 1: [Office - Process Application – Work Package List] Office checks the box in front of WP and clicks button “Start Major Minor Release”.
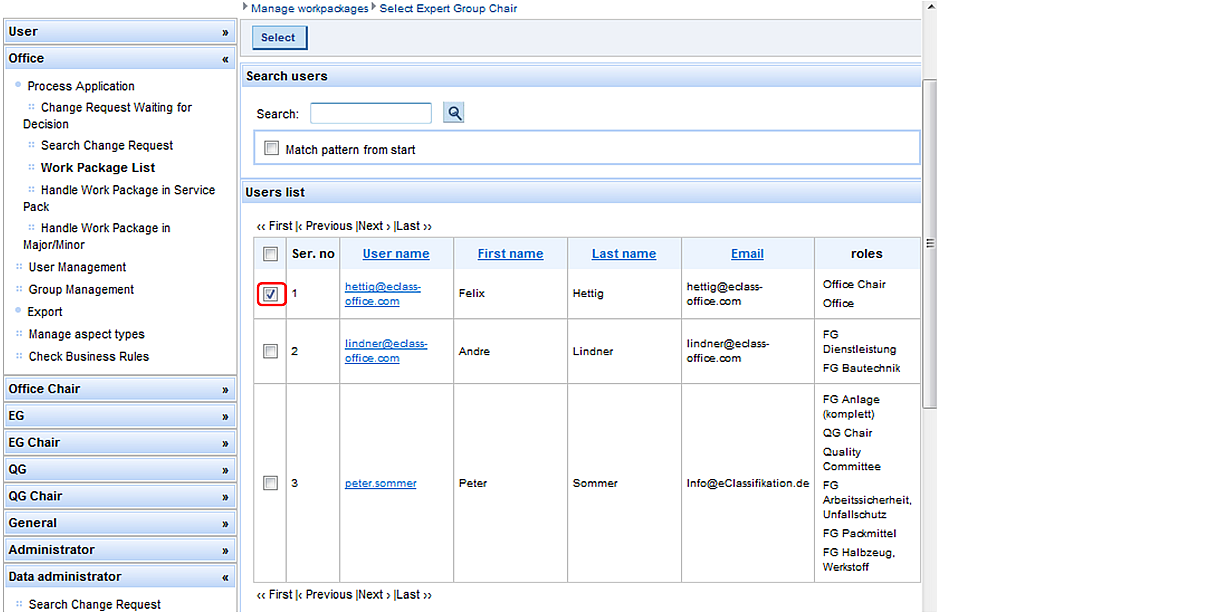
Step 2: Office selects a user assigned to Expert Group Chair.
EG Chair prepares Work Package

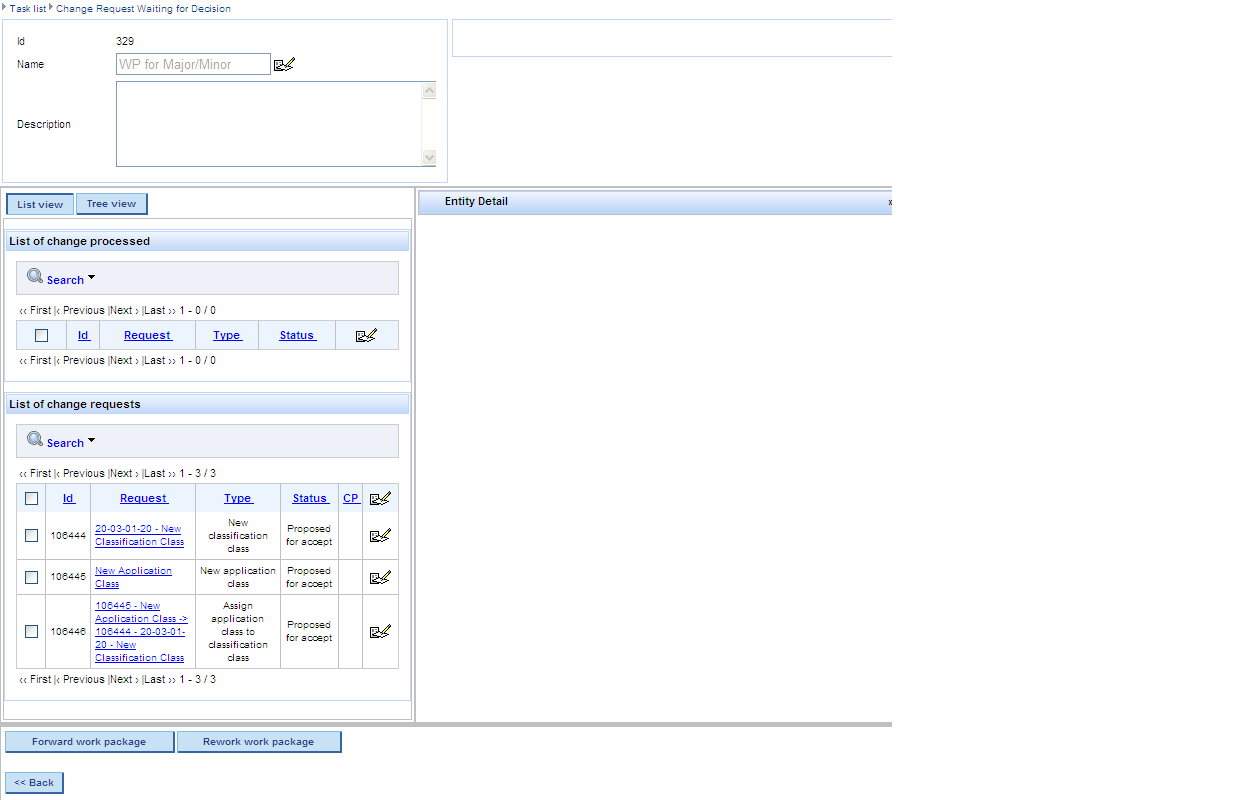
[EG Chair – Process Application – Change Request Waiting for Decision] EG Chair clicks button “View task” in order to display the details of the WP and the corresponding CRs
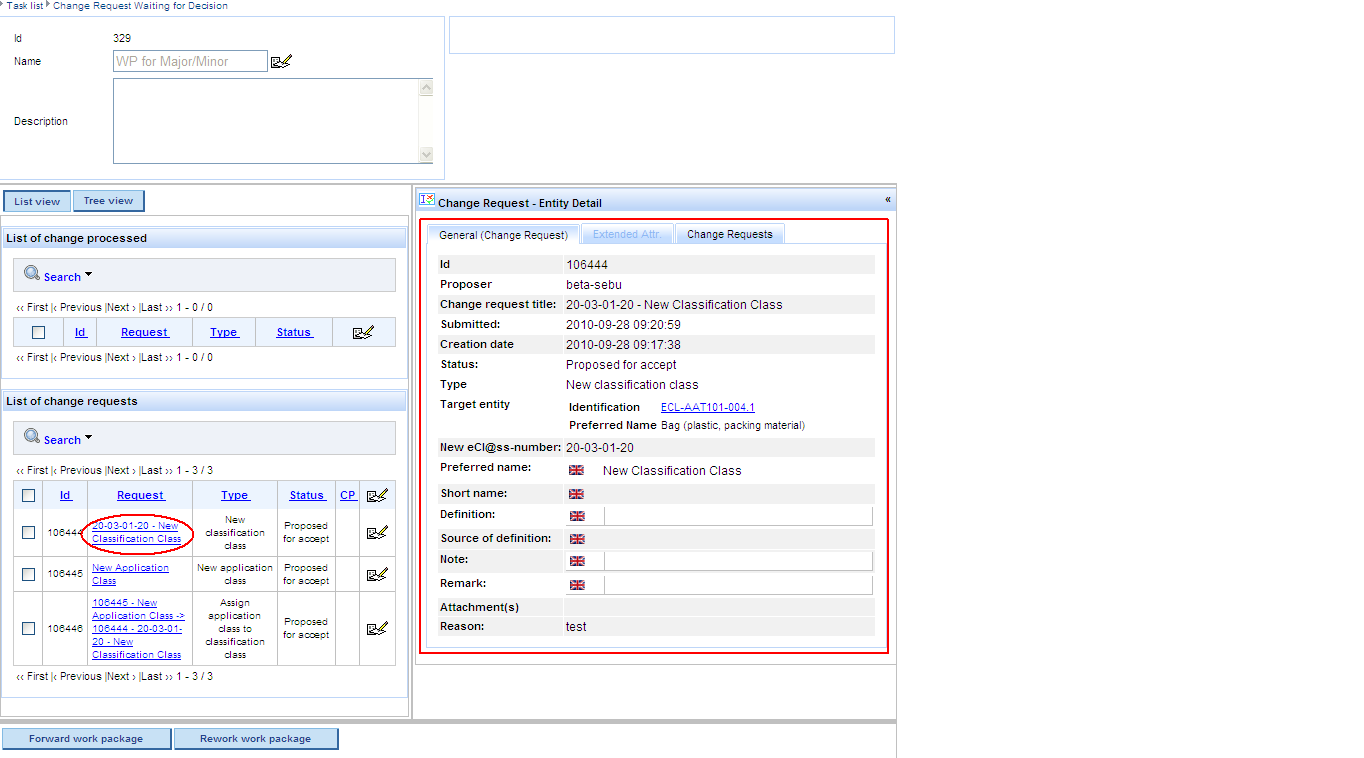
The details of each CR can be viewed on the right side of the panel by selecting the respective CR:
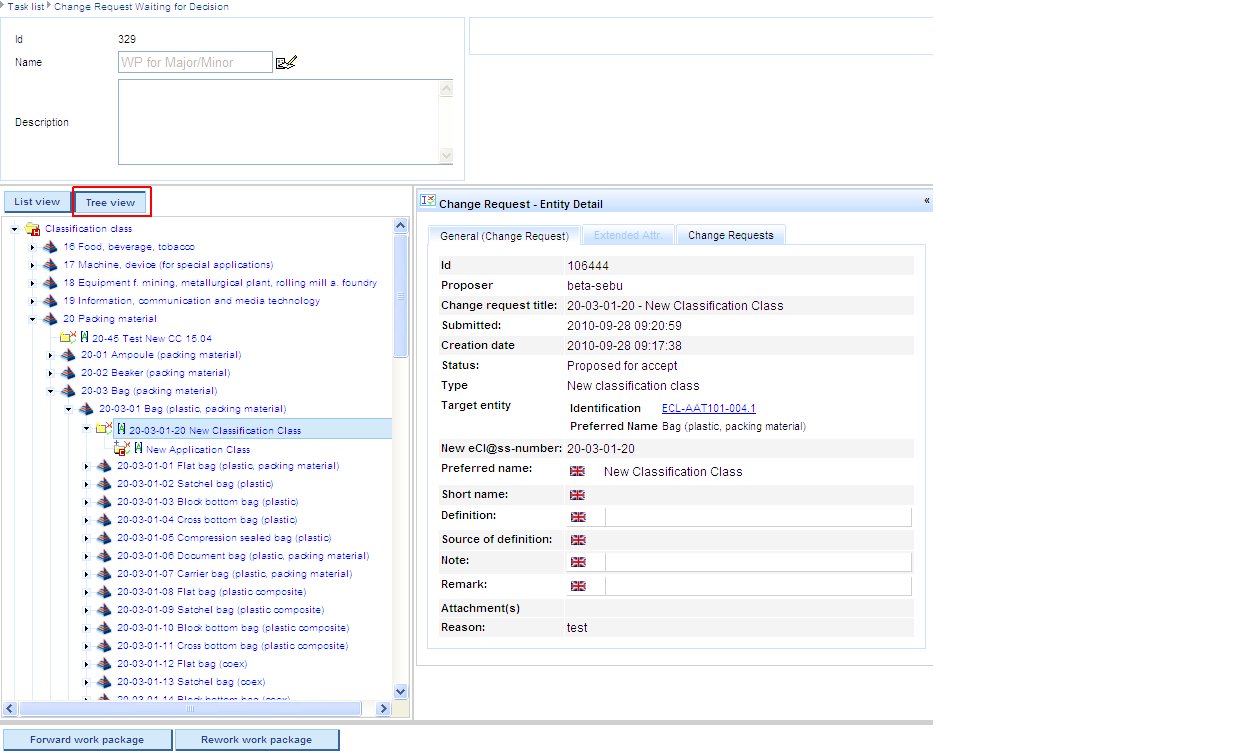
At the same time, EG Chair has the possibility to view the CRs within the hierarchy, by selecting the option “Tree view”:
EG Chair sends the Work Package back to Office
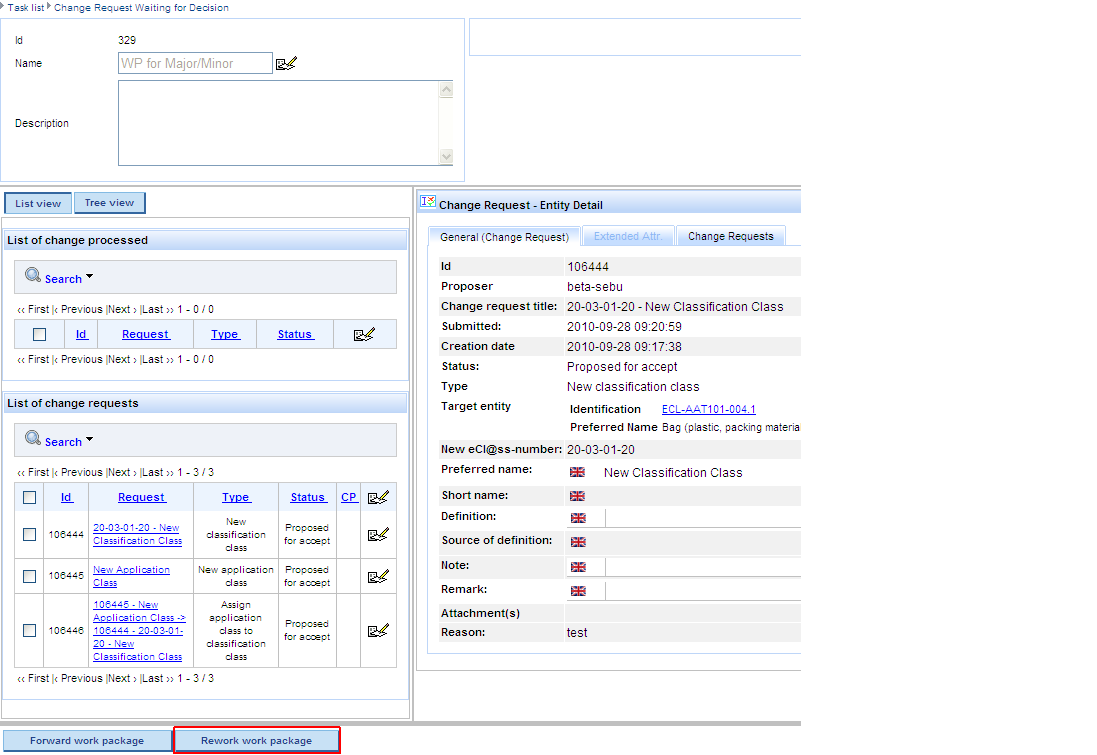
EG Chair decides that one/several/all CRs contained in the WP are not in scope of EG and sends the complete WP back to Office by clicking button “Rework work package”.
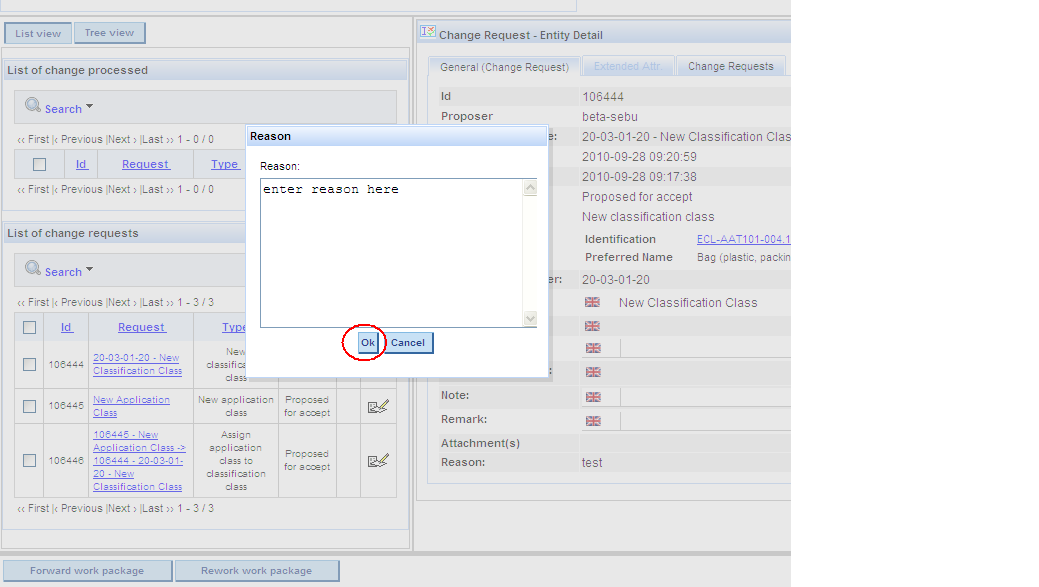
EG Chair gives the reason for sending the WP back and presses button „OK“.
Note: CRs included in this WP are still in status Proposed for accept in this stage of the workflow.
Office re-prepares Work Package

[Office – Process Application – Handle Work Package in Major/Minor] Office clicks button “View task” in order to display the details of the WP to be reworked and the corresponding CRs.
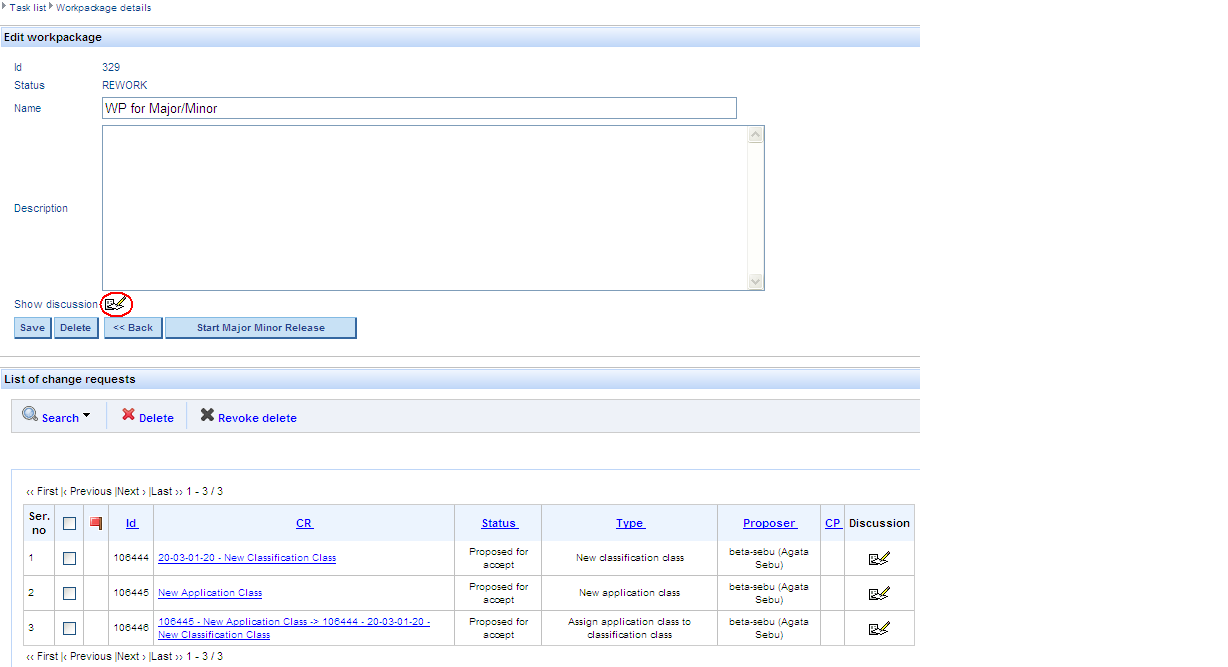

The reason given by EG Chair for sending back the WP can be viewed within the Forum of the WP.
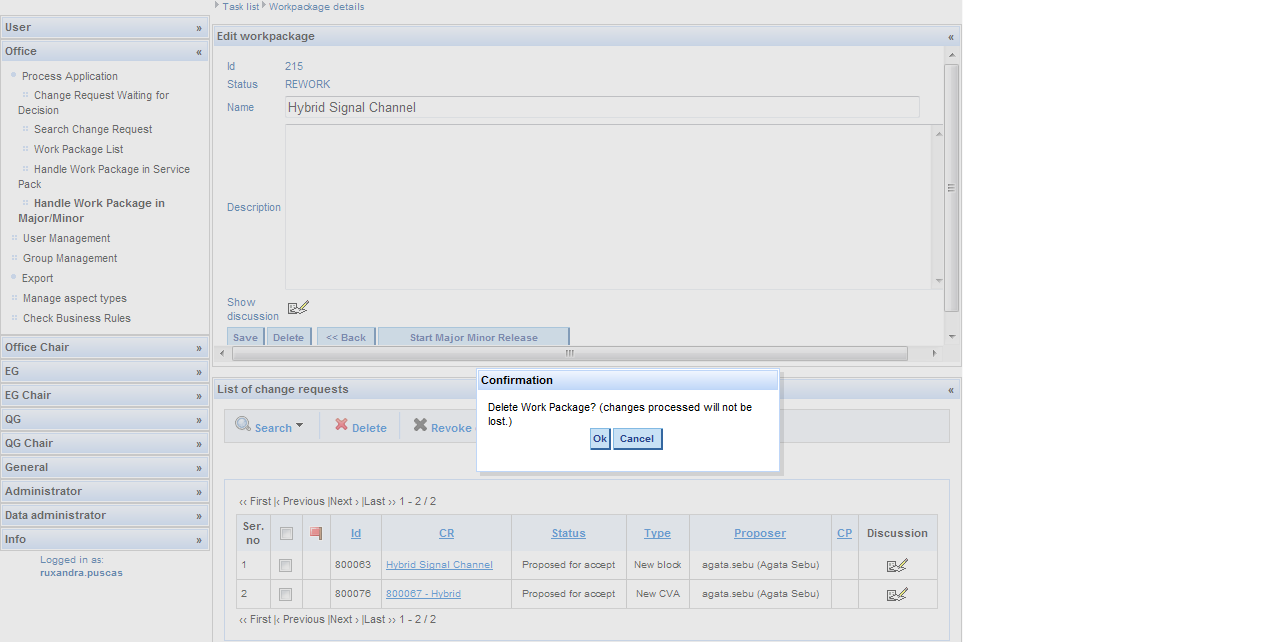
Office has now the possibility to:
A. Remove CRs from the received WP by checking in the box in front of the respective CR and clicking button “Delete”. This decision can be withdrawn by pressing button “Revoke delete”.
B. Submit again WP to EG Chair by clicking button “Start Major Minor Release” and choosing again a user assigned to EG Chair. The WP will be again displayed in the task list of EG Chair under [EG Chair – Process Application – Change Request Waiting for Decision].
C. Stop work on the WP by deleting the WP. The WP may be deleted even if it still contains CRs, which continue to be listed under [Office – Search Change Request] in status “Proposed for accept”.
EG Chair forwards the Work Package to EG
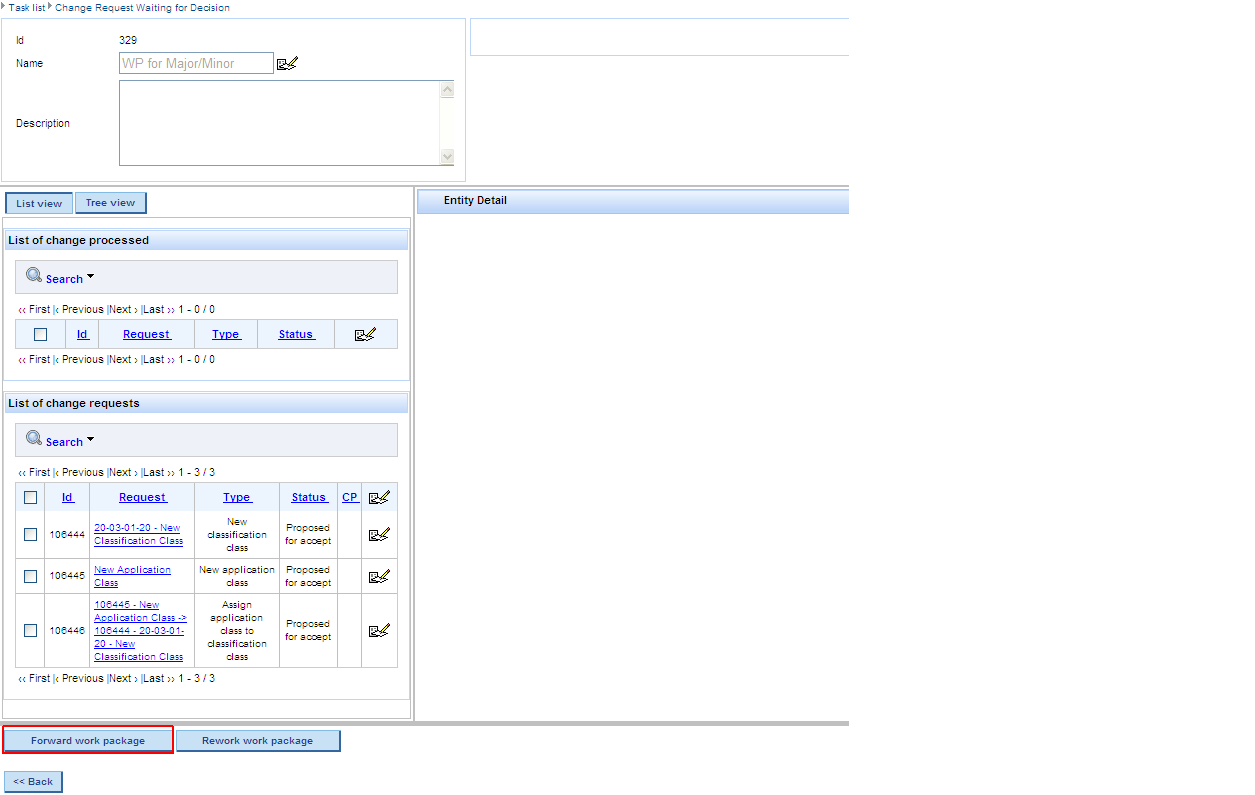
EG Chair decides that all CRs contained in the WP are in scope of EG and forwards the complete WP by clicking button “Forward work package”.

The WP has disappeared from the Task list of EG Chair.
EG works on Change Processed
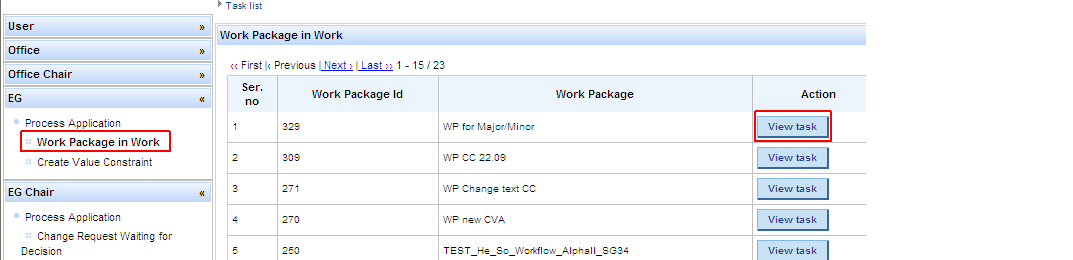
[EG – Process Application – Work Package in Work] EG clicks button “View task” in order to display the details of the WP and the corresponding CRs.

For each CR in WP EG can:
A. Create CP
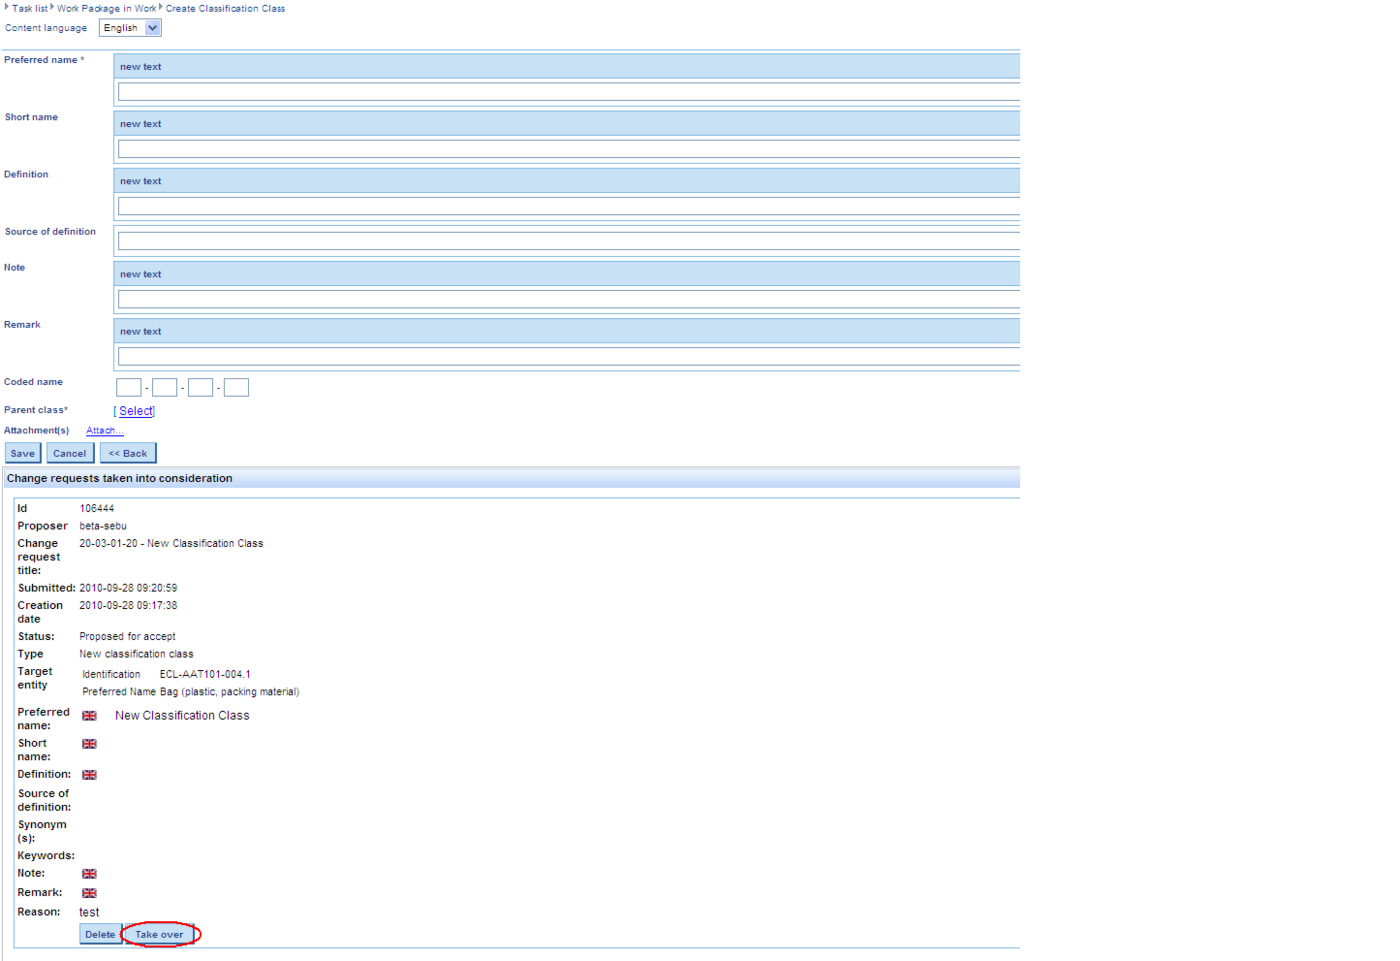
a) TEST CASE: Create CP of CR for New SE.
Step 1: Check in box in front of the CR (or several CRs of the same type) and click button “Create change processed”
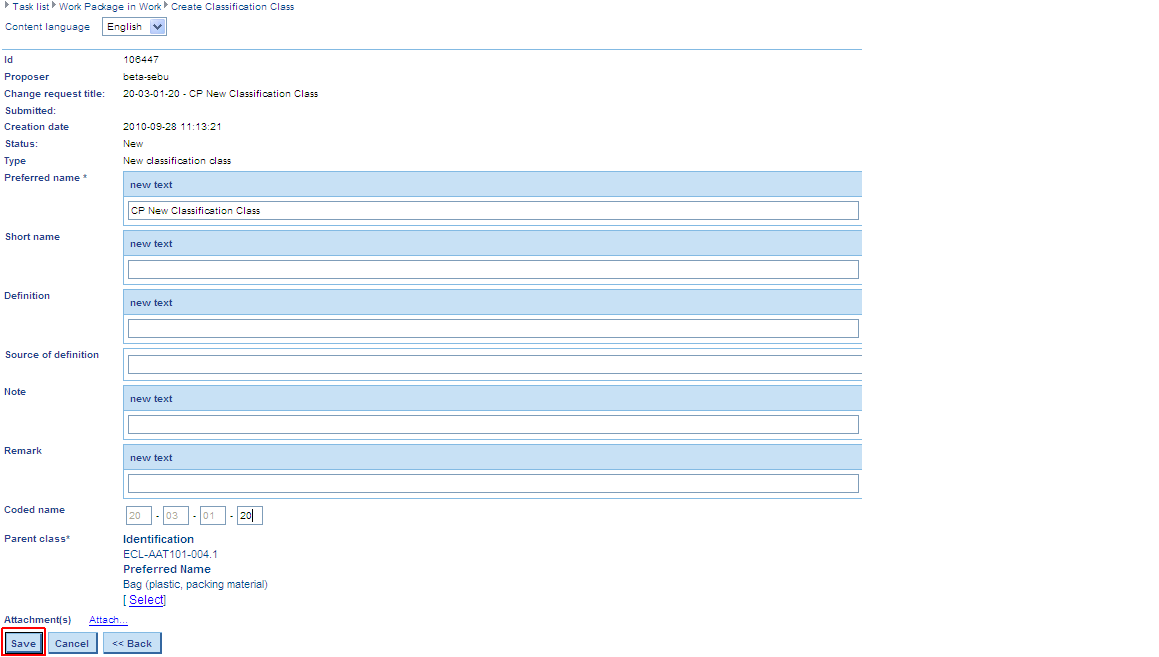
Step 2: Click button “Take over” or insert manually the details of the CP.
b) TEST CASE: Create CP of CR for Assign New SE to New SE (connect CP to CP).
NOTE: In order to be able to create a CP consisting in the connection between two other CPs, these CPs need to be created first.
CP of assignments can be created either directly, by pressing button “Take over” (in which case the already created CPs for New SE will automatically be taken over as Source and Target entity) or manually, by following the below described steps:
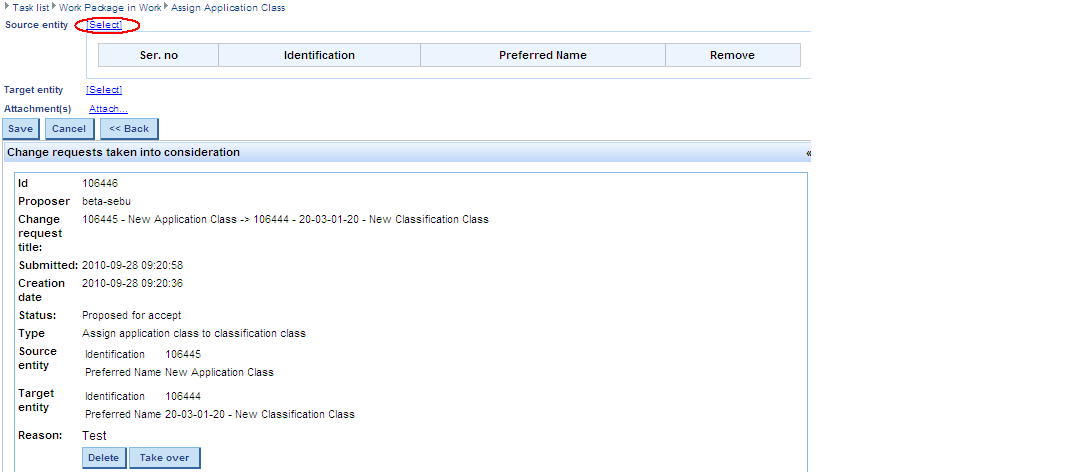
Step 1: Check in box in front of the CR of assignment and click button “Create change processed”.
Step 2: Click Select-button on the right of the source entity.

Step 3: Select CP for NEW SE (in this case New Application Class)
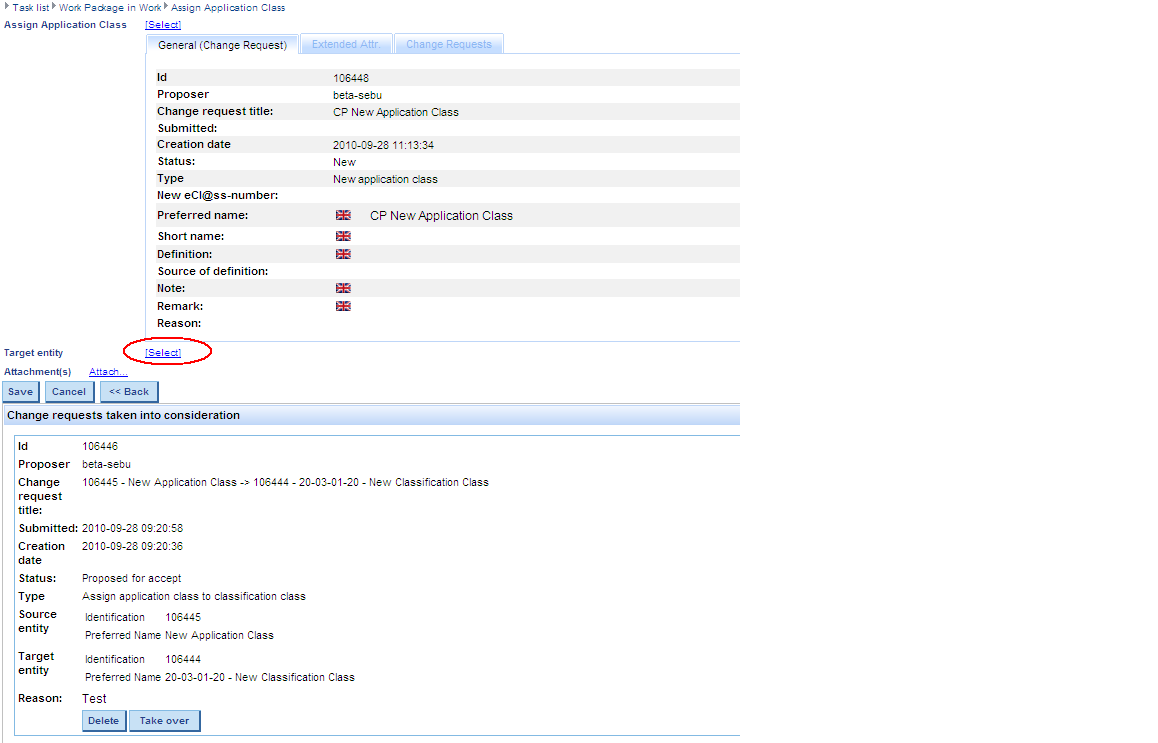
Step 4: Click Select-button on the right of the target entity.
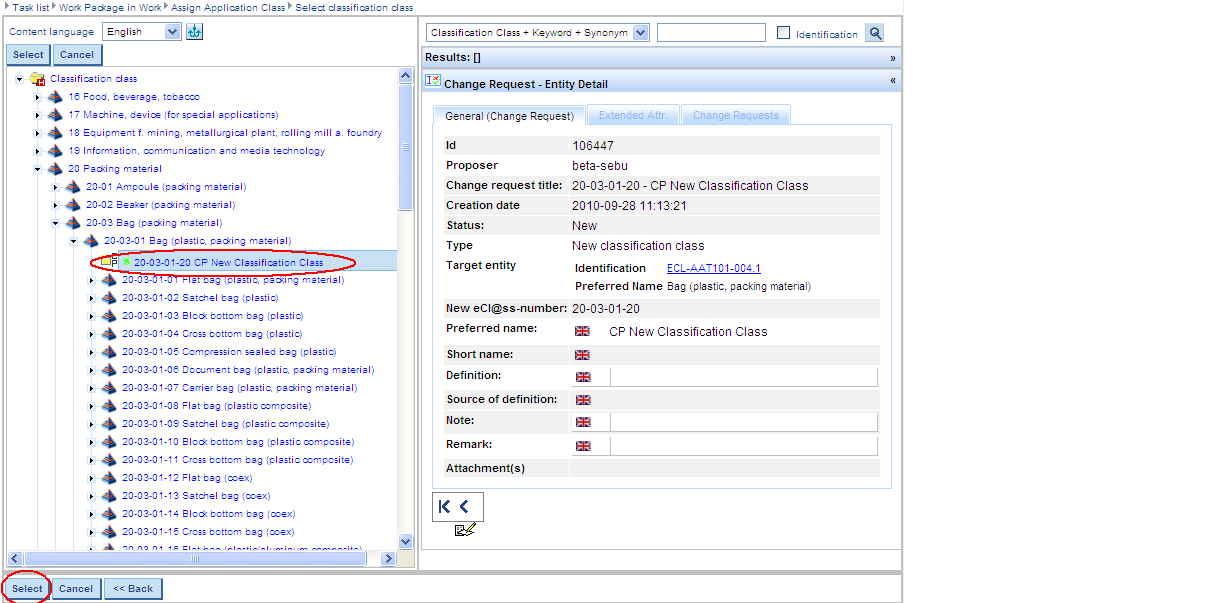
Step 5: Choose the CP for NEW SE (in this case New Classification Class) in tree and press the Select-button
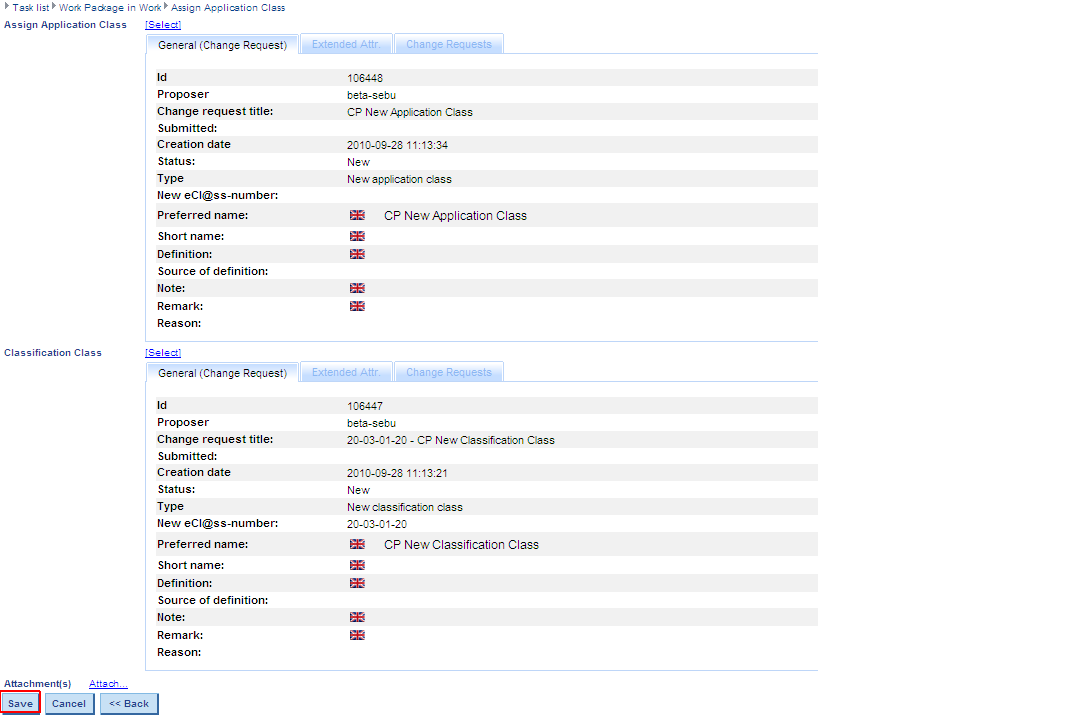
Step 6: Press the Save-button.
Observations:
a) One CP can be created for several CRs only if these are of the same type
b) The system does not allow the creation of 2 different CPs for one and the same CR. In this case, after having selected a CR and pressed button “Create Change Processed”, following message is displayed: “Change Processed X was already created for Change Request Y.”
c) It is not possible to create Change Processed out of Change Requests in status [Proposed for Rework] or [Proposed for Reject]. In this case following message is displayed: “Cannot create Change Processed out of Change Requests in status [Proposed for Rework] or [Proposed for Reject]”.
d) At present, the system does not allow the creation of independent CPs without having a CR as starting point. Nevertheless, if one deletes the CR within the save dialogue of the CP, the respective CP won’t be connected to the CR any longer. However it keeps the type of the CR on the basis of which it has been created. The same happens if the CR is set in status [Proposed for Rework] or [Proposed for Reject] after the CP has been created.
e) For CRs type “Change Textual Information” made for one and the same structure element, when selecting one of these CRs in order to create the CP, the system automatically connects all the other CRs for that respective structure element to the CP. They will be displayed on the right side of the panel after having selected the CP.
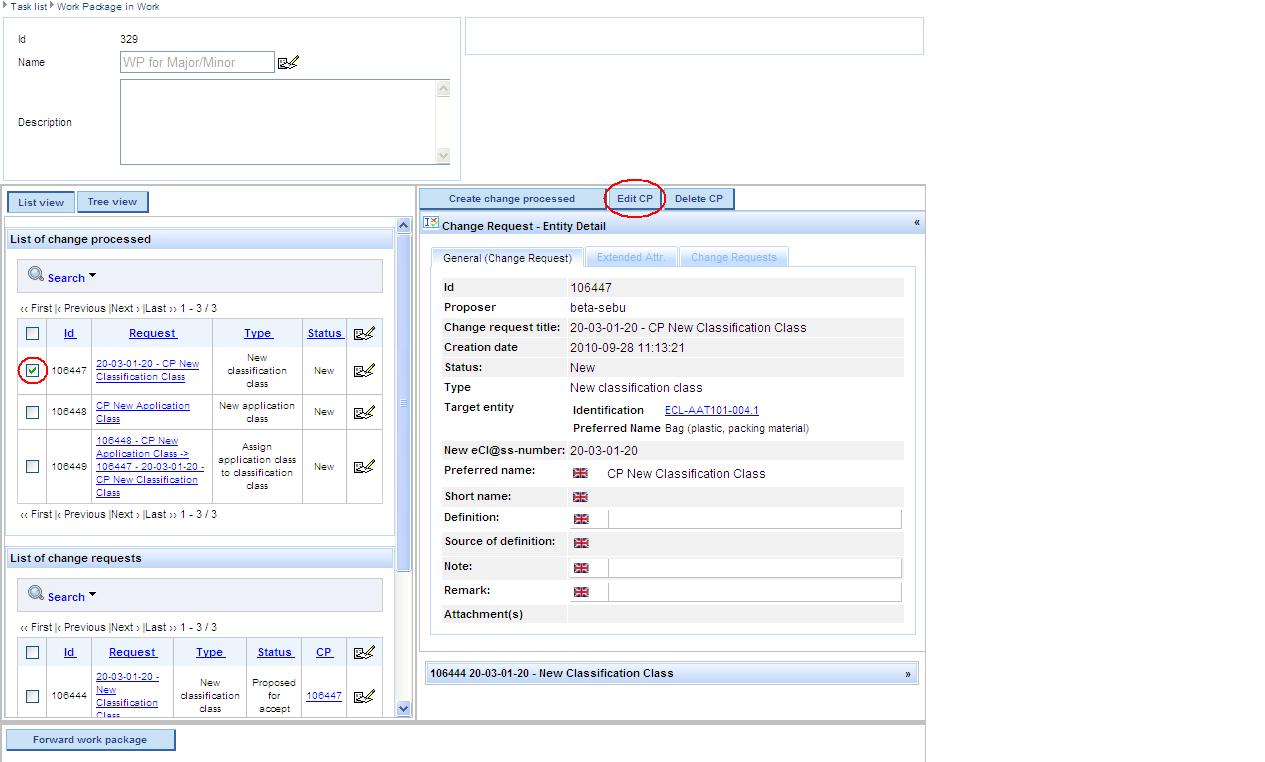
B. Edit CP
Step 1: Click on the CP which needs to be edited so that the “Edit CP” button becomes active.
Step 2: Check in box in front of the CP and click button “Edit CP”.
Step 3: Edit the CP and press Save-button.
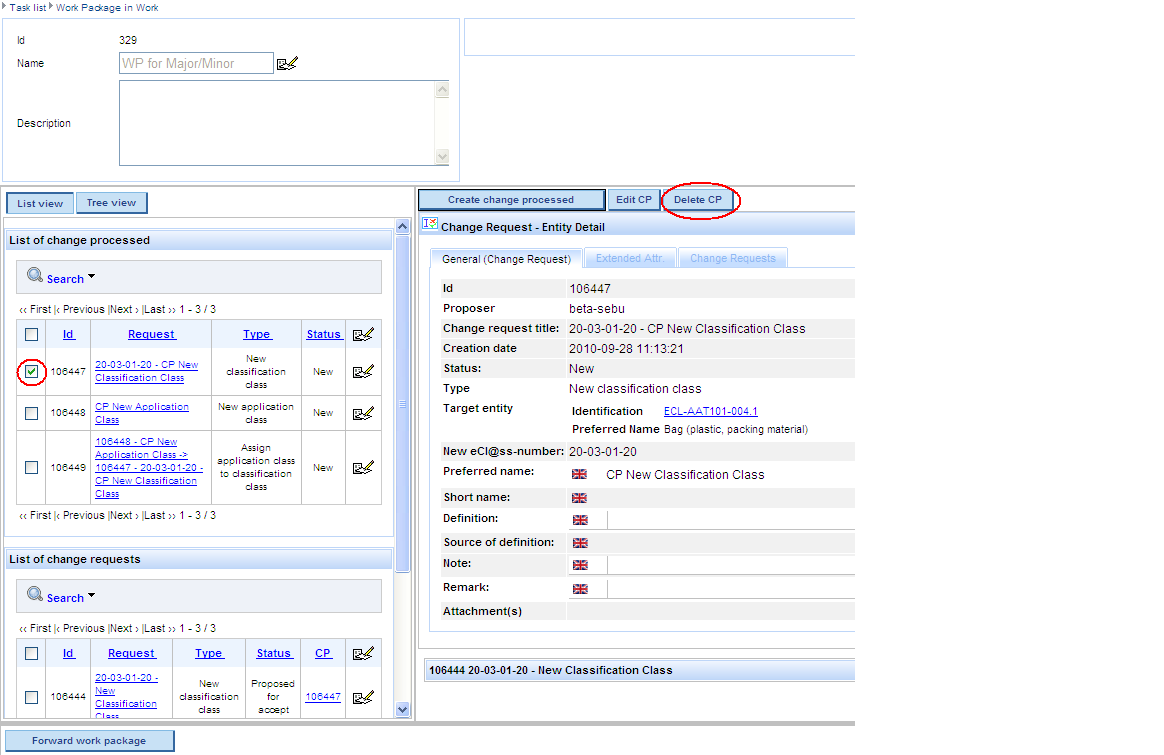
C. Delete CP
Step 1: Click on the CP which needs to be deleted so that the “Delete CP” button becomes active.
Step 2: Check box in front of the CP and click button “Delete CP”.

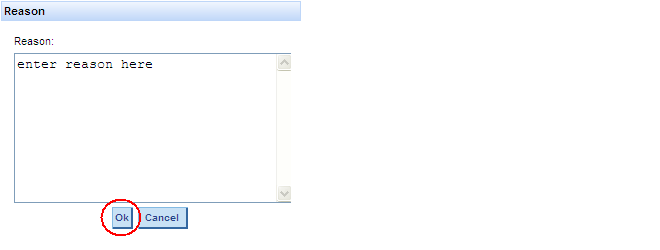
Step 3: Confirm decision by pressing Ok-button.
NOTE: CP for New SE A and CP for New SE B should not be deleted before having deleted the CP of type connect CP for New SE A to CP for New SE B. Otherwise following message is displayed: “The change processed can not be deleted because it references CPs X, Y. Please delete these CPs first”.
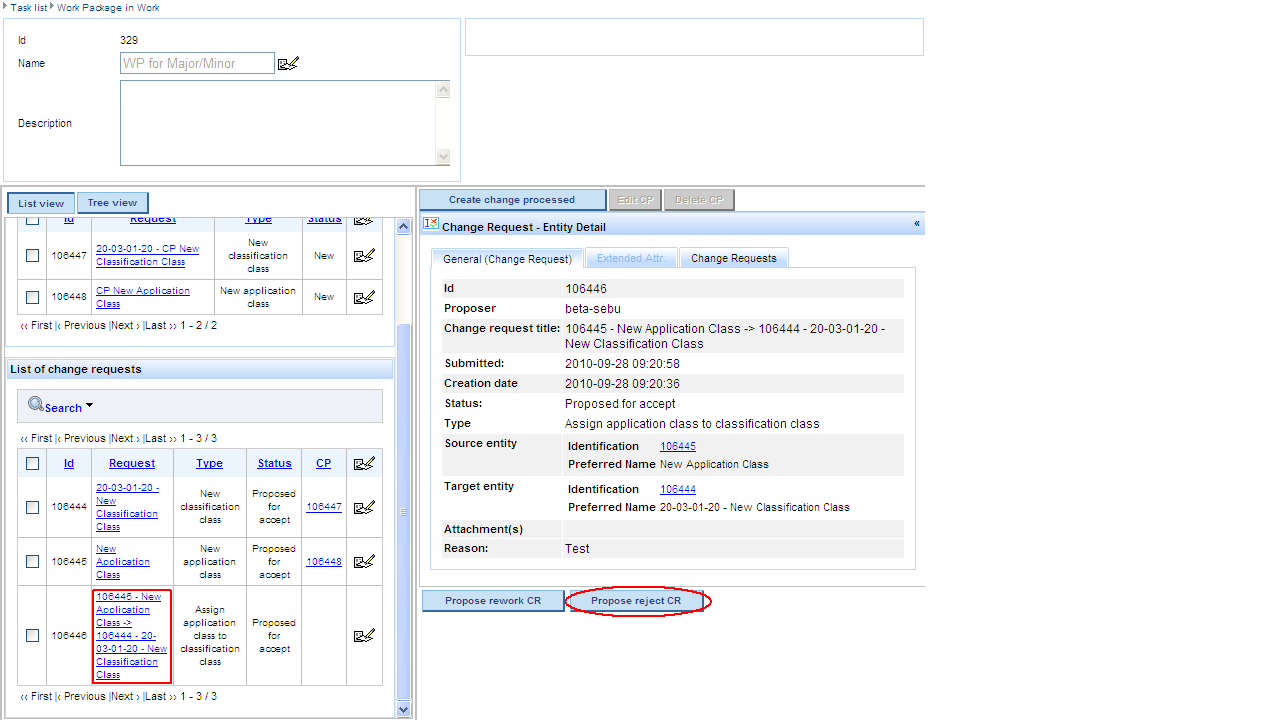
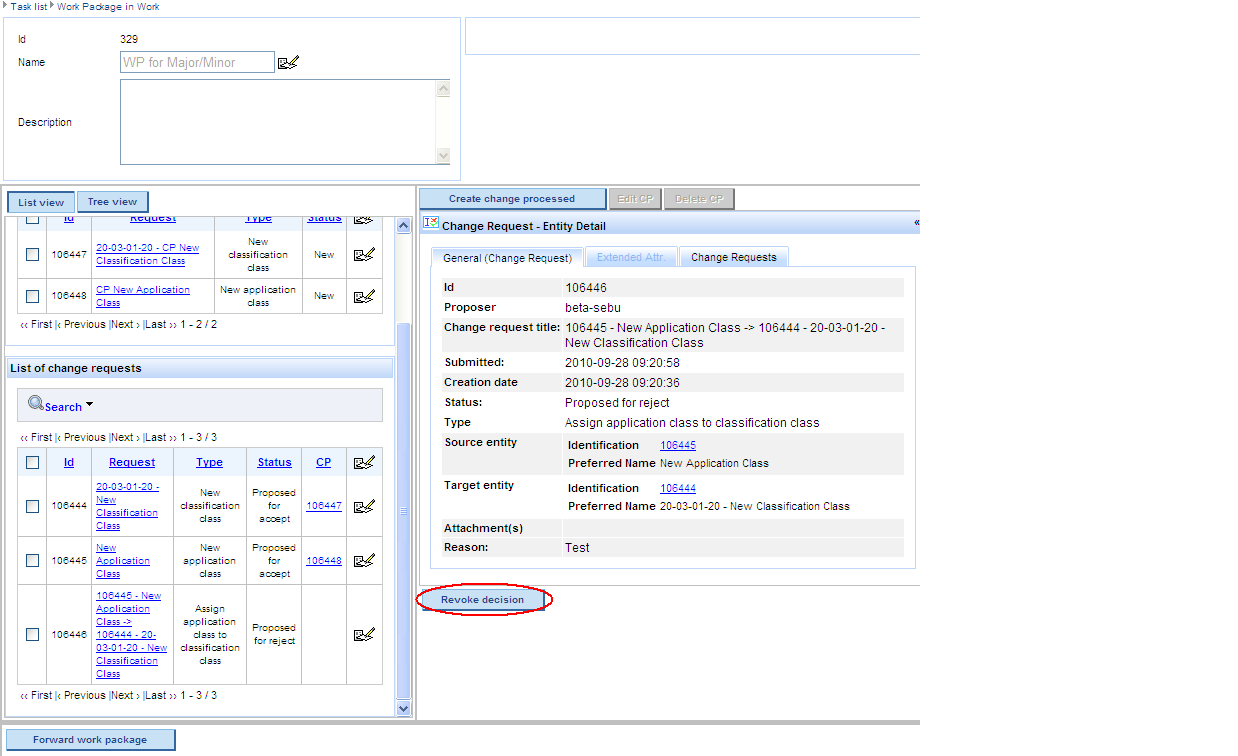
D. Propose CR to reject
Step 1: Click on the CR which needs to be rejected so that the “Propose reject CR” button becomes visible.
Step 2: Press button “Propose reject CR”.
Step 3: Give the reason for rejecting the CR and press OK-button.
NOTE: After the CR has been rejected, the [Revoke decision] button is available for the respective CR.
E. Propose CR to rework
Step 1: Click on the CR which needs to be reworked so that the “Propose rework CR” button becomes visible.
Step 2: Press button “Propose rework CR”.
Step 3: Give the reason for proposing the CR for rework and press OK-button.
NOTE: After the CR has been proposed for rework, the [Revoke decision] button is available for the respective CR.
Observation to point D and E:
The reason for proposing CRs for rework/reject may be viewed by Office within the Forum discussion under [Office – Process Application – Search Change Request]
G. Continue workflow
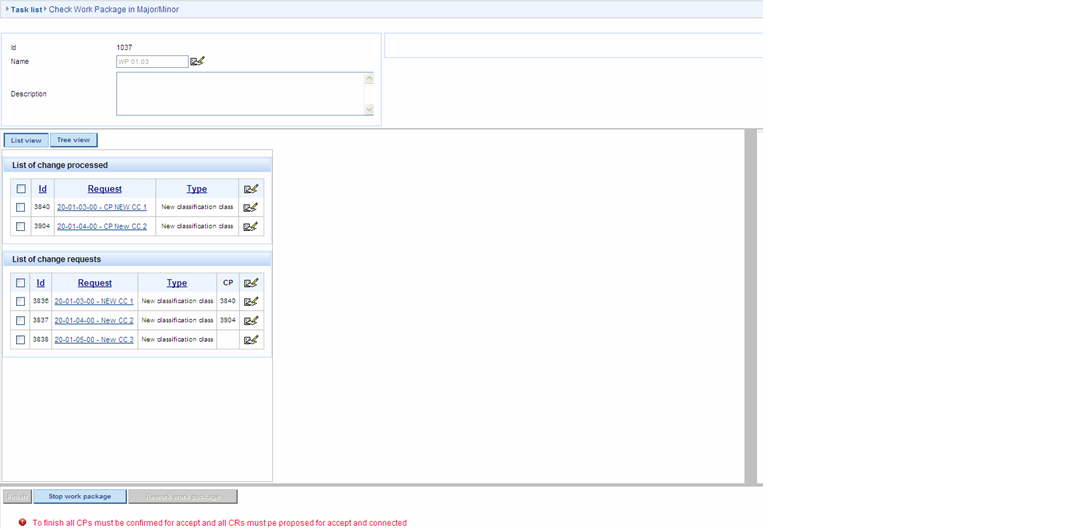
The workflow may be continued by pressing button [Forward work packege] ONLY AFTER all CRs have been connected to CPs or if they have been set to status “Proposed for rework” or “Proposed for reject”. The WP is sent to EG Chair and disappears from the task list of EG.
EG Chair checks Work Package
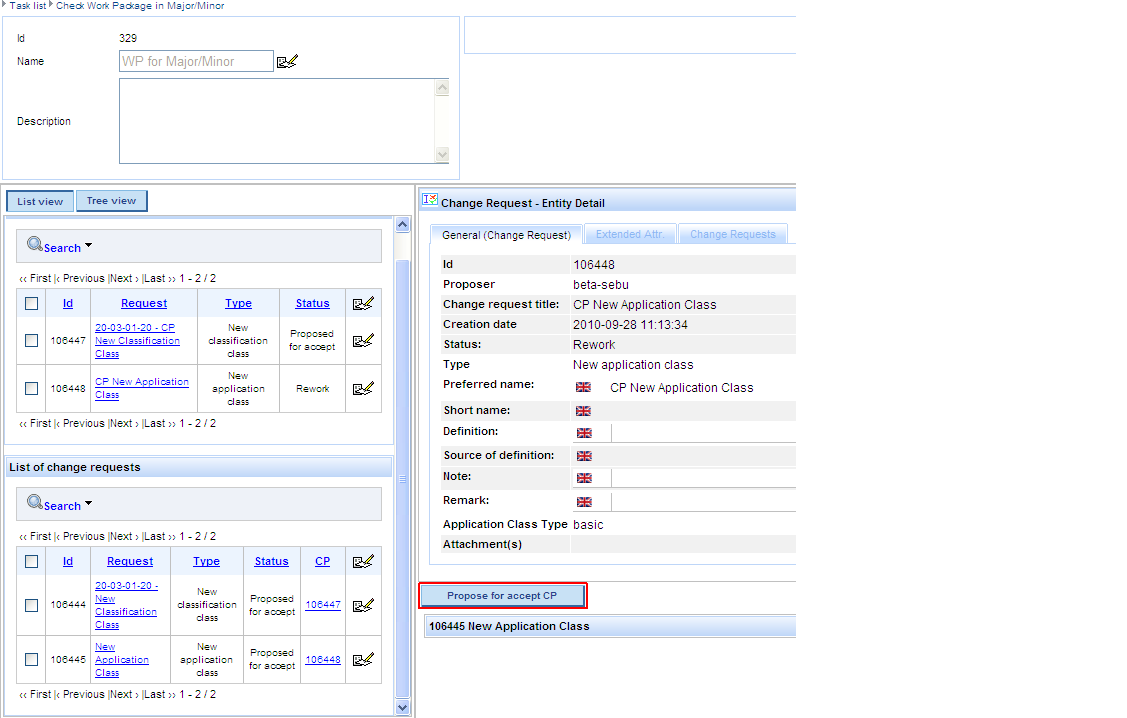
[EG Chair – Process Application – Check Work Package] EG Chair clicks button “View task” in order to display the details of the WP and the corresponding CRs.
EG Chair sends the Work Package back to EG
EG Chair does not agree with the technical correctness (content) or the resolution of CR’s of CP’s contained in a WP and sends the complete WP back to EG by pressing button [Rework work package].
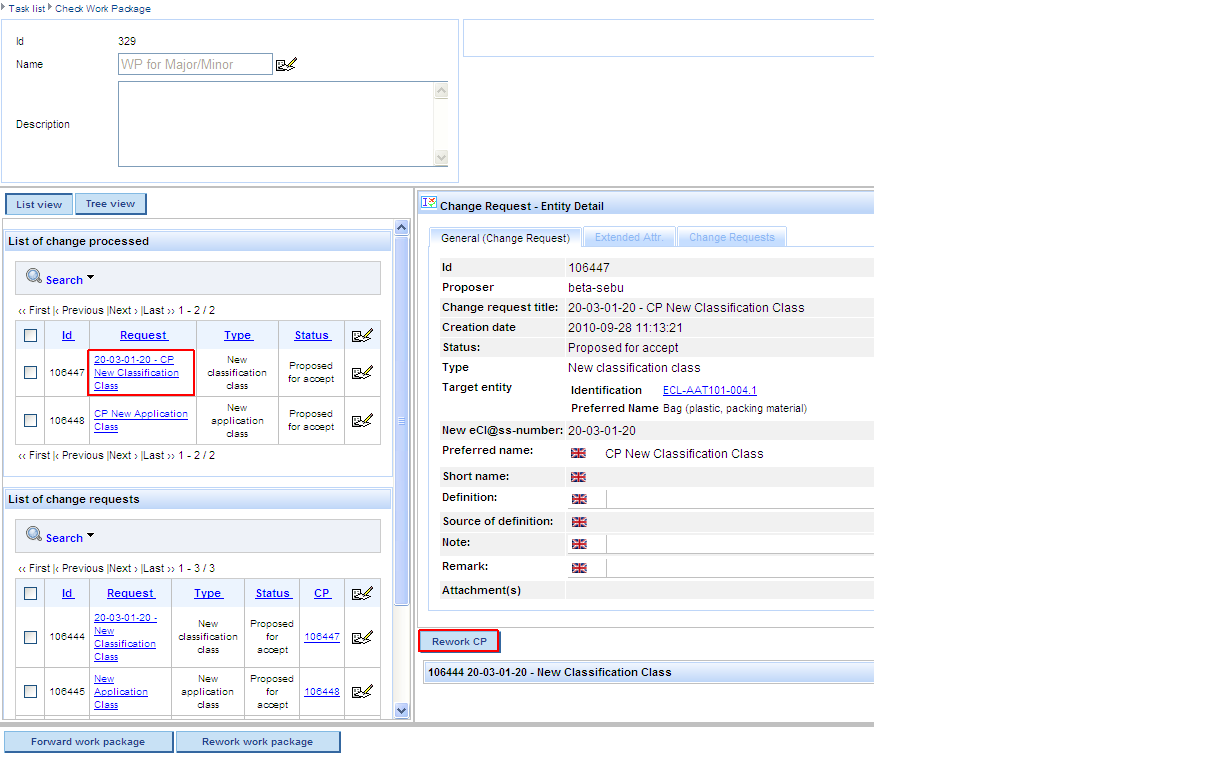
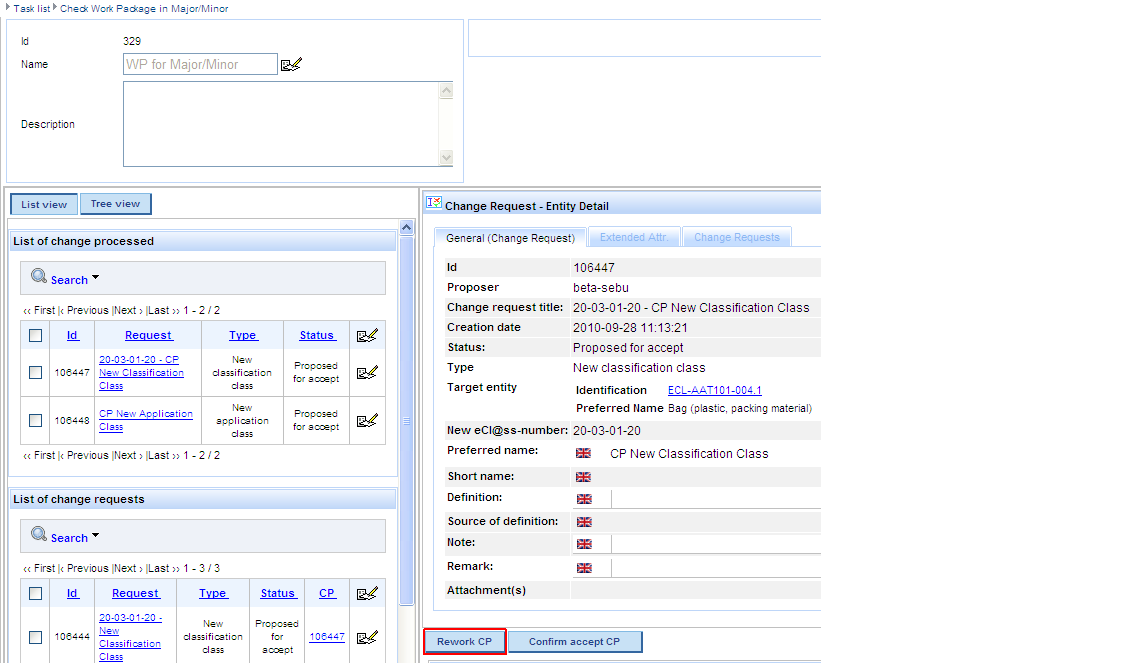
If EG Chair does not agree to a CP created by EG, it may set it to status “Rework”.
Step 1: Click the respective CP in order to view the details of the CP and related CR on the right side of the panel.
Step 2: Press button [Rework CP].
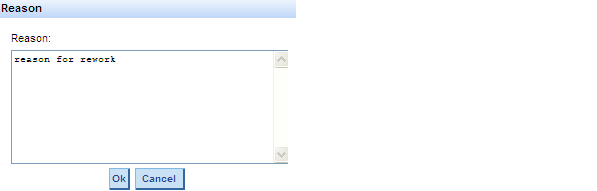
Step 3: Give the reason for sending the WP back and press button „OK“.
NOTE: After the CP has been proposed for rework, the [Propose for accept CP] button is available for the respective CP.
Step 4: Press button [Rework work package], give a reason and press button „OK“ in order to send the WP back to EG.
Observations:
- The reason for proposing CPs for rework may be viewed by EG within the CP Forum and the reason for sending back the WP within the WP Forum [EG – Process Application – Work Package in Work]
- If any of the CPs contained in a WP is set to rework, the “Forward work package” button becomes inactive.
EG Chair forwards the Work Package to QG Chair
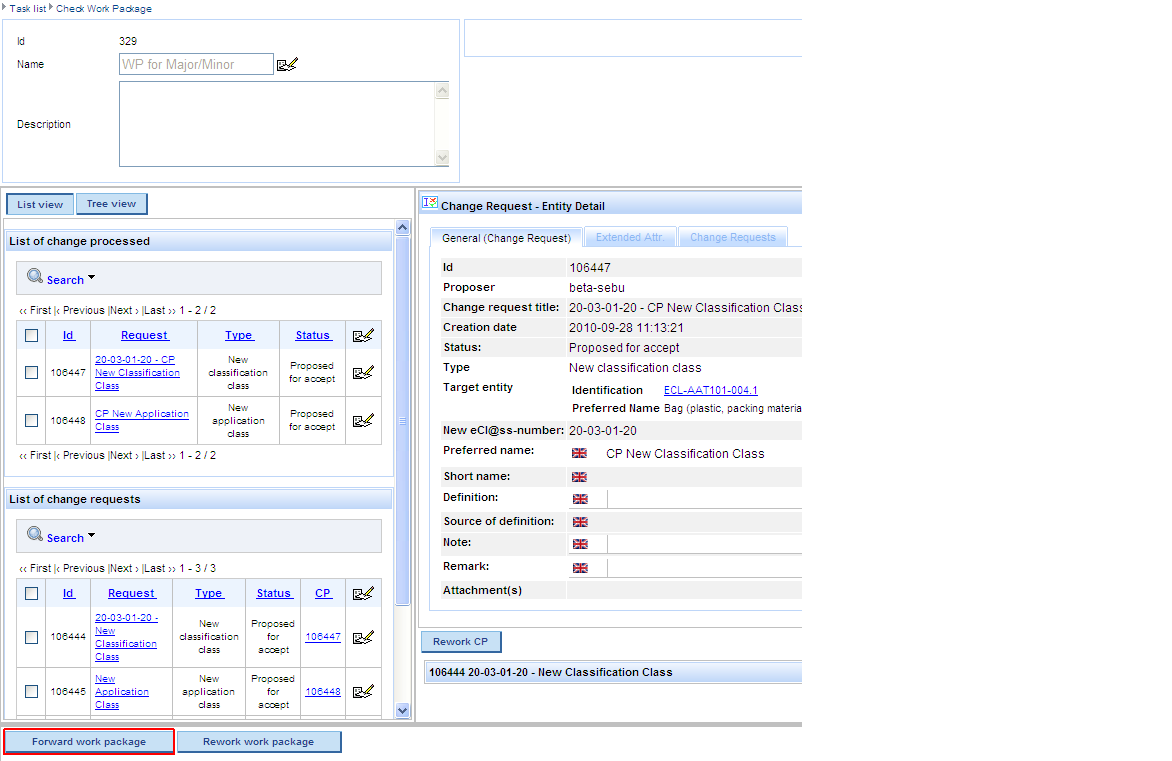
If EG Chair is satisfied with the CPs and the resolution of the CRs contained in the WP, it forwards the WP to QG Chair by pressing the [Forward work package] button.
The WP has disappeared from the Task list of EG Chair.
QG Chair checks Work Package
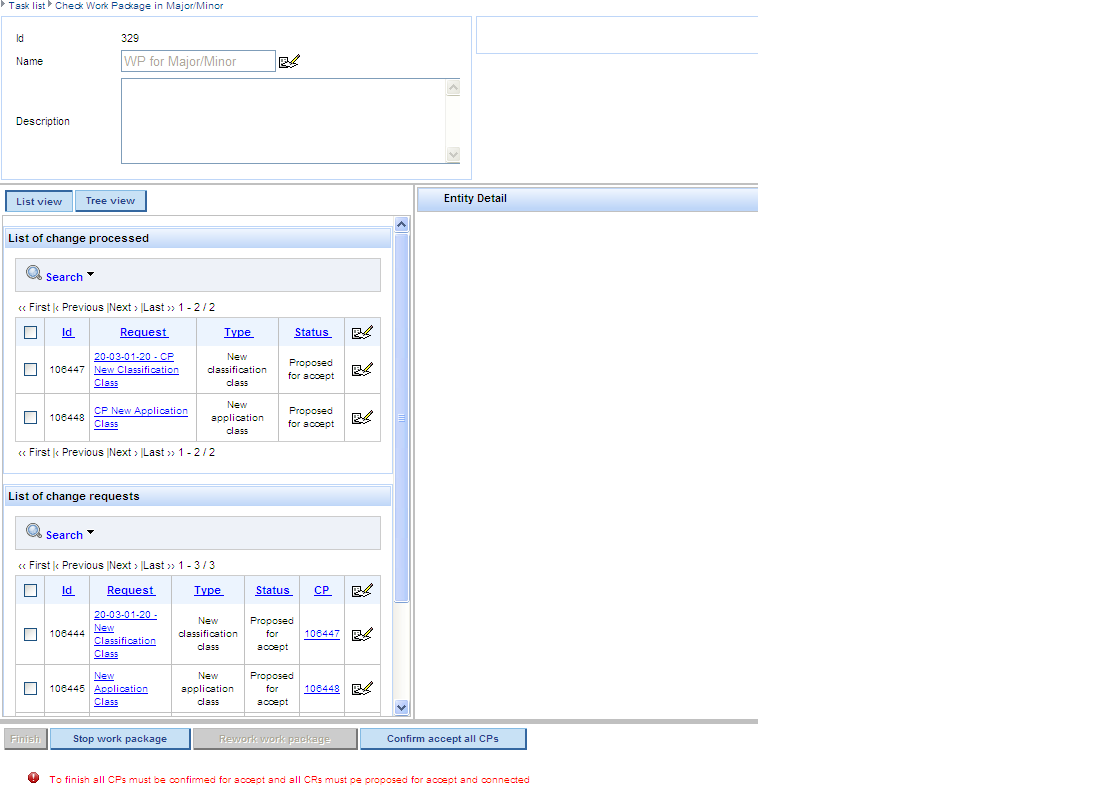
[QG Chair – Process Application – Check Work Package in Major/Minor] QG Chair clicks button “View task” in order to display the details of the WP and the corresponding CRs
Quality Chair checks the CPs of the WP with regard to quality, the CRs with regard to resolution and decides on:
A. the quality of CPs
- asks Suggestor for CP improvement by pressing button [Rework CP].
- agrees to the CP created by Suggestor (click the respective CP and press button [Confirm accept CP]).
B. the resolution of CR
- agrees to the proposal of Suggestor that Proposer needs to rework CR (click the respective CR and press button [Rework CR] -> the CR will be removed from the WP)
- agrees to the proposal of Suggestor to reject CR (click the respective CR and press button [Reject CR] -> the CR will be removed from the WP)
- disagrees to the proposal of Suggestor to reject CR (click the respective CR and press button [Propose accept CR])
- disagrees to the proposal of Suggestor to ask Proposer to rework CR (click the respective CR and press button [Propose accept CR])
C. next steps
- decides to move WP back to Suggestor (if QG Chair Proposed accept CR or if it decided that CP needs to be reworked)
- decides to stop work on the WP
- decides to accept CPs and forwards them for tagging as CPs (not as WP)
QG Chair sends the Work Package back to EG Chair
QG Chair asks Suggestor for CP improvement, agrees or disagrees with the status of CRs ([Proposed for Rework], [Proposed for Reject]) set by EG (if any CRs set in these statuses are available) and sends the complete WP back to EG Chair.
Step 1: Click the respective CP in order to view the details of the CP and related CR on the right side of the panel.
Step 2: Press button [Rework CP].
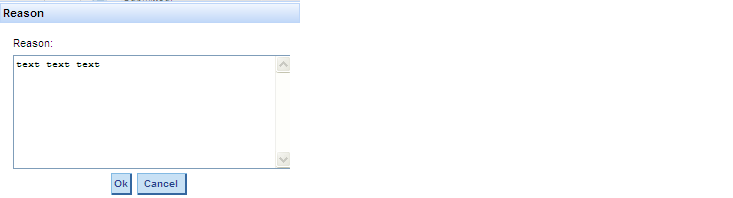
Step 3: Give the reason for setting the CP to Rework (which shall be stored in the CP Forum) and press button „OK“.
NOTE: After the CP has been proposed for rework, the [Propose for accept CP] button is available for the respective CP.
Step 4: Press button [Rework work package], give a reason and press button „OK“ in order to send the WP back to EG Chair. EG Chair in its turn will send the WP back to EG by pressing button “Rework Work Package”.
QG Chair stops work on Work Package
QG Chair decides to stop all work on the WP:
Step 1: Press button [Stop work package].
Step 2: Give the reason for stopping the work on the WP and press button OK.
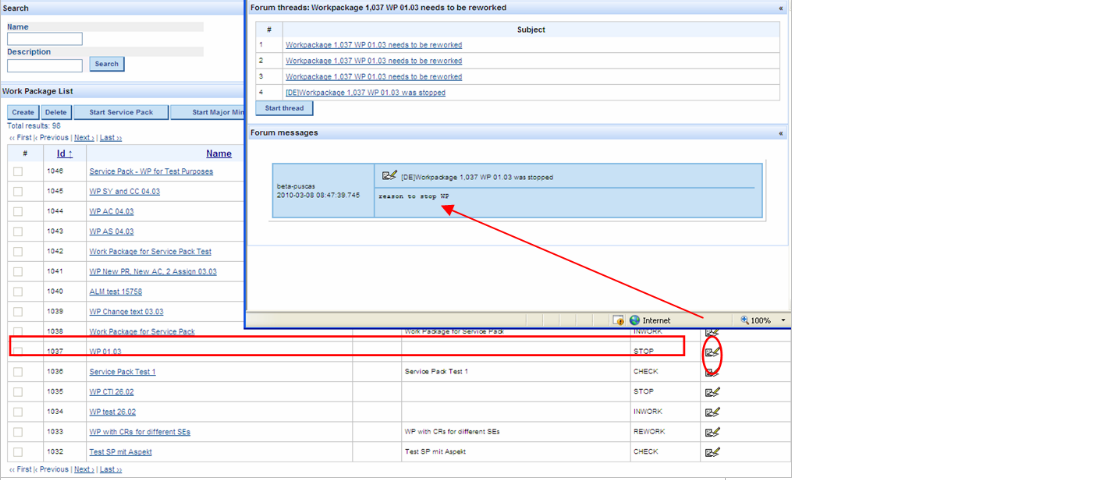
The WP is sent to [Office – Work Package List], it is displayed in status “STOP” and the reason for stopping WP shall be displayed within the Forum of the WP.
QG Chair forwards Change Processed for tagging
If QG Chair decides that the quality of CPs in the WP is sufficient:
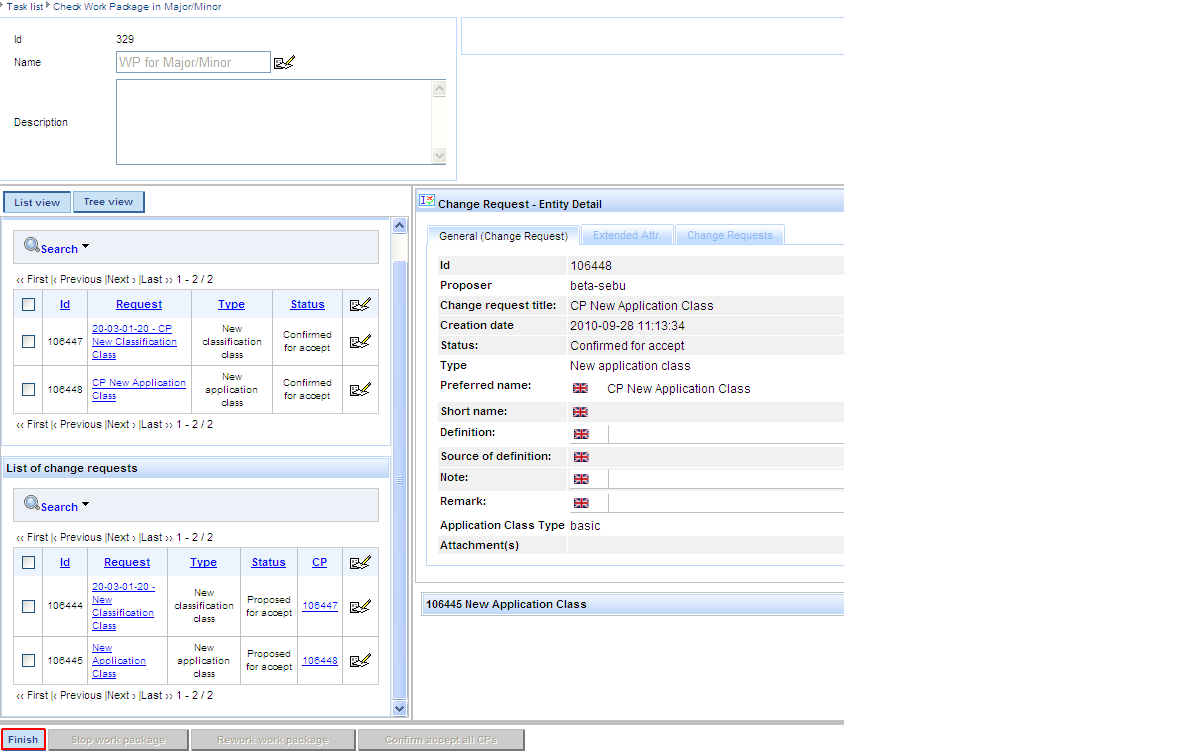
Step 1: QG Chair “Confirms accept” each CP contained in the WP or presses button “Confirm accept all CPs”.
NOTE: Until all CPs contained in a WP are confirmed for accept by QG Chair, the “Finish” button will be inactive.
Step 2: After all CPs are “Confirmed for accept” press button “Finish”:
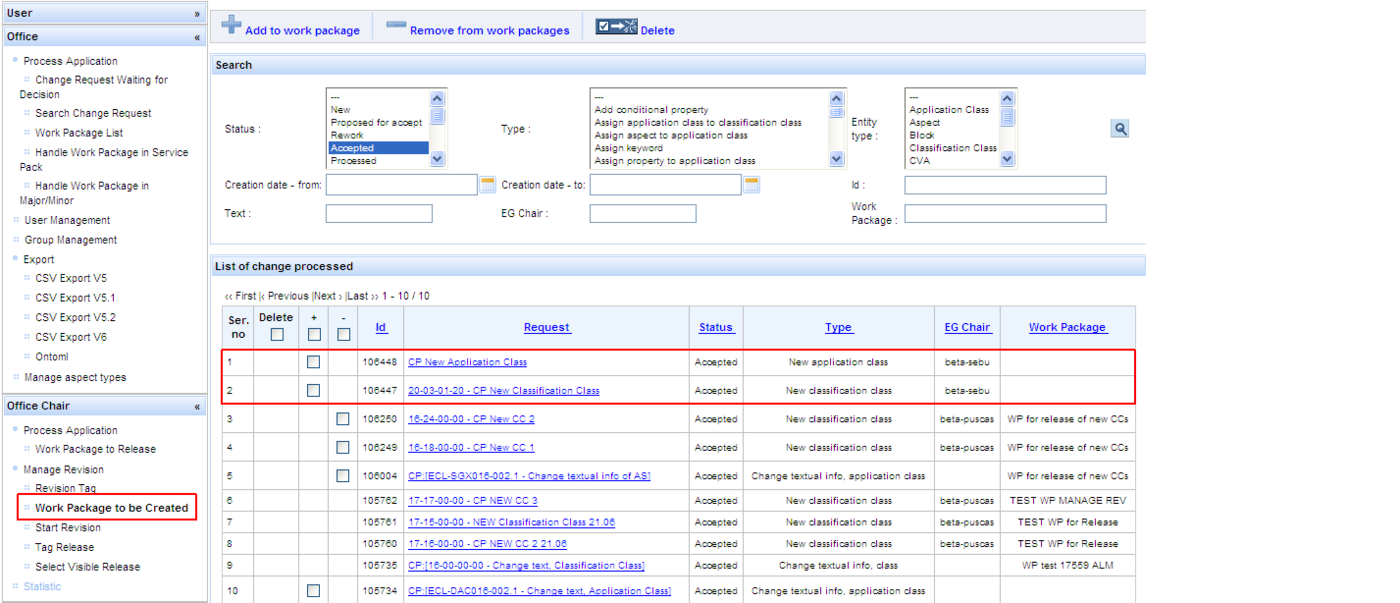
The CPs are forwarded to [Office Chair – Manage Revision – Work Package to be Created].

The WP can be viewed under [Office – Work Package List] and it is in status “RELEASE”.