Aspect (Create Change Request)
Overview
An Aspect is a type of Characterization Class in the semantic model of the dictionary. Aspects collect Properties which describe the approach, method of approach, point of view of a product or service or a part of a product or service
- in relation to a given situation,
- from a certain point, from a certain direction
- or at a certain angle.
Aspects prevent the compilation of long lists of Properties that are difficult to search, use and maintain. Aspects help each part of the supply chain to quickly find and contribute with its own knowledge about the product.
General Information
The workspace area for the management of Aspects can be accessed via menu Content manger à Aspects. This workspace offers users different functionalities described in brief in the following table.

Figure 1: Content Manager Aspect
Search | Triggers a search in the available content, considering the search options set in the advanced search. |
Tree view | Allows navigation to the hierarchical view |
Compare | Allows the comparison of two or more Aspects |
Export | Allows the export of desired Aspects |
Create | Allows the creation of new Aspects. |
Change text | Allows editing the attributes of a selected Aspect |
Remove | Allows removal of selected Aspect |
Reactivate | Allows reactivation of a deprecated Aspect or Properties assigned to an Aspect. |
Assign | Allows assignment of dictionary elements (Block Reference, Property) to a selected Aspect. |
Withdraw | Allows withdrawal of dictionary elements (Block Reference, Property) from a selected Aspect. |
Search for an Aspect
First of all, the user can change the language of the content by navigating the mouse to the button "en" which is left to search field. Various languages can be selected.

Figure 2: Language of the Content
In the field Enter query it is possible to type in the ID or the preferred name of the aspect.
By clicking on "advanced search" (under search field), there are several search options available.
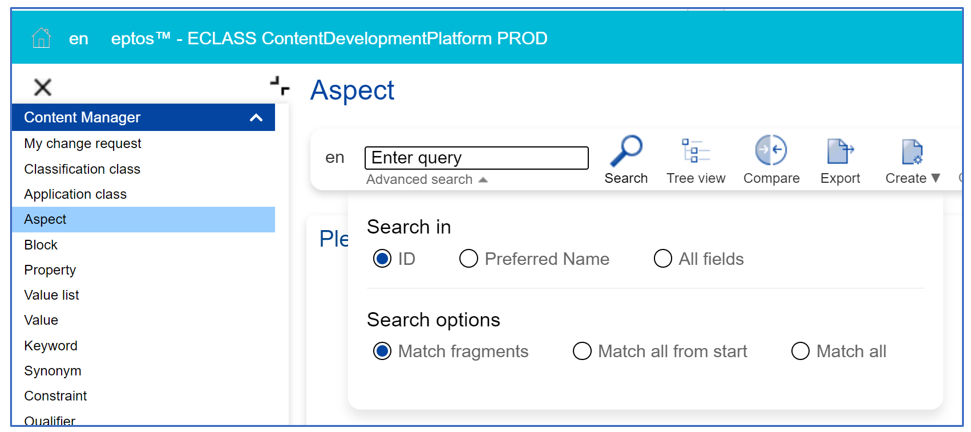
Figure 3: Advanced Search Field
The search options are explained via mouse over in the CDP. By clicking on the Search button without entering name or ID in the search field, all Aspects are displayed in the list view below.
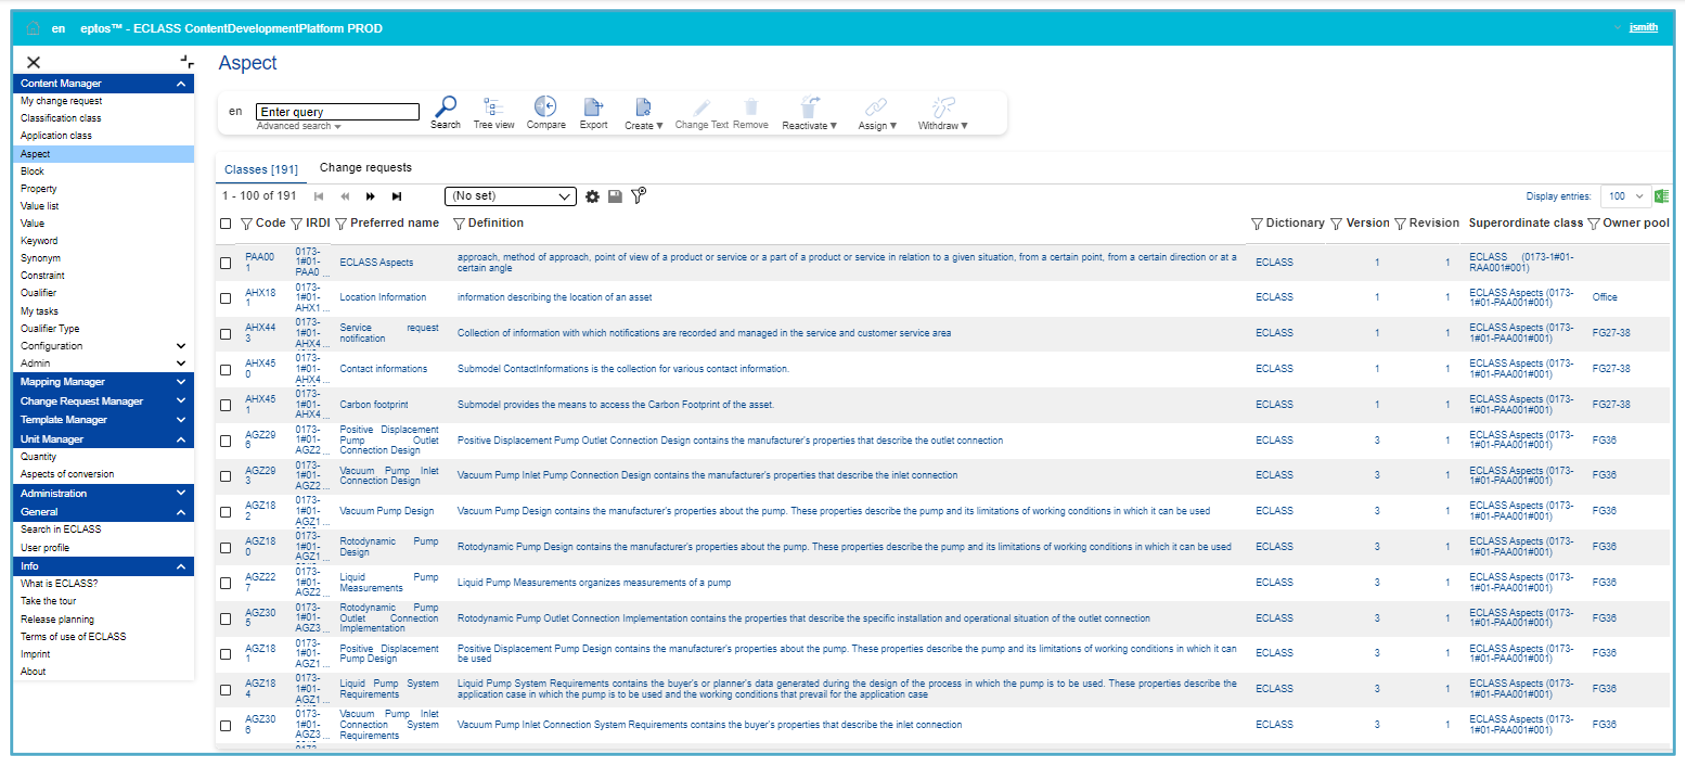
Figure 4: List of Aspects
The user can select between the tabs Classes [number of existent Aspects] and Change requests [number of Change requests]. Note: Number of Change requests is only displayed after clicking on the tab.
On the far-right side, the option to display up to 100 entries is available. Here the Excel icon allows to directly export in an Excel file the entries that are displayed on the page:
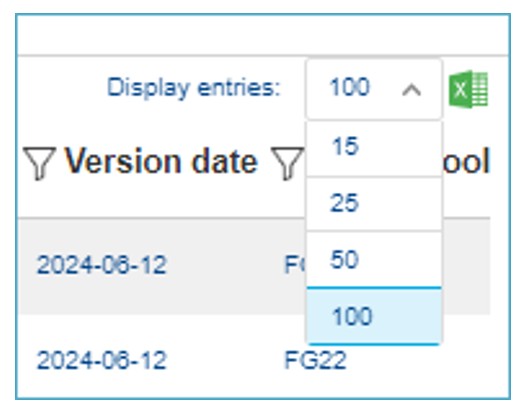
Figure 5: Display entries
Details Page
In order to view more details related to an Aspect, users may open the Aspect in view mode by clicking on it from the list view. Note: opening an Aspect in view mode is also possible from the tree view of Aspects. The details page of an Aspect is subdivided into different tabs. Tabs which do not contain any information are grayed out. The following table gives an overview of the tabs available for an Aspect:
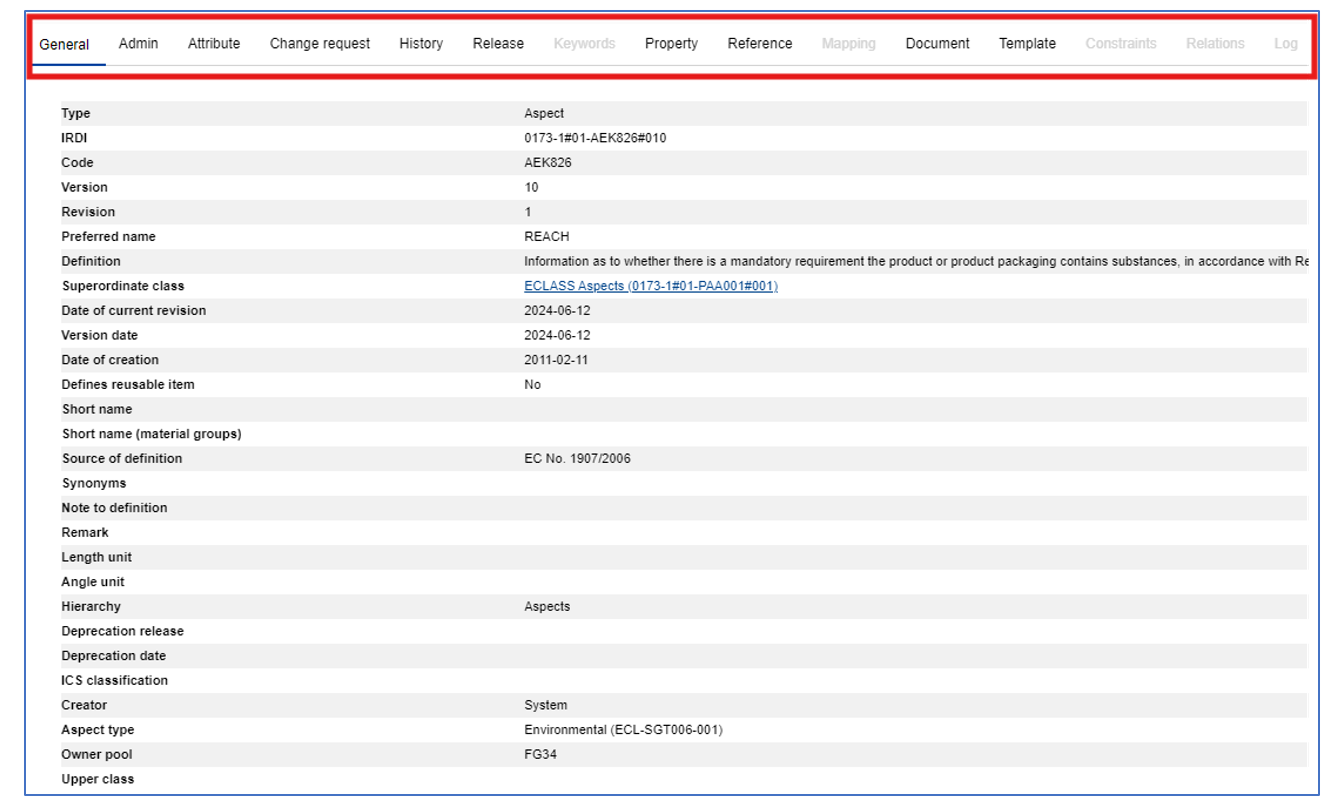
Figure 6: Overview of the available tabs for an Aspect
General (selected in screenshot) | Tab General displays the standard and extended Attributes of an Application Class. |
Admin | Tab Admin displays administrative information such as creation date, version date and creator of the selected Application Class. |
Attribute | Tab Attribute displays extended attributes of the selected Application Class. |
Change requests | Tab Change request displays the Change requests in connection with the selected Application Class. |
History | Tab History displays historical information on the selected AC. |
Release | Tab Release displays the release(s) the Application Class is part of. |
Aspect | Tab Aspect displays in a tabular view information related to the Aspects assigned to the selected Application Class. |
Keyword | Not available for aspects. |
Property | Tab Property displays in a tabular view information related to the Properties assigned to the selected Application Class. |
Reference | Tab Reference displays in a tabular view information related to the Classification Class(es) in which the selected Application Class is used. |
Mapping | Tab Mapping displays in a tabular view information related to the Mappings of the selected Application Class to other Application Classes. |
Template | Tab Template displays in a tabular view information related to the Templates of the selected Application Class. |
Constraints | Tab Constraints displays in a tabular view the Constraints existing for the selected Application Class. |
Relations |
|
Log | Tab Log contains logging information, structured in a clear, user-friendly manner, related to the selected Application Class and is visible only for users with administrator rights. |
Change Text
In the search overview, where all available Aspects as well as Change Requests are displayed, users have the possibility to change the content language (in which Aspects will be displayed) and search after specific Aspects (structure elements or change requests).

Figure 7: List of all available Aspects and CRs related to Aspects
Select an Aspect in the list by clicking it in order to create a CR for changing the textual information.
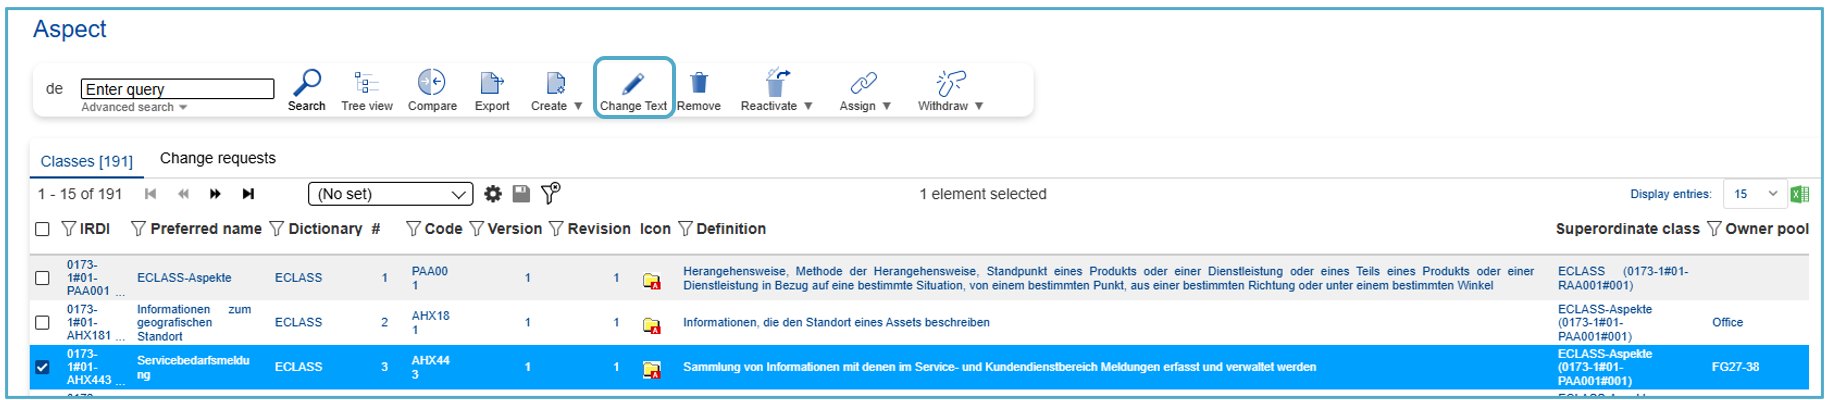
Figure 8: Select Aspect in order to change text
This Change Text dialog will open:
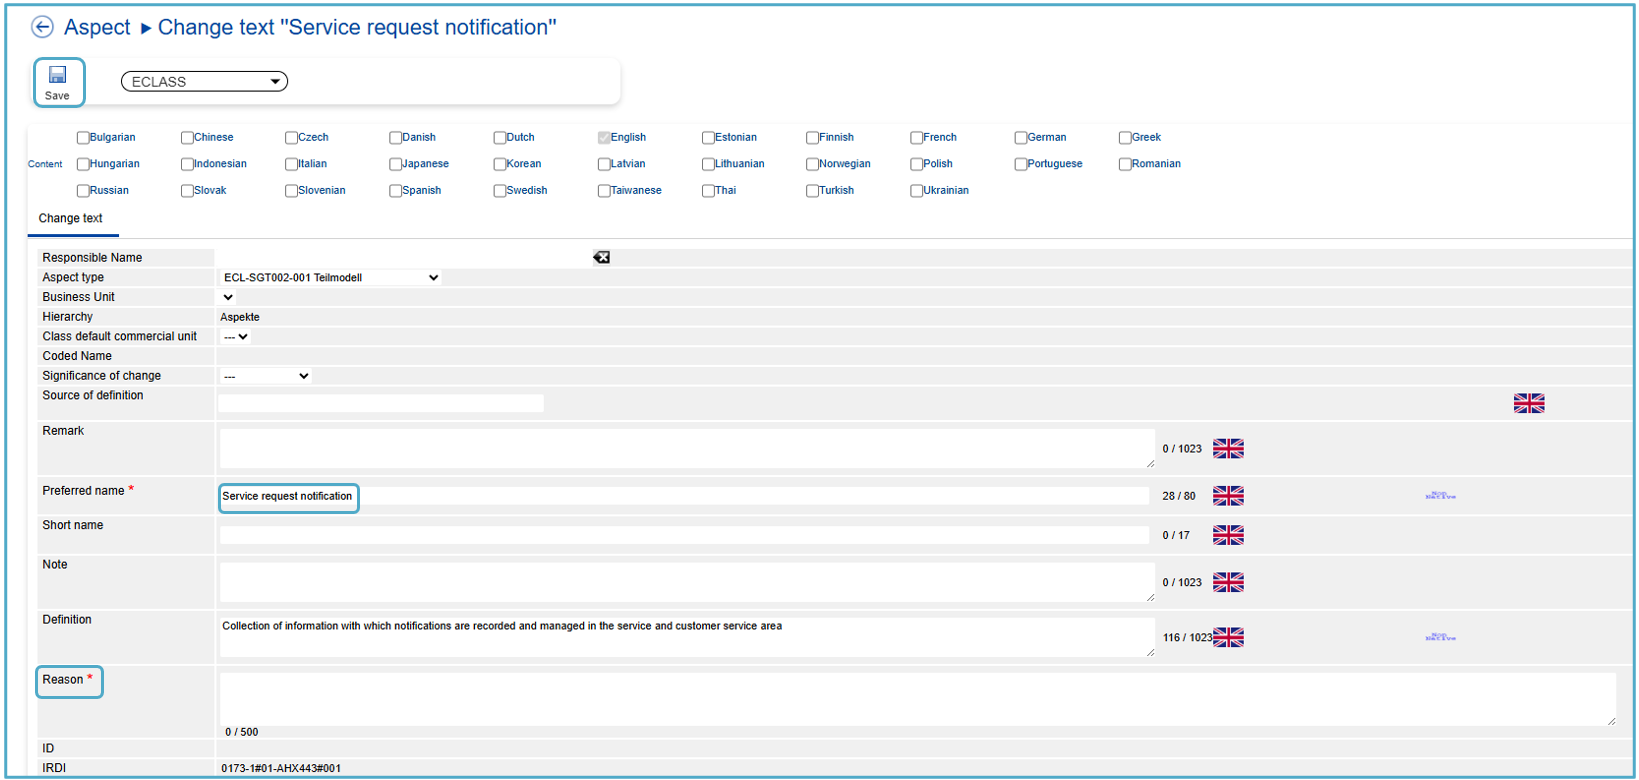
Figure 9: Change Text Dialog
Fill in the fields with the new text and then press button “Save”.
Attention: The fields Preferred Name and Reason are mandatory fields!!!
System displays message at the right top: Change request saved. The newly created Change Requests will be displayed under My Change Requests.

Figure 10: Change Request saved
Change Aspect
After selecting Aspect under Content Manager, users can directly select the option “Create”.

Figure 11: Option “Create”
At the same time, two buttons are displayed: “Create Aspect” and “Create Aspect directly assigned to Application Class…”
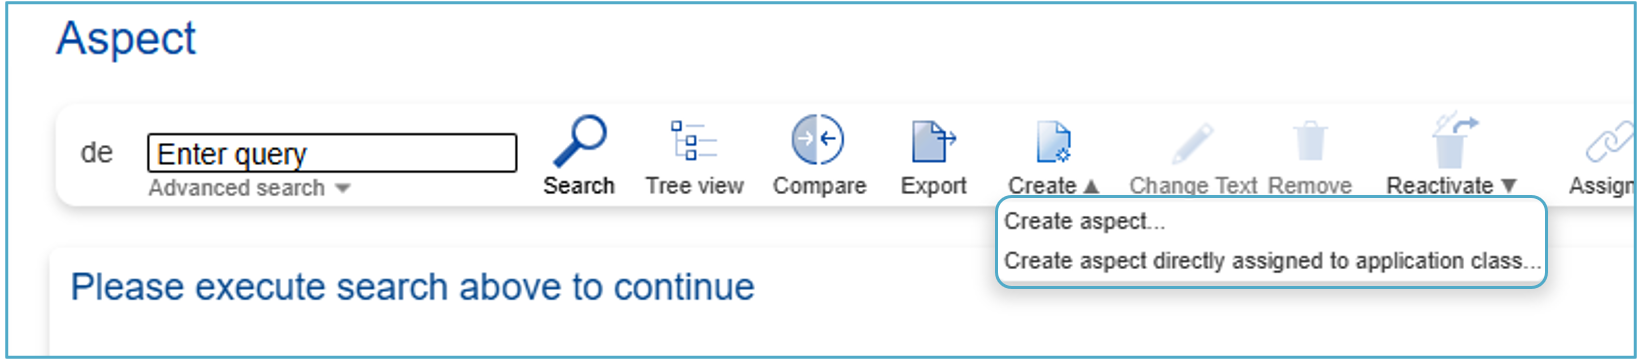
Figure 12: Additional buttons to the option “Create”
Create Aspect
After clicking on "Create Aspect", you will be prompted to select a parent aspect. Choose from the available classifications and aspects, then click on "Select" to proceed. 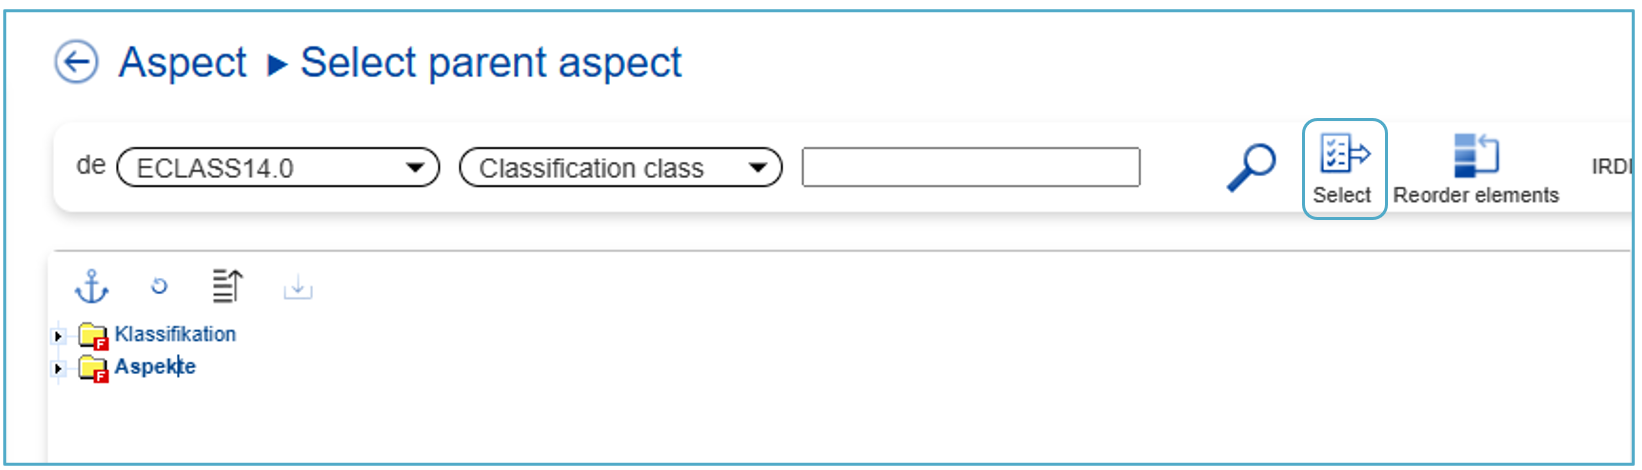
Figure 13: Selecting a parent Aspect
The system will display the Create dialog:
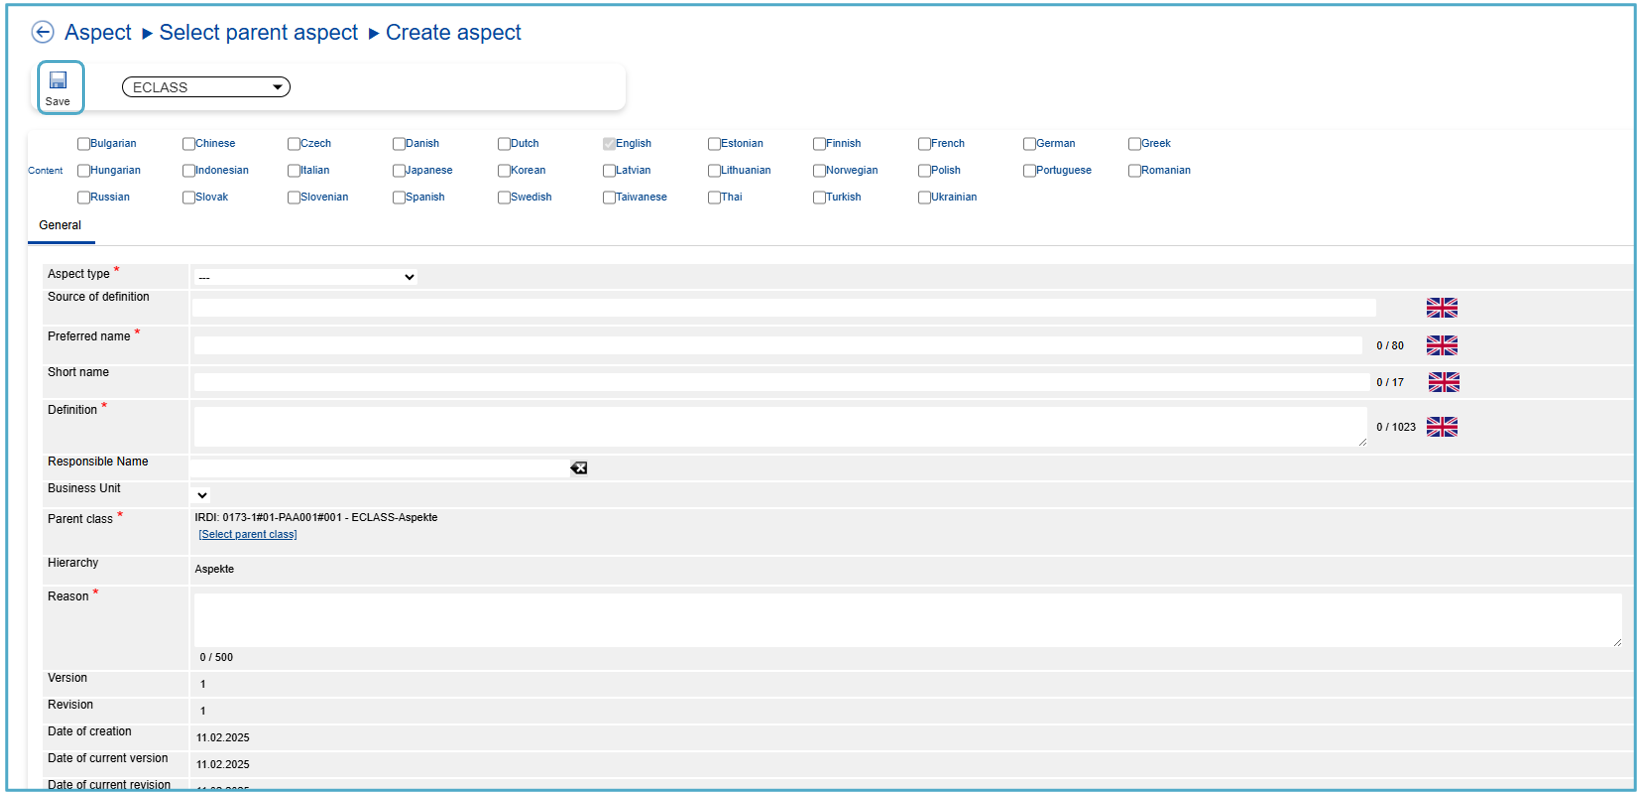
Figure 14: Create Aspect Dialog
Mandatory fields are:
- Aspect Type
- Definition
- Parent class
- Reason
Fill in the fields and press “Save”. The new Aspect will be created not assigned to an Application Class.
Create Aspect directly assigned to Application Class
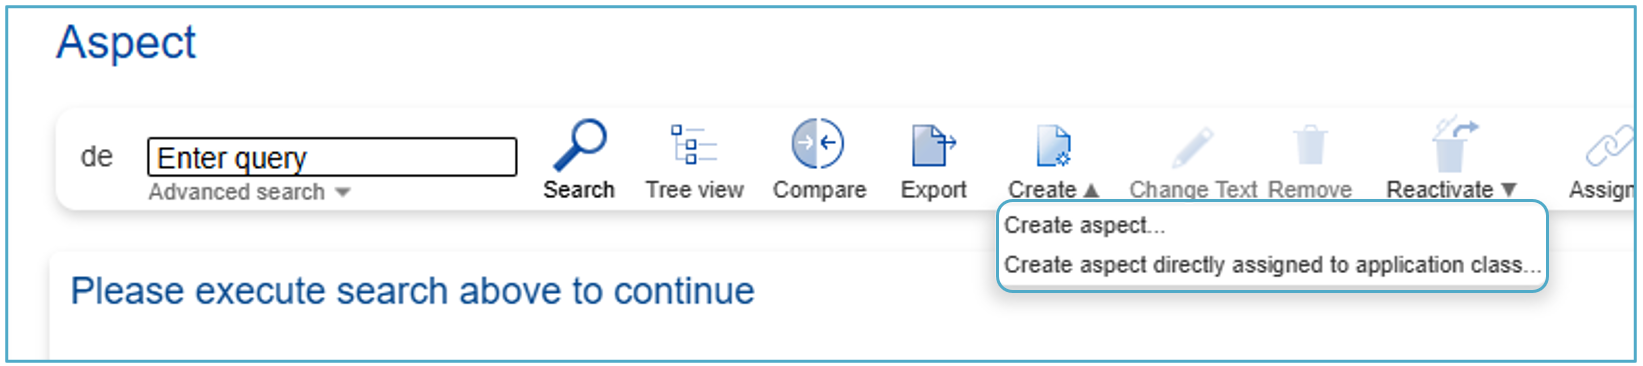
Figure 15: Select “Create aspect directly assigned to application class…”
Click “Create aspect directly assigned to application class…” and then click on “Search”.

Figure 16: Selecting a parent Aspect
The system will display the Create dialog:
Then you click on the Classification Class you want to assign it to and then click “Select”.
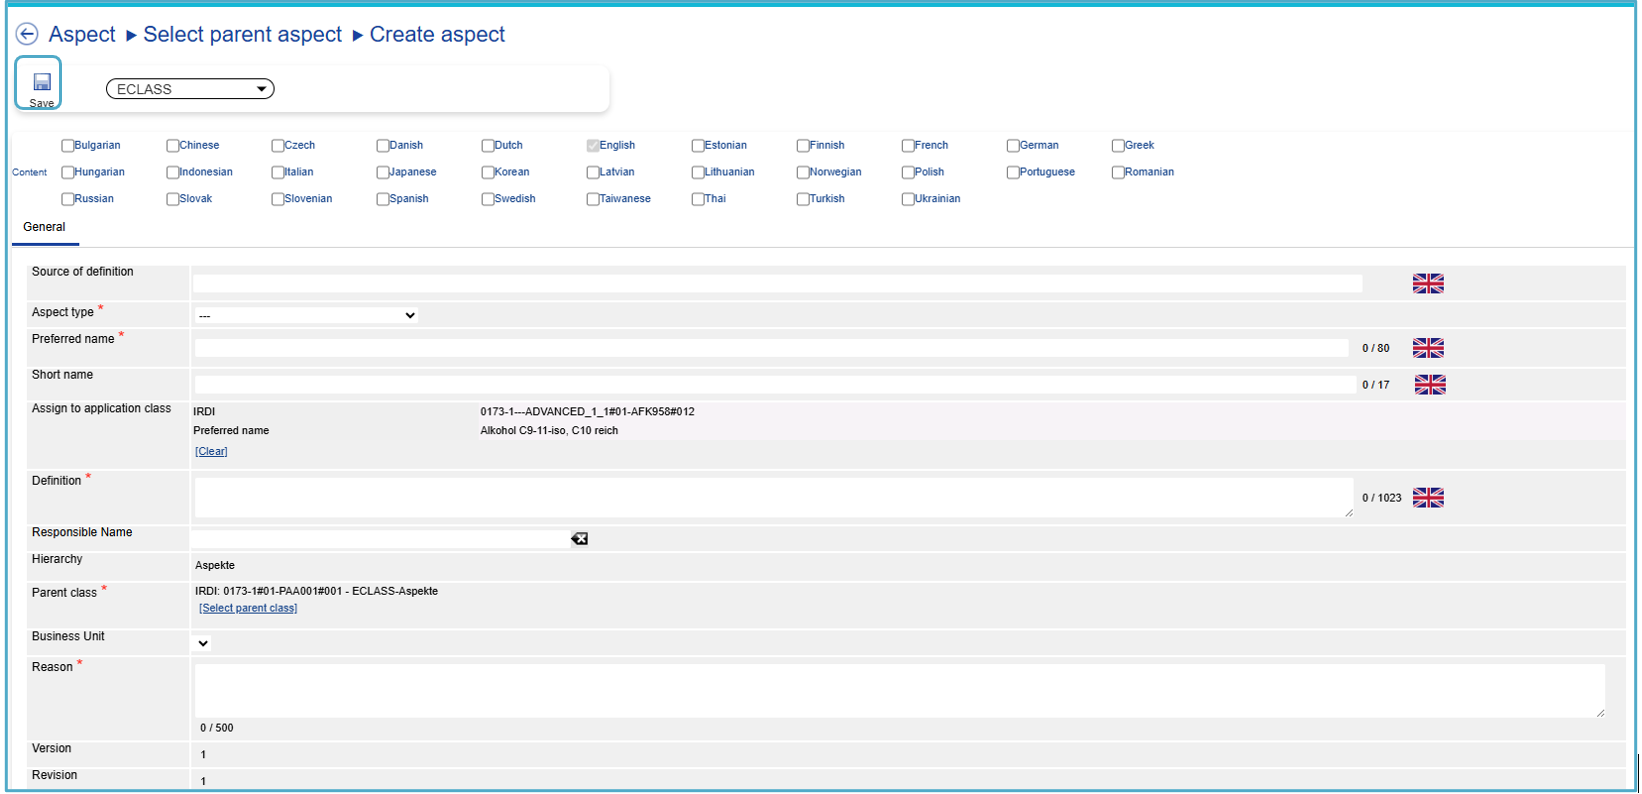
Figure 17: Create Aspect Dialog
Mandatory fields are:
- Aspect Type
- Preferred name
- Definition
- Parent class
- Reason
Fill in the fields and press “Save”.
Remove Aspect
After selecting Aspect under Content Manager, the user has to select a specific Aspect he/she would like to remove. After this the user has to hover above the “Remove” icon and will have two options to choose from: “Delete (CR)” and “Hard-delete”.
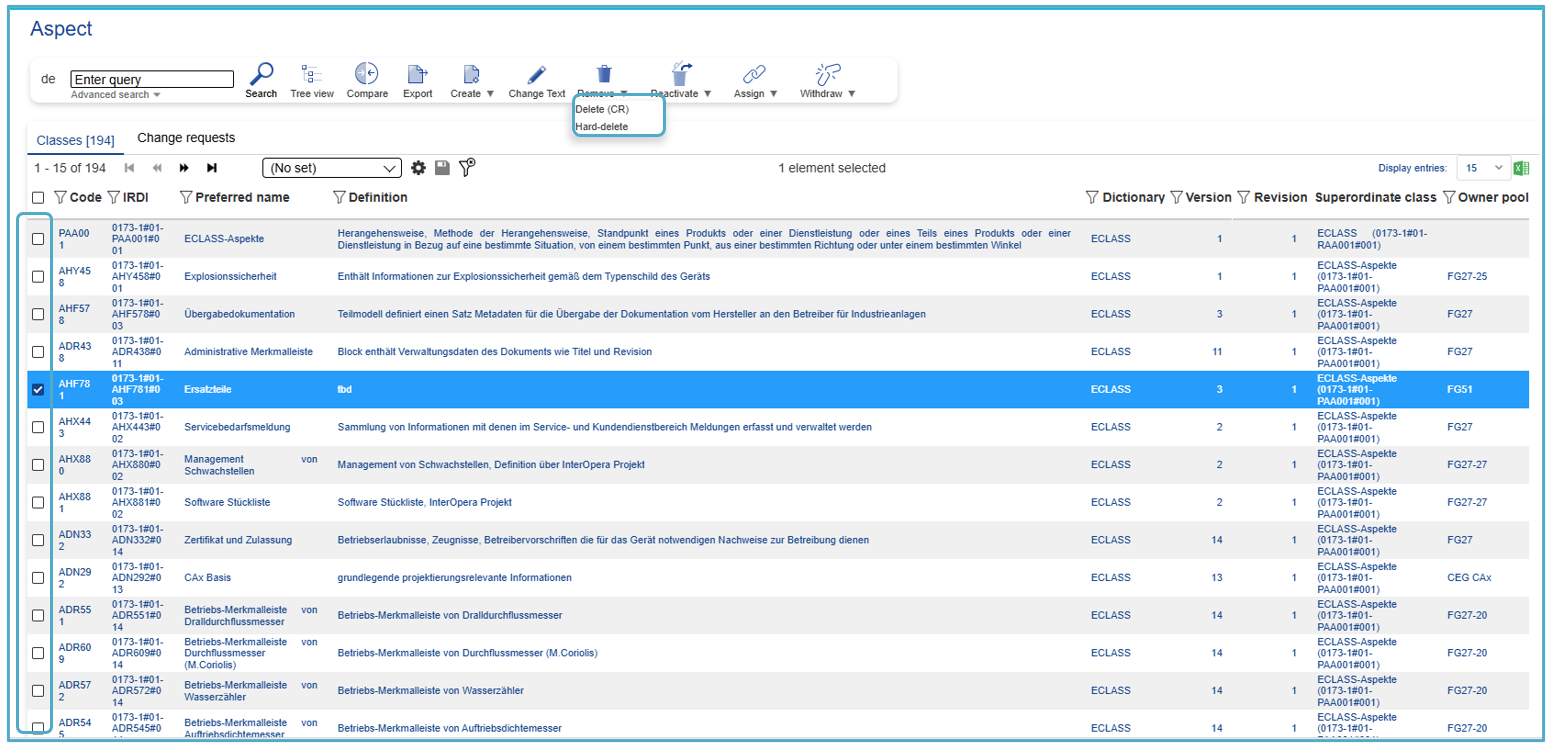
Figure 18: Select Aspect to remove
Delete (CR) Aspect
User selects an Aspect from the list – the system displays the Remove aspect dialog:
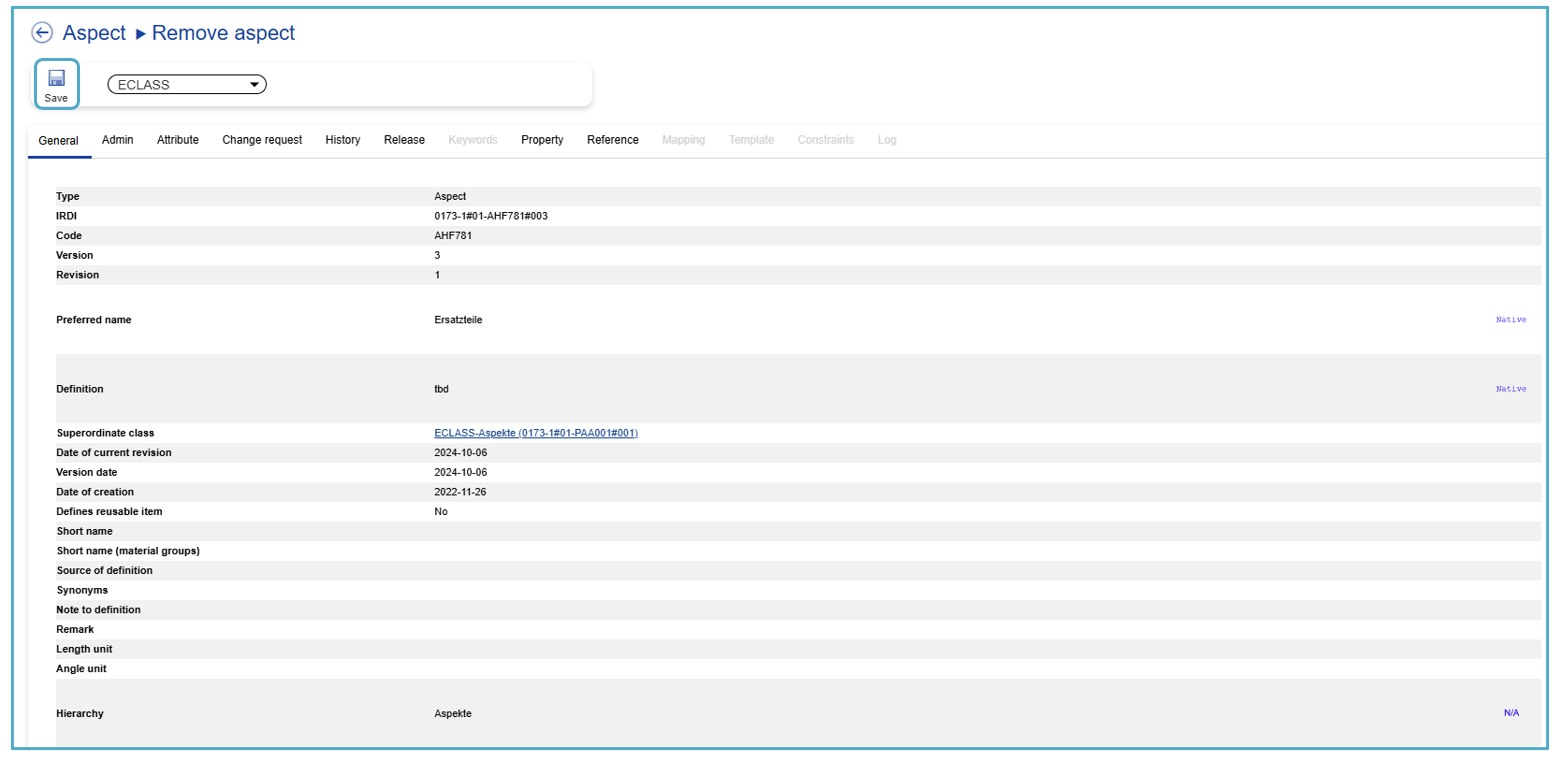
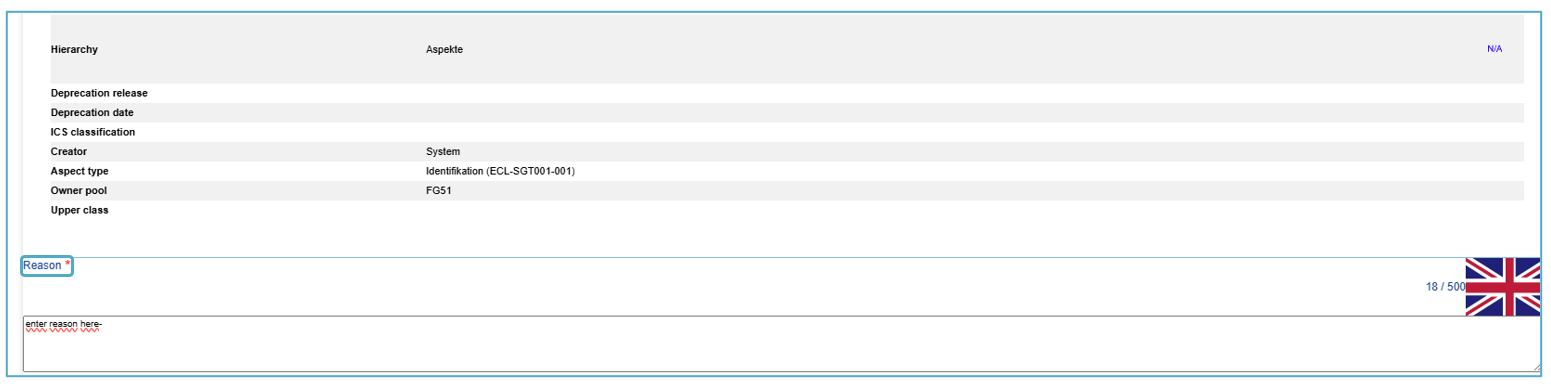
Figure 19: Remove aspect Dialog
Under the tab “Reference”, all instances where the Aspects is used are displayed, so that the user can evaluate the impact the operation “Remove Aspect” will have on the system.
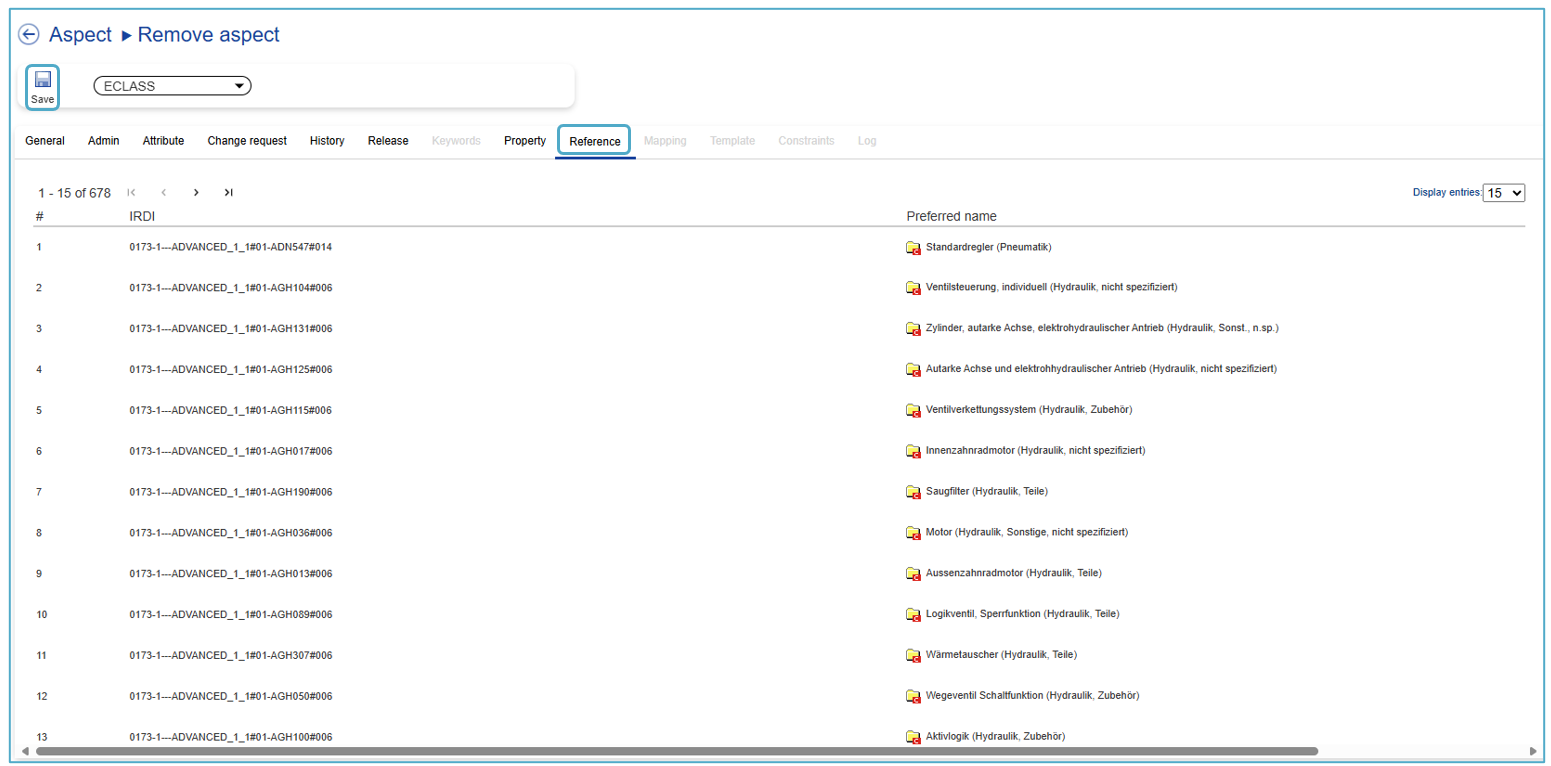

Figure 20: References Tab
Fill in the mandatory field “Reason” and press save -> “Change request saved” message will be displayed. Note: With deletion the Aspect will be deprecated everywhere. If the user wants to remove the Aspect just in one class the user has to do that under menu “Content manager” --> “Application class”.
The CR for Deleting (CR) the Aspect can be viewed under “My Change Requests”.
Hard-delete Aspect
The hard delete function gives the user the opportunity to remove structural elements that were created incorrectly or by mistake in Alpha and Beta versions.
In order to hard-delete an Aspect, the user needs to select the element in the corresponding list or tree view. Then he needs to open the drop-down of "Remove" button in toolbar and select option "Hard-delete".
Note: If the user tries to “hard delete” an element in the PROD release, the following ERROR message will be displayed:
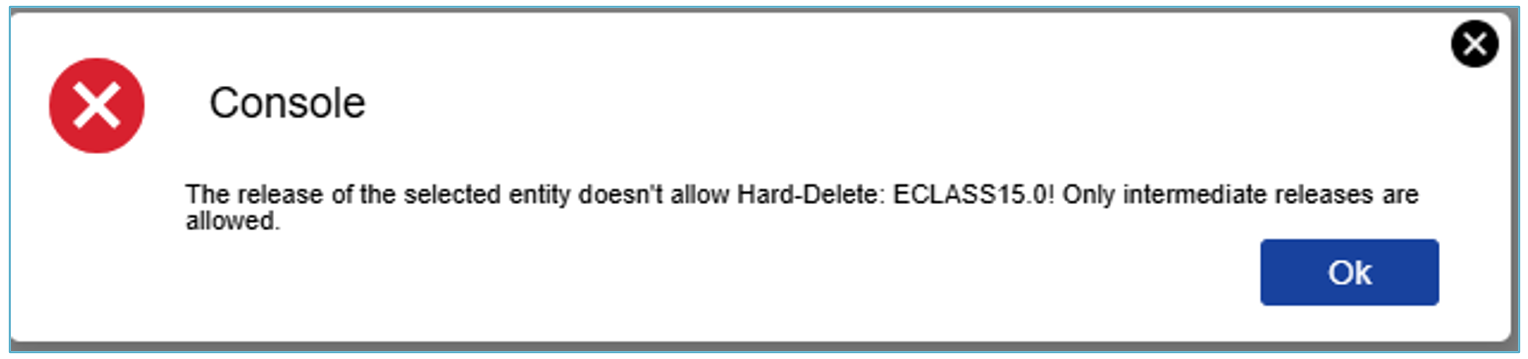
Figure 21: ERROR message
Assign Aspect
Assign Aspect block reference to Aspect
After selecting Aspect under Content Manager, the user has to select a specific Aspect in the list he/she would like to assign a block reference to. First hover over “Assign” in the toolbar.
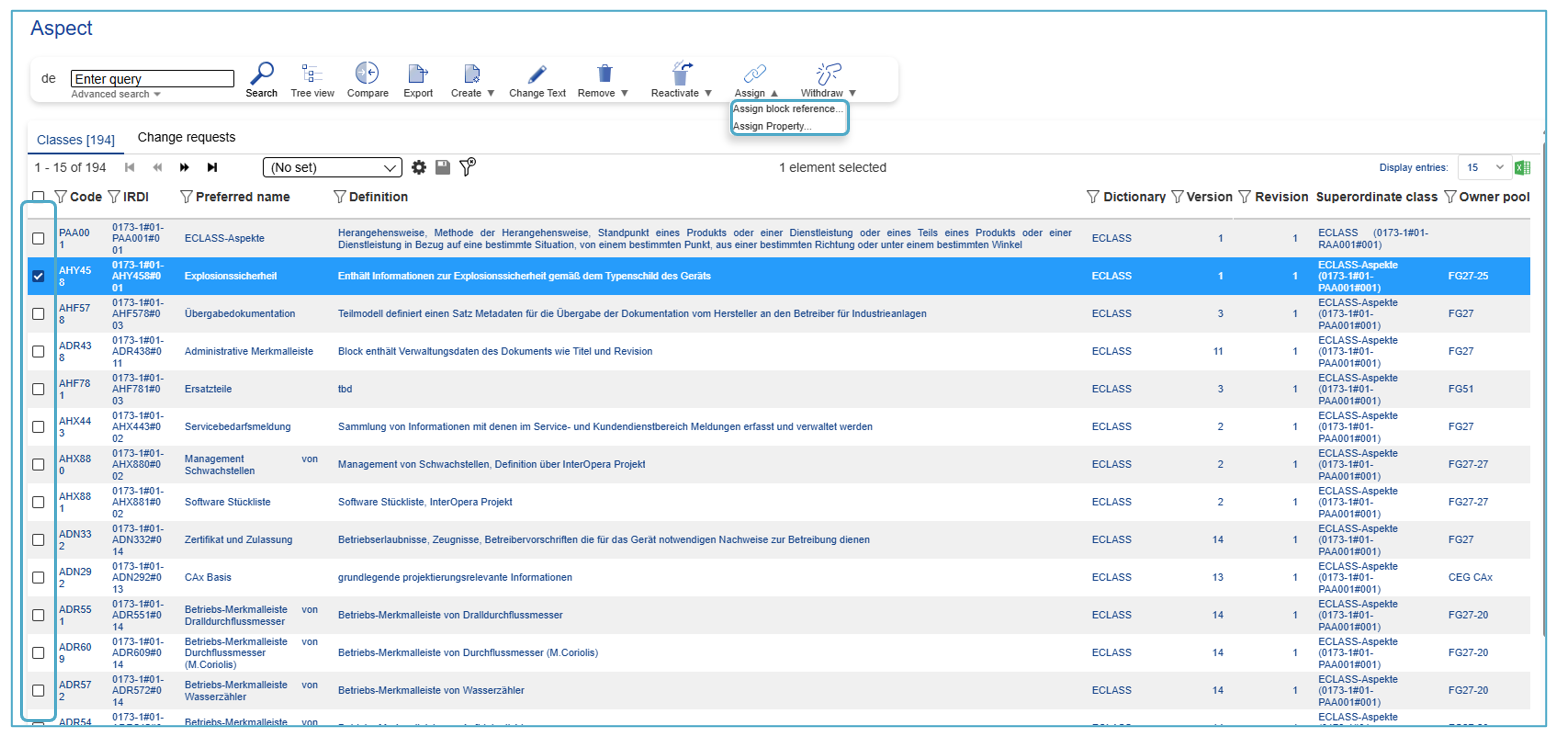
Figure 22: Select Aspect to Assign
After selecting “Assign block reference” the next dialog will open. Choose the Property and click “Select”.
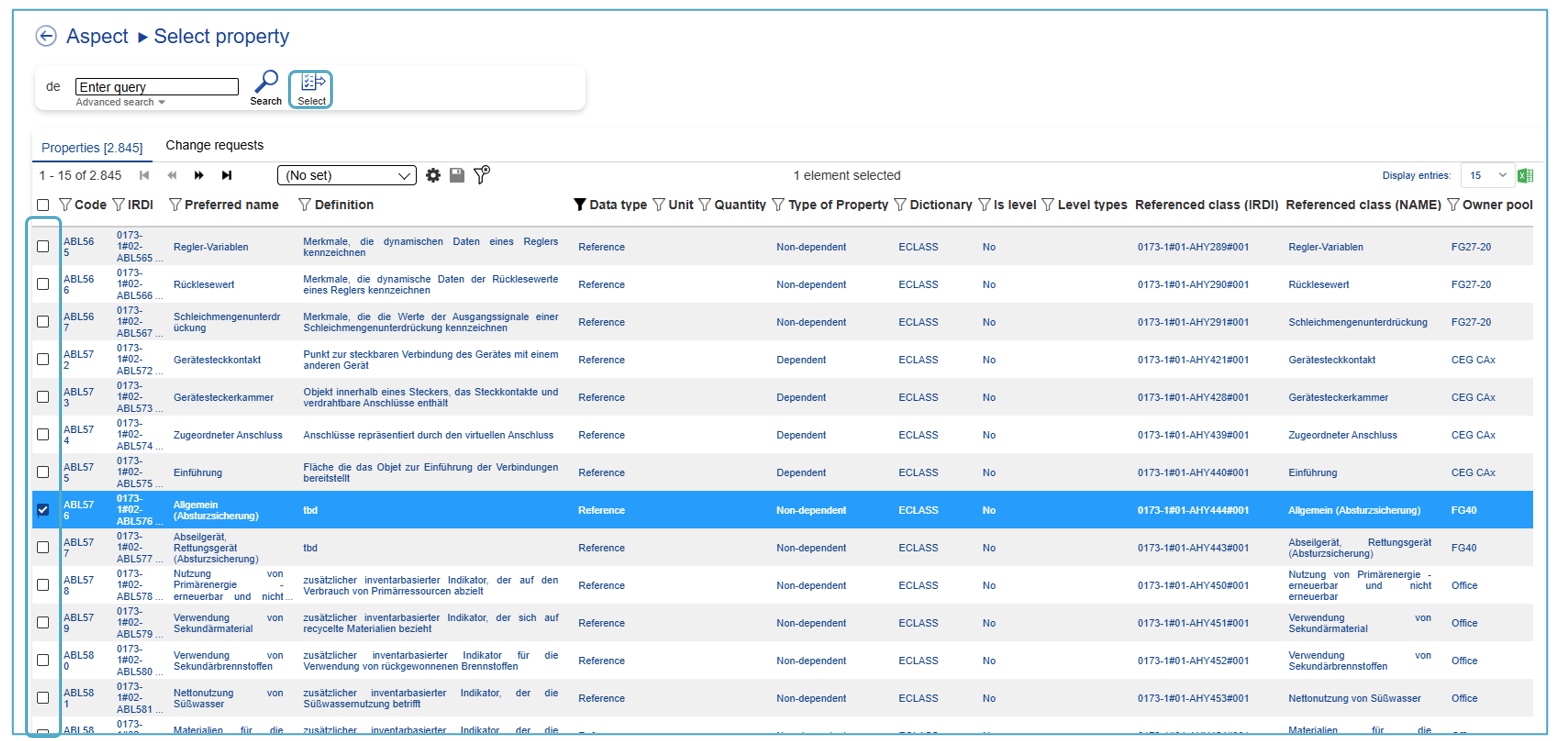
Figure 23: Select Property to Assign
Fill in the reason and click “Save”.
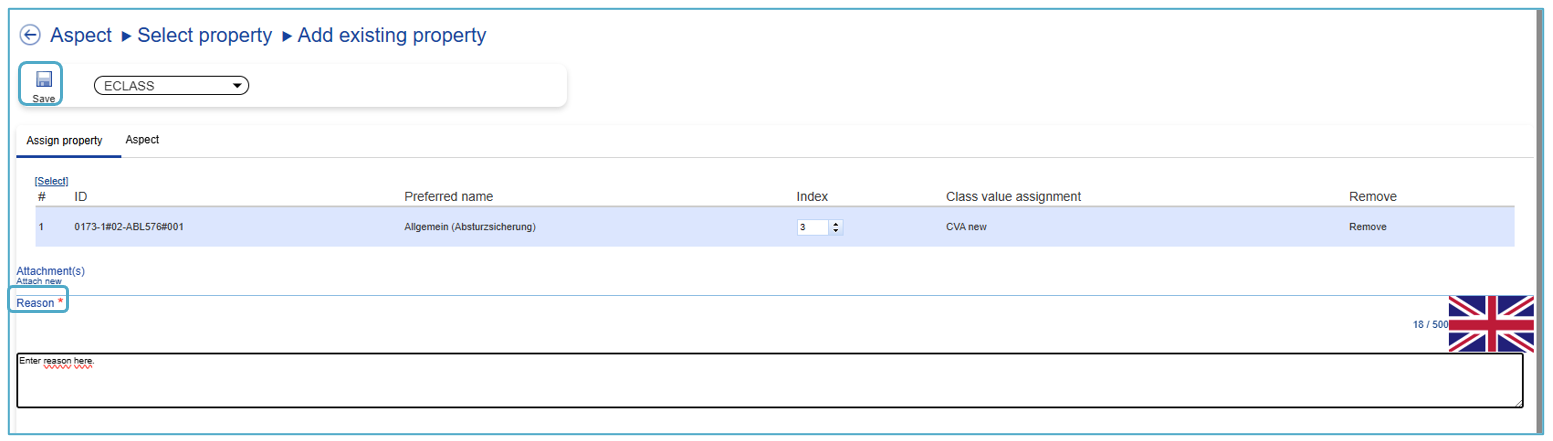
Figure 24: Dialog Reason
Assign Property to Aspect
After selecting Aspect under Content Manager, the user has to select a specific Aspect in the list they would like to assign an Property to.
After selecting “Assign Property” the next dialog will open. Choose the Property and click “Select”.
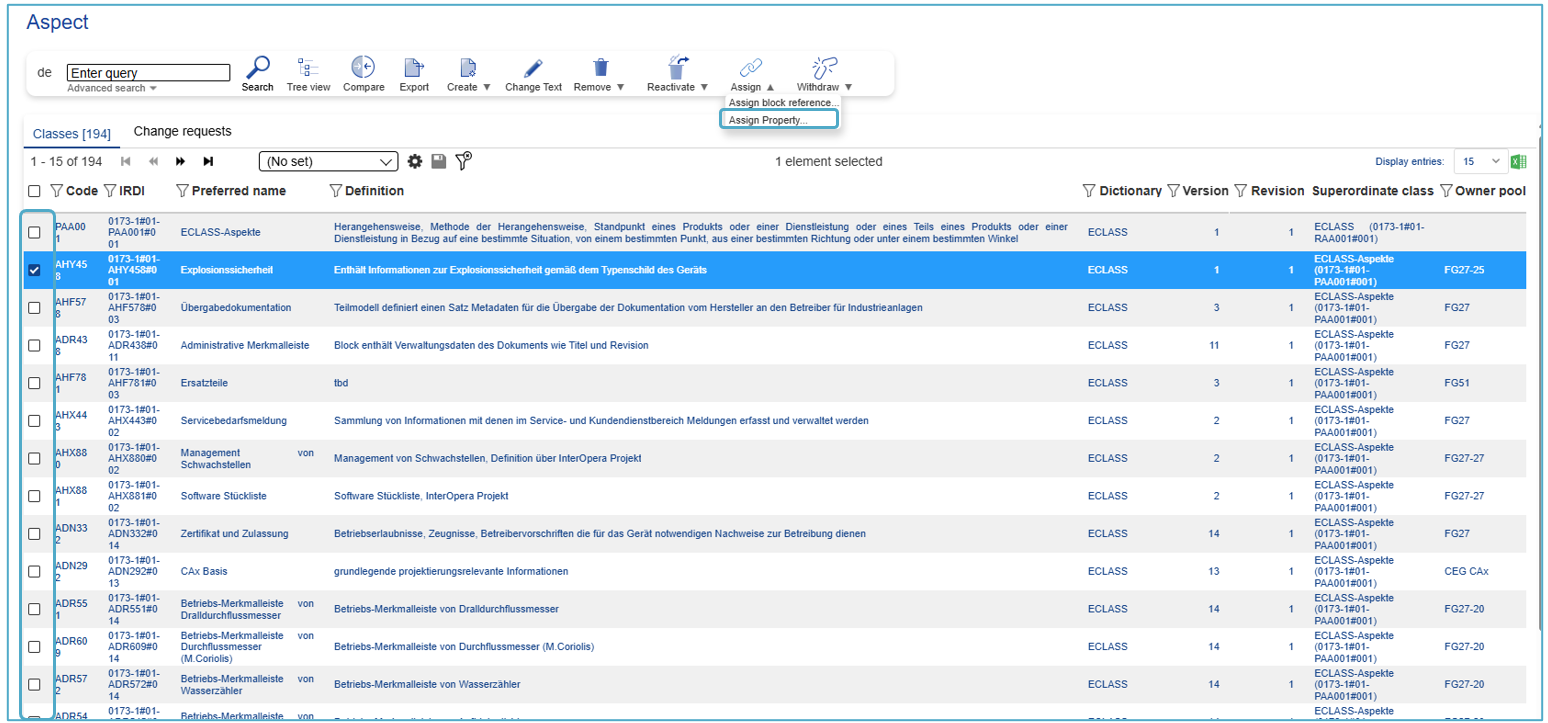
Figure 25: Select Aspect to Assign
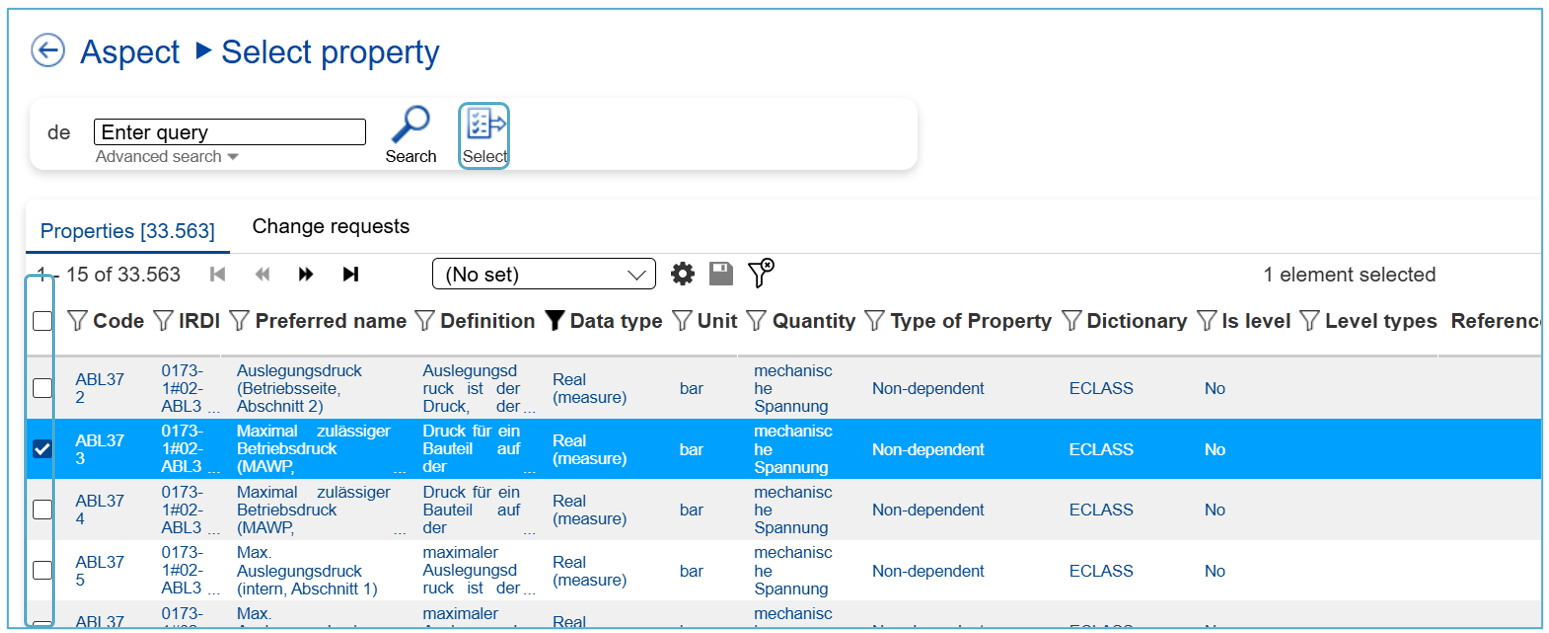
Figure 26: Select Property to Assign
After choosing a Property to assign the Aspect to, click “Select” and the dialog will open.
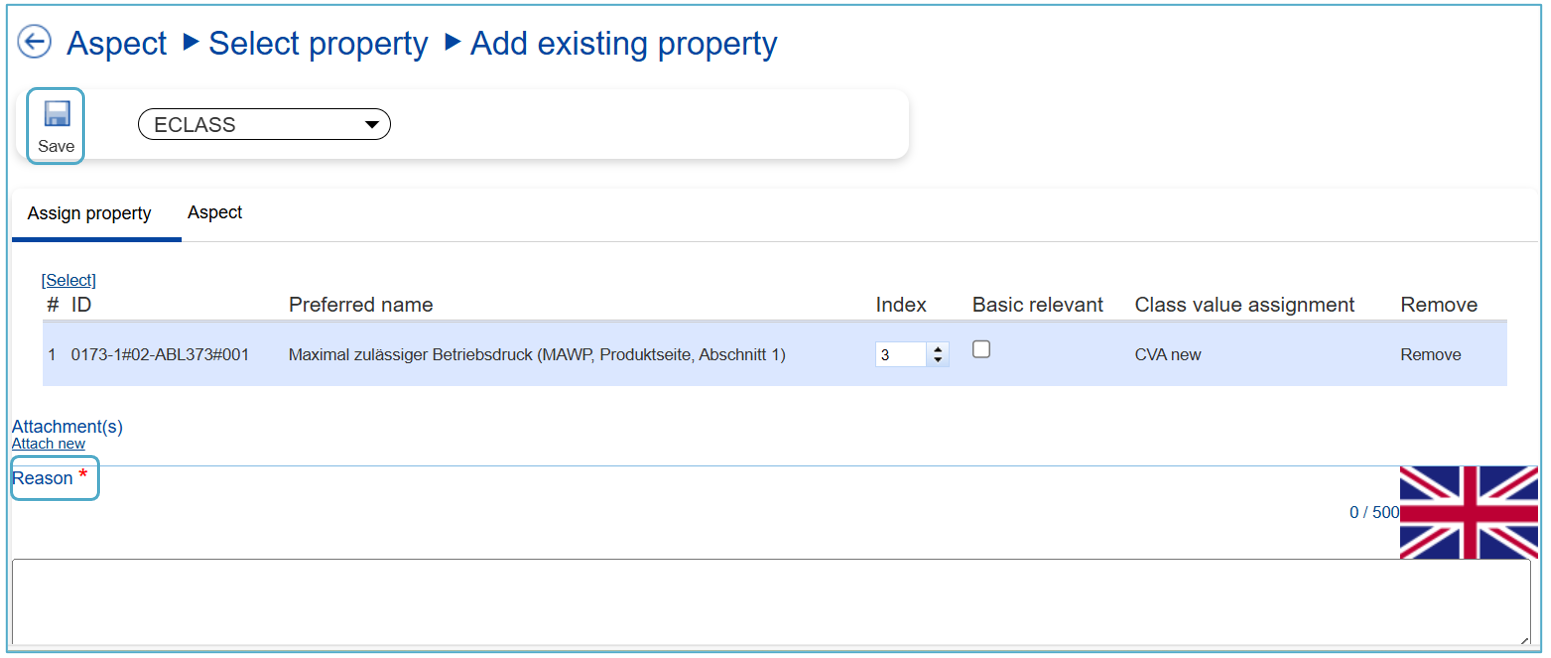
Figure 27: Dialog Reason
Fill in the reason and click “Save”.
Withdraw Property from Aspect

Figure 28: Select Aspect to Withdraw
After selecting Aspect under Content Manager, the user has to select a specific Aspect in the list in which he/she would like to unassign a Property from. Subsequently the user has to click on the "Withdraw” button in the toolbar and then click on “withdraw Property”
After selecting “Withdraw Property” the next dialog will open. Choose the Property and click “Select”. Note: When selecting “Withdraw block reference” the block reference can be withdrawn from the class (see picture).
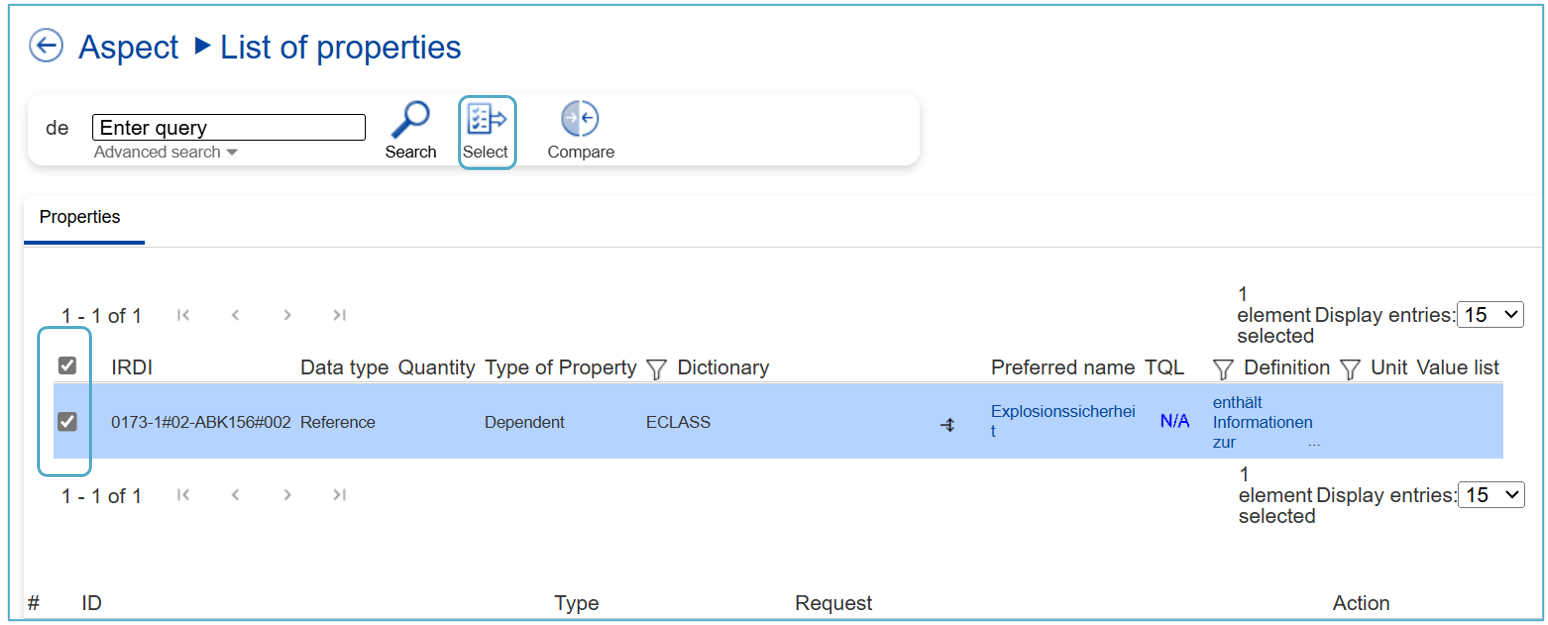
Figure 29: List of Properties
Choose the Property and click “Select”.
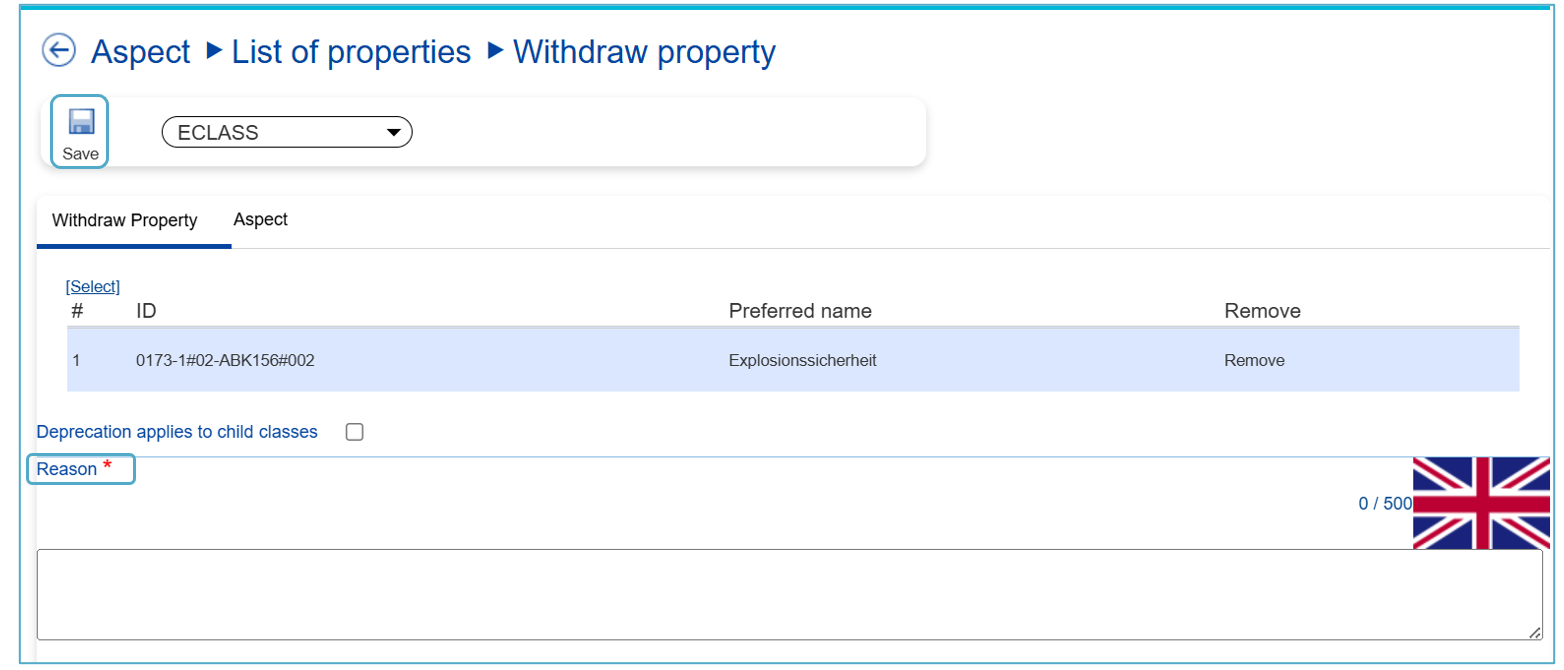
Figure 30: Dialog Reason
Fill in the reason and click “Save”.