Property (Create Change Request)
Overview
Properties are characteristics of classes. For systems describing products, Properties can be viewed as the most fundamental structural element. With the help of Classification Classes products are divided into certain categories of similar products, the product groups. These product groups can be unambiguously described by Properties (e.g. material, color, article number). The sum of all Properties of a subgroup is called an Application Class.
General Information
The workspace area for the management of Properties can be accessed via menu Conten manager → Properties.

Figure 1: Content Manager Property
Search | Triggers a search in the available content, considering the search options set in the advanced search. |
Tree view | Allows navigation to the hierarchical view |
Export | Allows the export of desired Properties |
Compare | Allows the comparison of two or more Properties |
Create | Allows the creation of new Properties |
Change text | Allows editing the attributes of a selected Property |
Remove | Allows removal of selected Property (or hard delete) |
Reactivate | Allows reactivation of a Block reference or Properties assigned to a Block. Only active if the Property is deprecated. |
Replace | Allows replacing a Property with another Property or replacing a Value list with another Value list. |
Clone | Allows copying of a selected Property to be used in a copy-paste action. |
Restrict value list | Allows to define which Values from the Value list are available for selection in the selected Property. |
Assign | Allows assignment of dictionary elements (Synonym, Value List, Condition, Relation) to a selected Property. |
Add to | Allows adding Properties to different Classes: Blocks, Aspects or Application Classes. |
Withdraw | Allows withdrawal of dictionary elements (Synonym, Value Lists) from a selected Property. |
Move | Allows moving, joining or merging into cardinality of Properties. |
Search for a Property
First of all, the user can change the language of the content by navigating the mouse to the button "en" which is left to search field. Various languages can be selected.
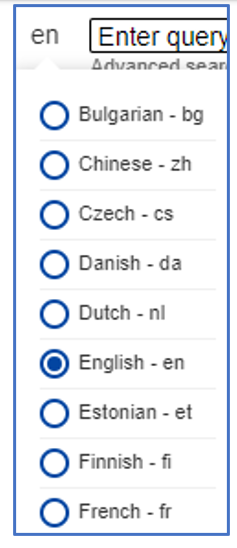
Figure 1: Language of Content
In the field Enter query it is possible to type in the ID or the preferred name of the Property.
By clicking on "advanced search" (under search field), there are several search options available.

Figure 2: Advanced search field
The search options are explained via mouse over in the CDP. By clicking on the Search button without entering name or ID in the search field, all Properties are displayed in the list view below.
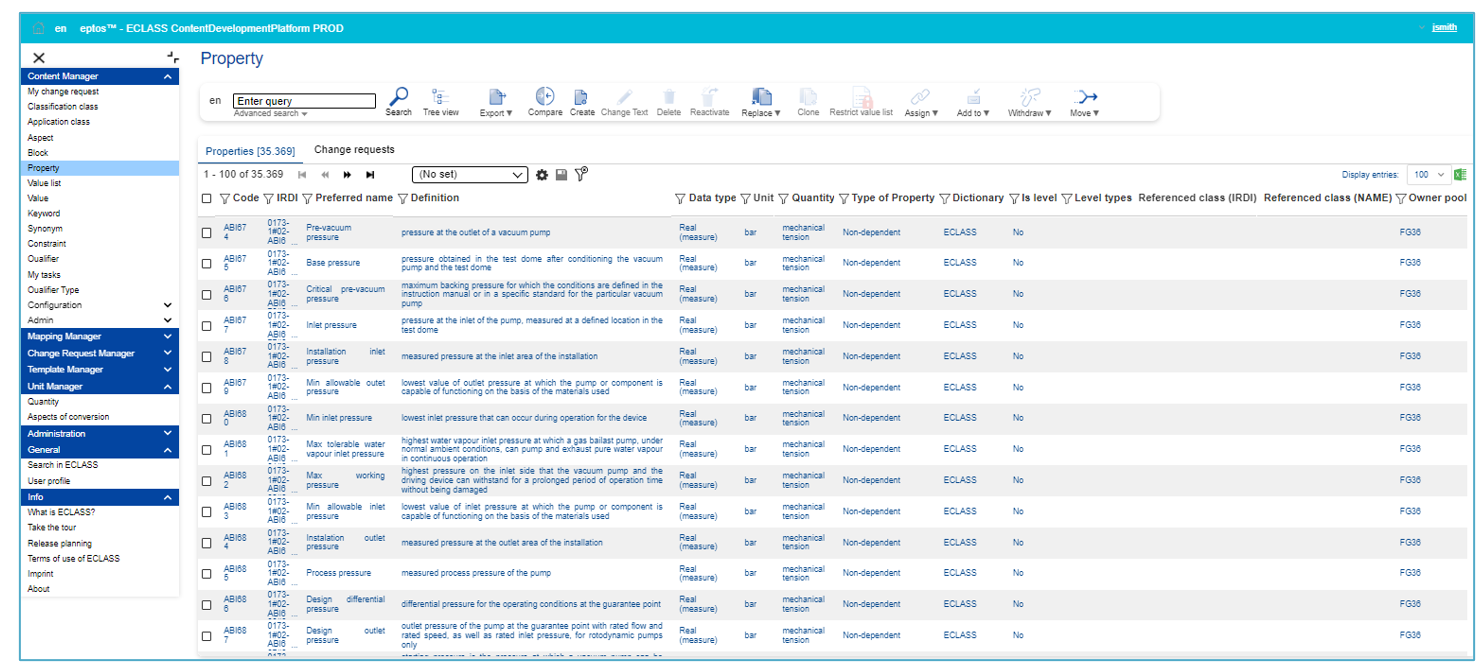
Figure 3: List of Properties
The user can select between the tabs Classes [number of existent Properties] and Change requests [number of Change requests]. Note: Number of Change requests is only displayed after clicking on the tab.
On the far-right side, the option to display up to 100 entries is available. Here the Excel icon allows to directly export in an Excel file the entries that are displayed on the page:
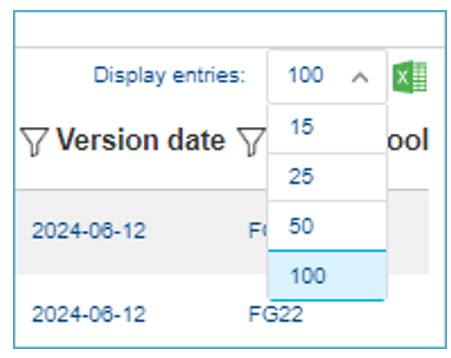
Figure 4: Display Entries
Tab Properties

The list view contains the following columns:
Code | 6-digit identifier (part of the IRDI) |
IRDI | International Registration Data Identifier |
Preferred name | Name of the Property |
Definition | Definition of the Property |
Data type | Data type of the Property (Conceptual data model - ECLASS Technischer Support) |
Unit | A Unit of Measurement is a definite magnitude of a Quantity, defined and adopted by convention or by law, that is used as a standard for measurement of the same kind of Quantity. |
Quantity | A Quantity is a characteristic of an object that can be quantified by measurement. A Quantity can be expressed as the combination of Unit of Measure and a number, where the number is the magnitude. |
Type of Property | Condition (Property which acts as condition for a Dependent Property), dependent (Property whose use depends on a value of a Condition Property.) or non-dependent (A Property of which the (instantiated) Value is not depending on any other Value.) can be the property types. |
Dictionary | The dictionary in which the Property is used |
Is level | Defines if a Property has a level or not. |
Level types | Property Levels define a Property and its levels out of min, max, typ, nom. The Values are a vector, which includes the minimal, maximal, typical and nominal Value (min, max, typ, nom) concurrently. |
Referenced class (IRDI) | IRDI of the class the PR is assigned to. |
Referenced class (NAME) | Name of the class the PR is assigned to. |
Owner Pool | Owner of the Property, meaning the responsible group for that Property |
Tab Change Requests

ID | Change Request Identifier |
Request | Name of the Change request |
Submitted | Submission date of Change request |
Status | The status of the Change request |
Type | Type of change request |
Proposer | Proposer of the change request |
Data type | Condition, dependent or non-dependent can be the property types. |
Quantity | A Quantity is a characteristic of an object that can be quantified by measurement. A Quantity can be expressed as the combination of Unit of Measure and a number, where the number is the magnitude. |
Unit | A Unit of Measurement is a definite magnitude of a Quantity, defined and adopted by convention or by law, that is used as a standard for measurement of the same kind of Quantity. |
Type of property | Condition (Property which acts as condition for a Dependent Property), dependent (Property whose use depends on a value of a Condition Property.) or non-dependent (A Property of which the (instantiated) Value is not depending on any other Value.) can be the property types. |
Work package | Name of the work package the Property belongs to (if there is one) |
Release | Version of Release on which the Change is requested on |
Dictionary | The dictionary in which the Property is used |
Owner Pool | Owner of the Property, meaning the responsible group for that Property |
Change text
The 'Change Text' function should be used to correct spelling mistakes or improve the fields definition/preferred name/source of definition. However, if the changes are significant enough to modify the entire concept of the property, please create a new property and use the 'Replace Property' CR instead.
- NOTE: Textual changes include changes of the class type and of the number of digits (INTEGER, REAL), as well as the number of characters (STRING). Apart from that, no other changes are possible for a property.
- The following changes trigger a creation of a new Property that replaces/substitutes the original property
- Change of the data type
- Change of the quantity/unit
In the search overview, where all available Property as well as Change Requests are displayed, users have the possibility to change the content language (in which Property will be displayed) and search for specific Properties (structure elements or change requests). To create a CR for changing the textual information, select a property in the list by clicking on it.
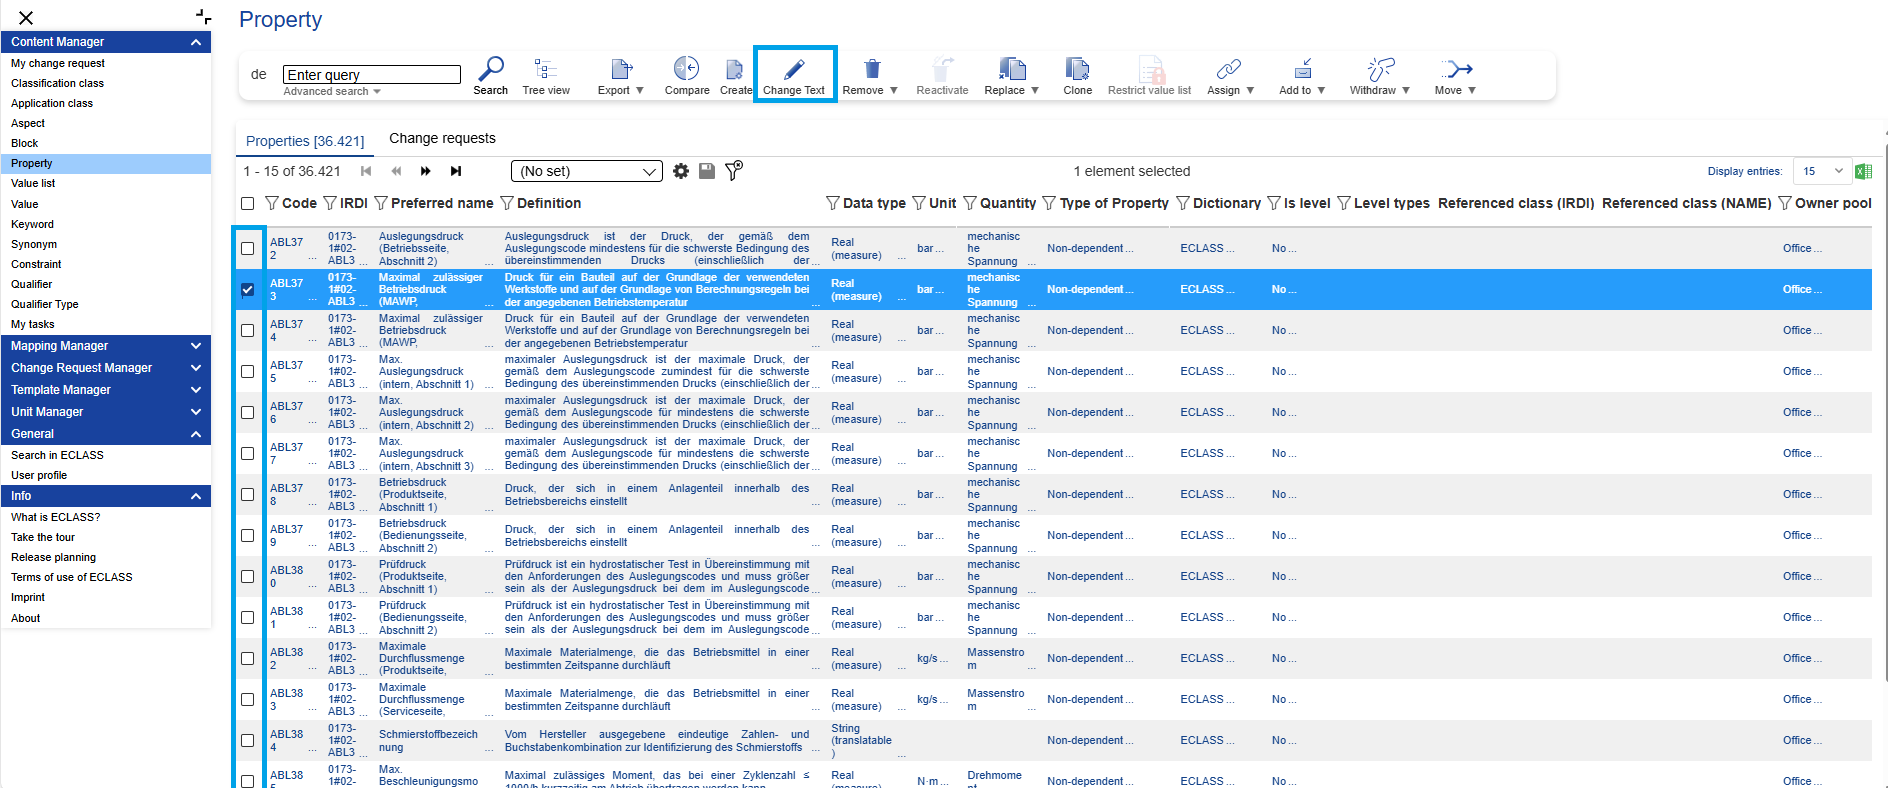
Figure 5: List of all available Property and CRs related to Property
This Change Text Dialog will open:
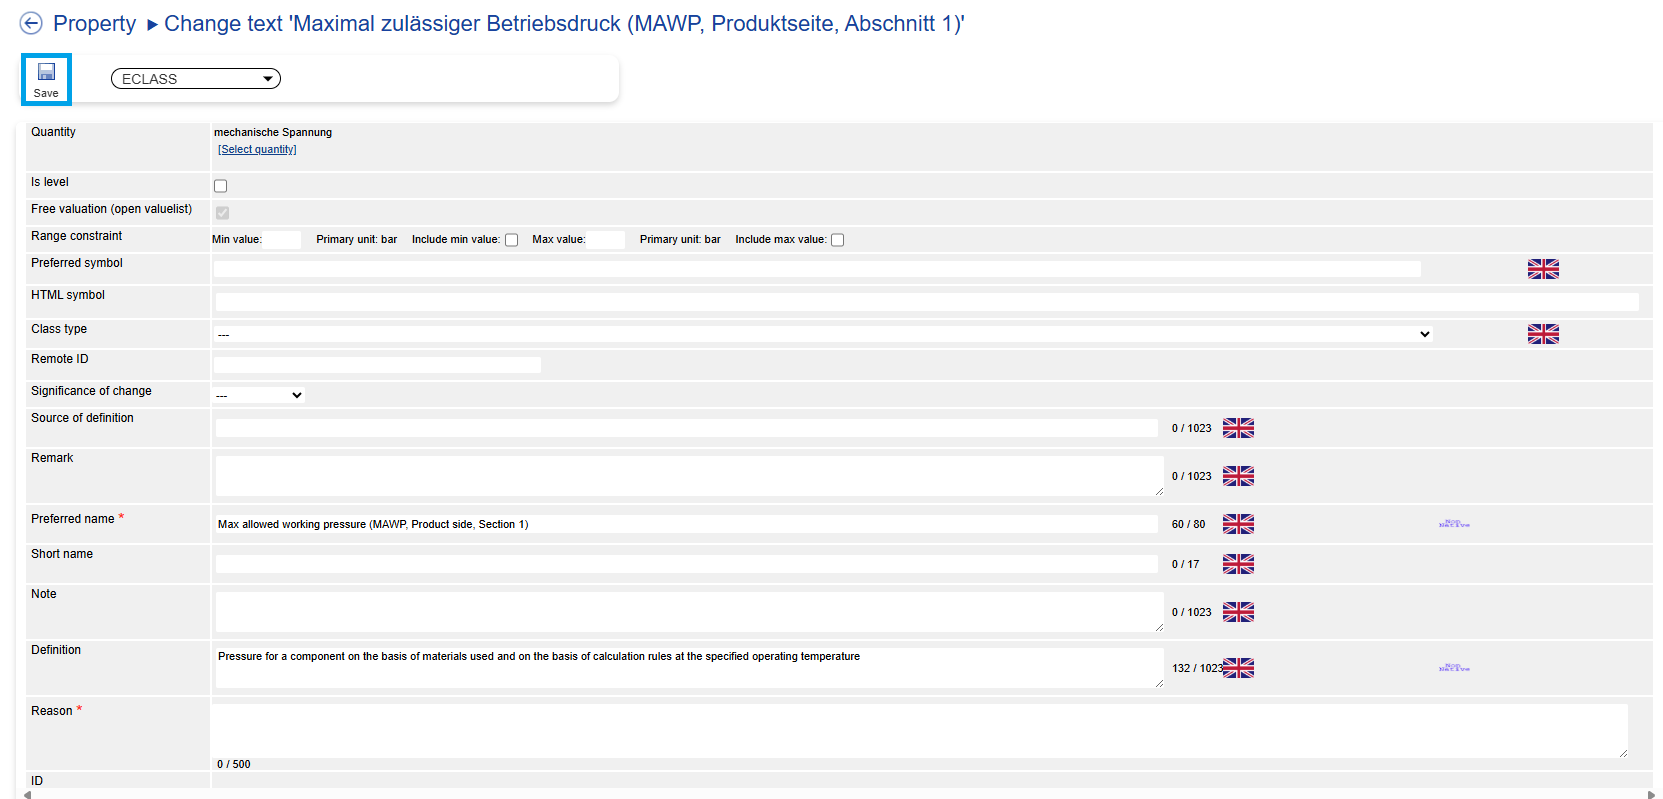
Figure 6: Change Text Dialog
Fill in the fields with the new text and then press button “Save”.
Attention: The fields Preferred Name and Reason are mandatory fields!!!
Result: CR for changing the textual information of Property will be saved and may be retrieved for further editing/submittal under menu entry My Change Request.
Create Property
In order to create a Change Request (CR) for a new Property proceed as follows:
After selecting Property under Content Manager, users can directly select the option “Create”.

Figure 7: Option "Create"
The system will display the Create dialog:
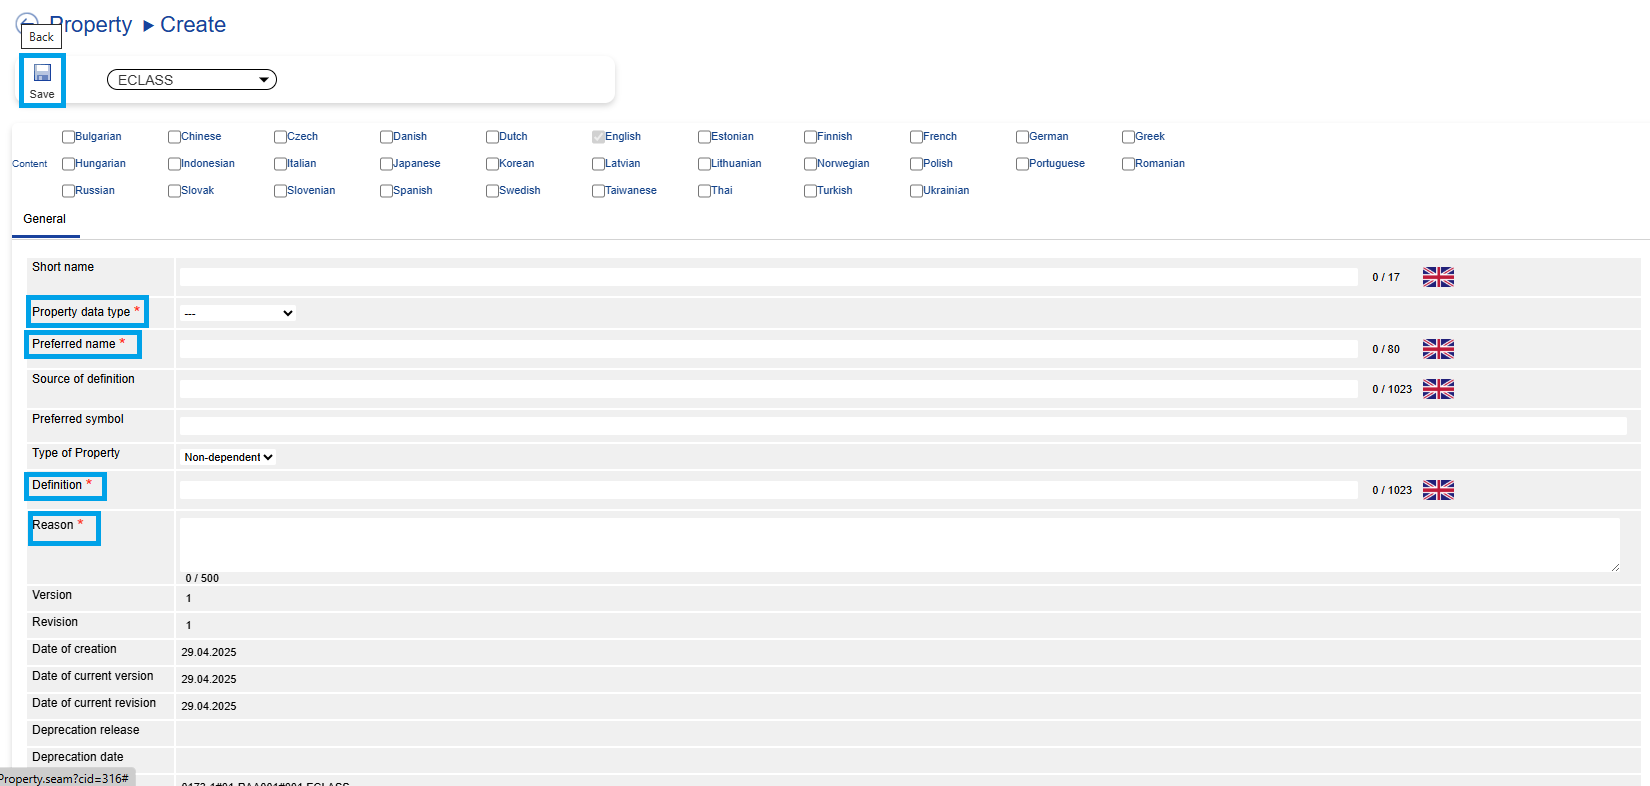
Figure 8: Create Property Dialog
Mandatory fields are:
- Property data type
- Preferred name
- Definition
- Reason
Fill in the fields and press “Save”. The new Property will be created.
Remove Property
A Property can be deleted from the ECLASS dictionary and all assignments to classes will be deleted automatically.
After selecting Property under Content Manager, the user has to select a specific Property he/she would like to remove. After this the user has to hover above the “Remove” icon and will have two options to choose from: “Delete (CR)” and “Hard-delete”.

Figure 9: Remove options
Delete (CR) Property
User selects a Property from the list – the system displays the Remove Property Dialog:
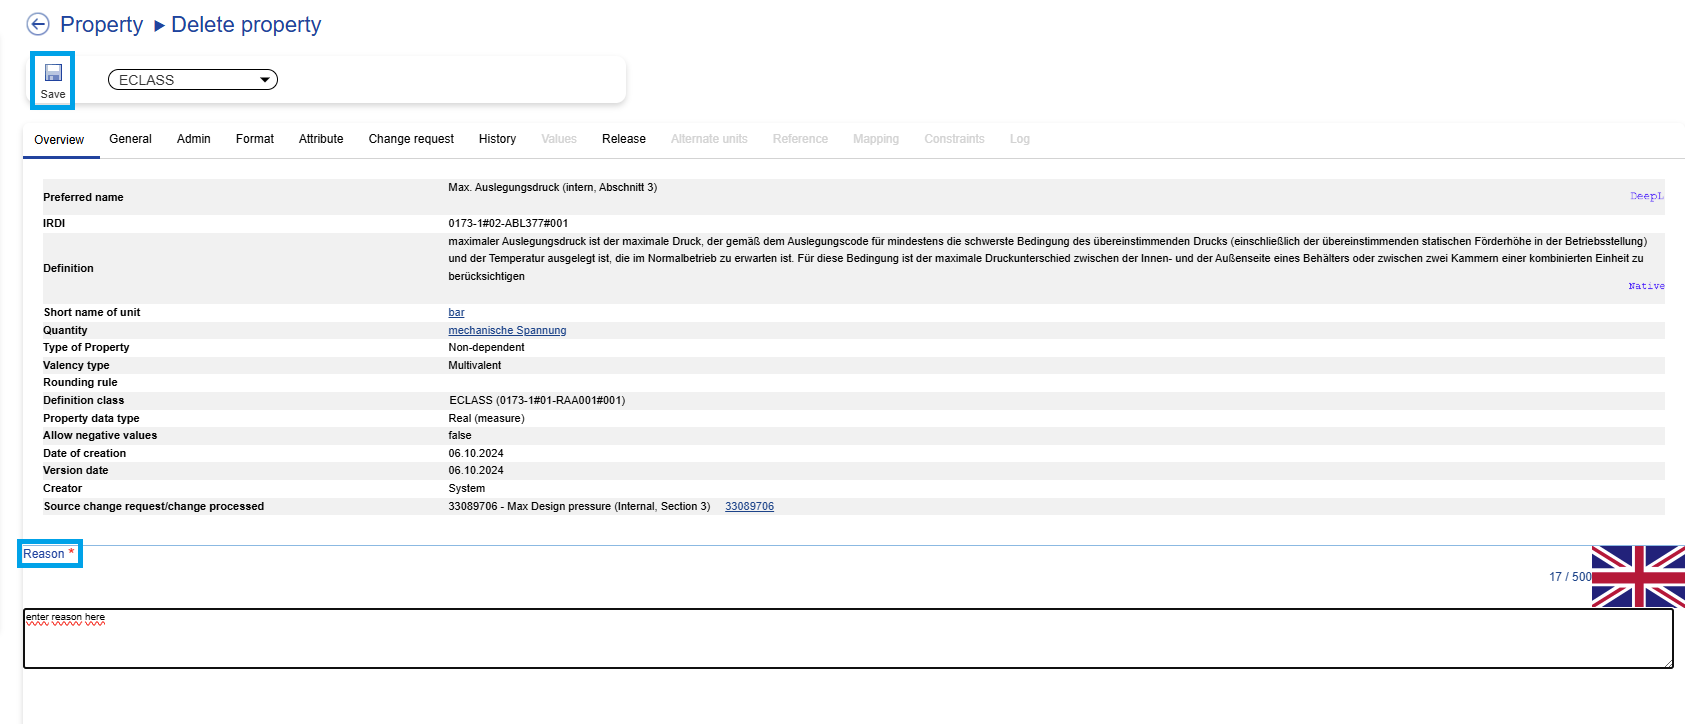
Figure 10: Delete Property Dialog
Enter reason for removal and press button “Save”.
Hard-delete Property
The hard delete function gives the user the opportunity to remove structural elements that were created incorrectly or by mistake in Alpha and Beta versions.
In order to hard-delete a Property, the user needs to select the element in the corresponding list or tree view. Then he needs to open the drop-down of “Remove” button in toolbar and select option “Hard-delete”.
Note: If the user tries to “hard-delete” an element in the PROD release, the following ERROR message will be displayed.
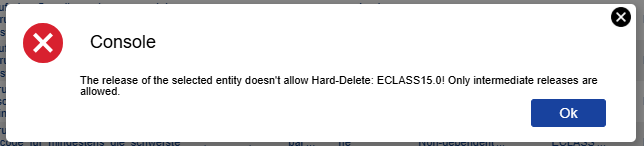
Figure 11: ERROR message
Replace Property
In order to replace a Property proceed as follows:
- Search and select the Property to be replaced
- Select menu entry Replace Property

Figure 12: Select "replace property"
3. In the next window the system provides the possibility to select the scope of the property replacement. Therefore, users have the possibility to replace a targeted Property selected int the context of a Class (local) or to replace the Property in all its usages (global, dictionary wise). For this, a dialog containing selection options local replacement and global replacement has been implemented.
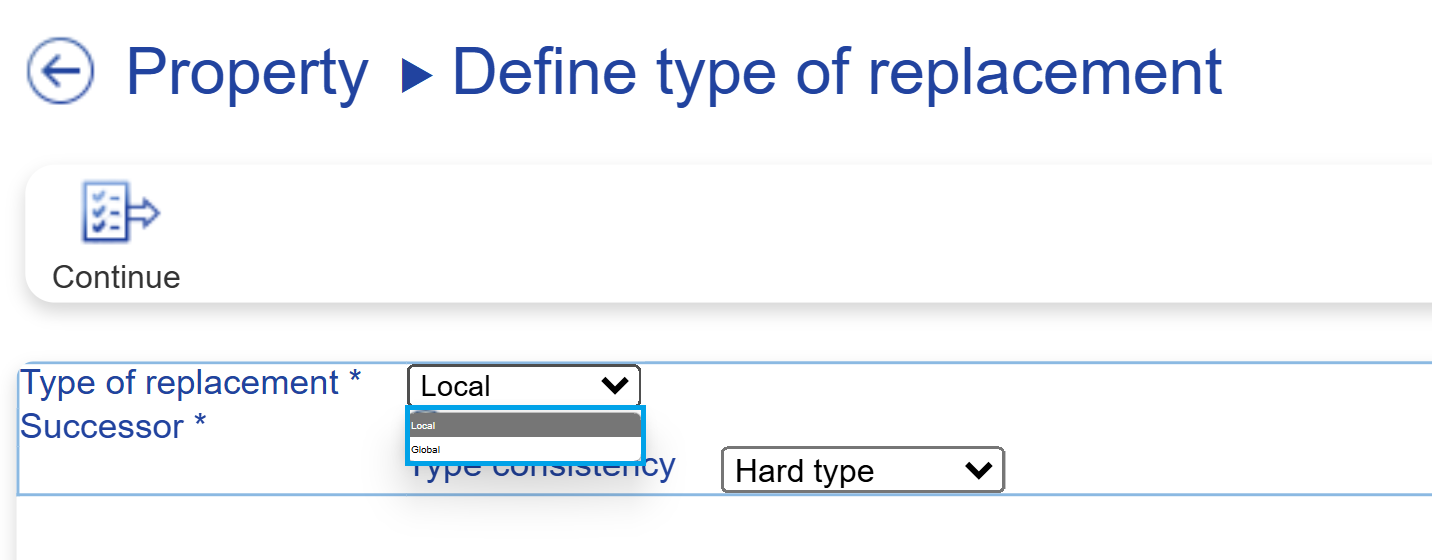
Figure 13: Selecting Type of replacement
Global replacement serves to indicate that the replacement of the Property is accomplished in all classes.
When local replacement is selected, the system displays the list of Classes where selected Property is used. The user selects the class where the replacement is applied.
The dialog also contains distinctive selection options “successor”. The user needs to choose type consistency: “Hard type”, “Weak type” or “No consistency”.
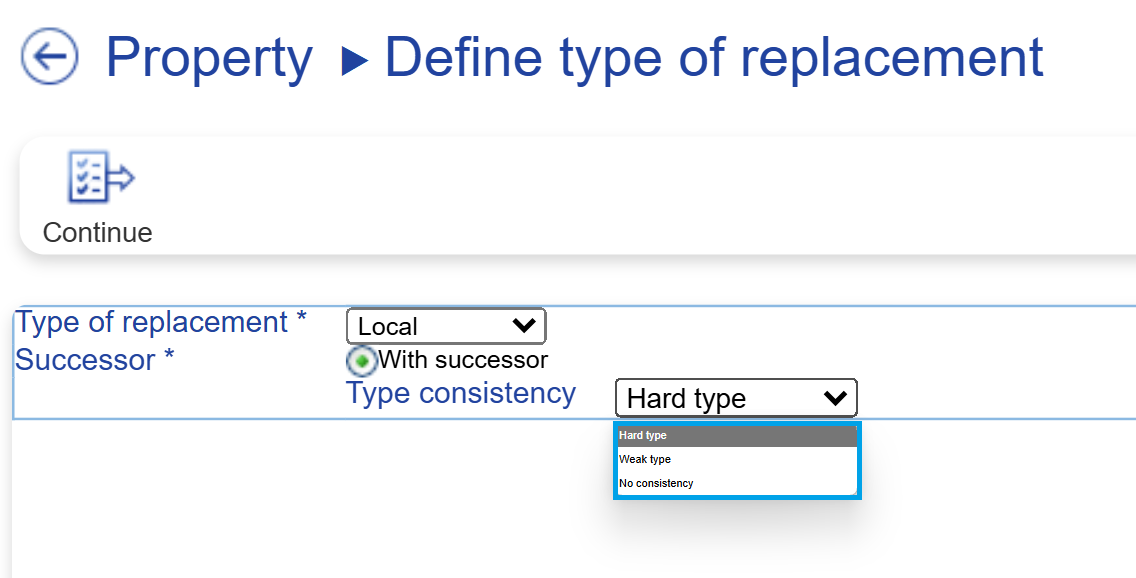
Figure 14: Select Type consistency
Hard consistency:
Only replacements are allowed when the data type and/or the unit of replacing and to be replaced PR is the same. Example:
P1 – “Temperature”/Real (measure)/°C
P2 – “Operating Temperature”/Real (measure)/F
Weak Type Consistency:
Only replacements are allowed when the data type of replacing and to be replaced PR is the same (the unit can be different). Example:
P1 – “Temperature”/Real (measure)/°C
P2 – “Operating Temperature”/Real (measure)/F
Examples of No Type Consistency
Select if the data type of replacing and to be replaced PR is the NOT same
P1 – “Temperature”/String
P2 – “Operating Temperature”/ Real (measure)/F
When a Property is replaced, the system creates structures update information (i.e. predecessor and successor relationships, with / without date type change.
4. Subsequently the user has to click on the button “Continue” to select replacing Property
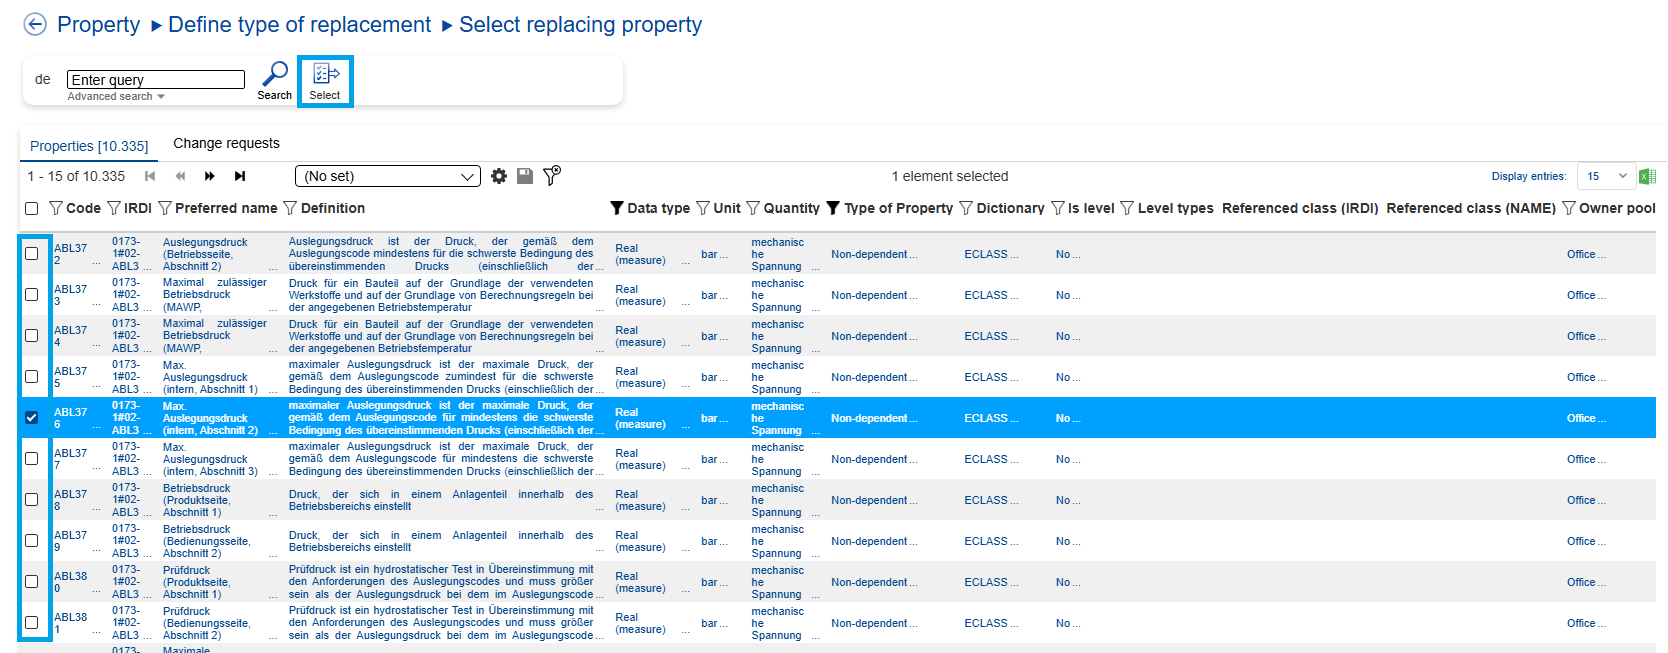
Figure 15: Select replacing Property
5. Enter reason for replacing the Property and press button "Save".
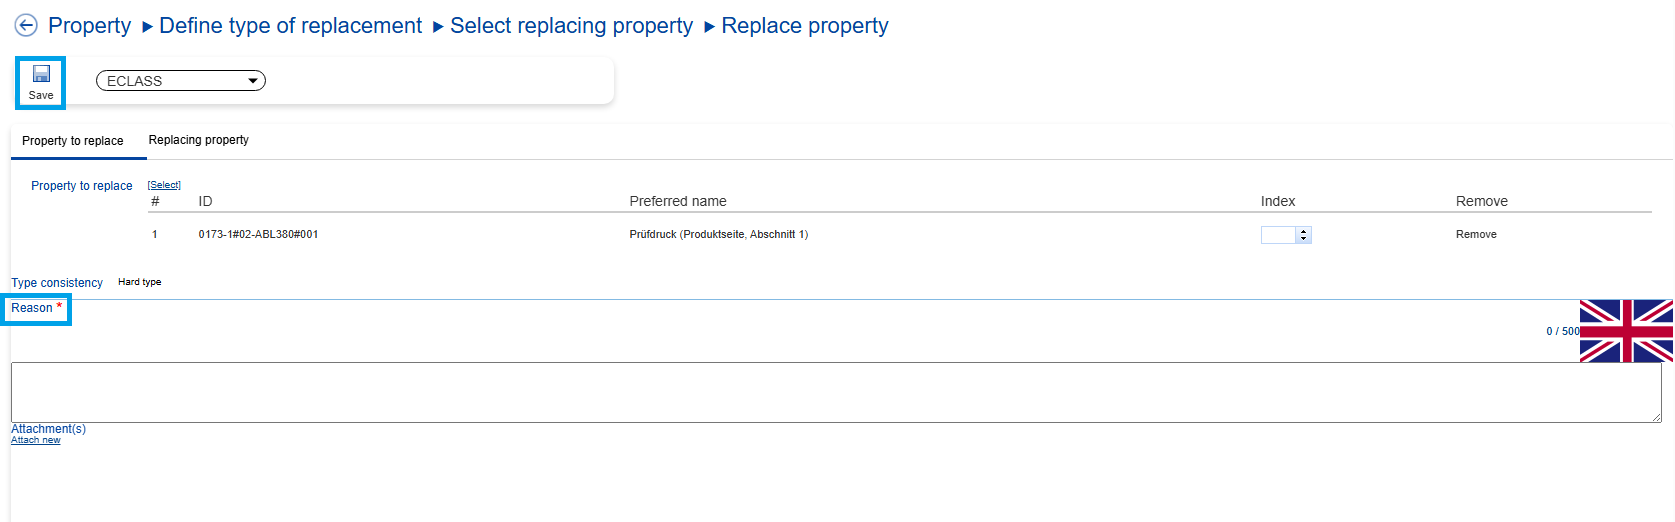
Figure 16: Dialog replace Property
Result: Change Request for replace Property will be saved and is displayed under menu entry “my change request”.
Clone Property
In order to create a new Property that is similar to an existing one, a Property can be cloned. This helps create Properties faster. In order to change request (CR) for a new cloned property (PR) proceed as follows:
- Browse and search through existing properties to choose which Property shall be cloned, i.e. shall serve as the basis for the new Property
- Select menu entry “clone”
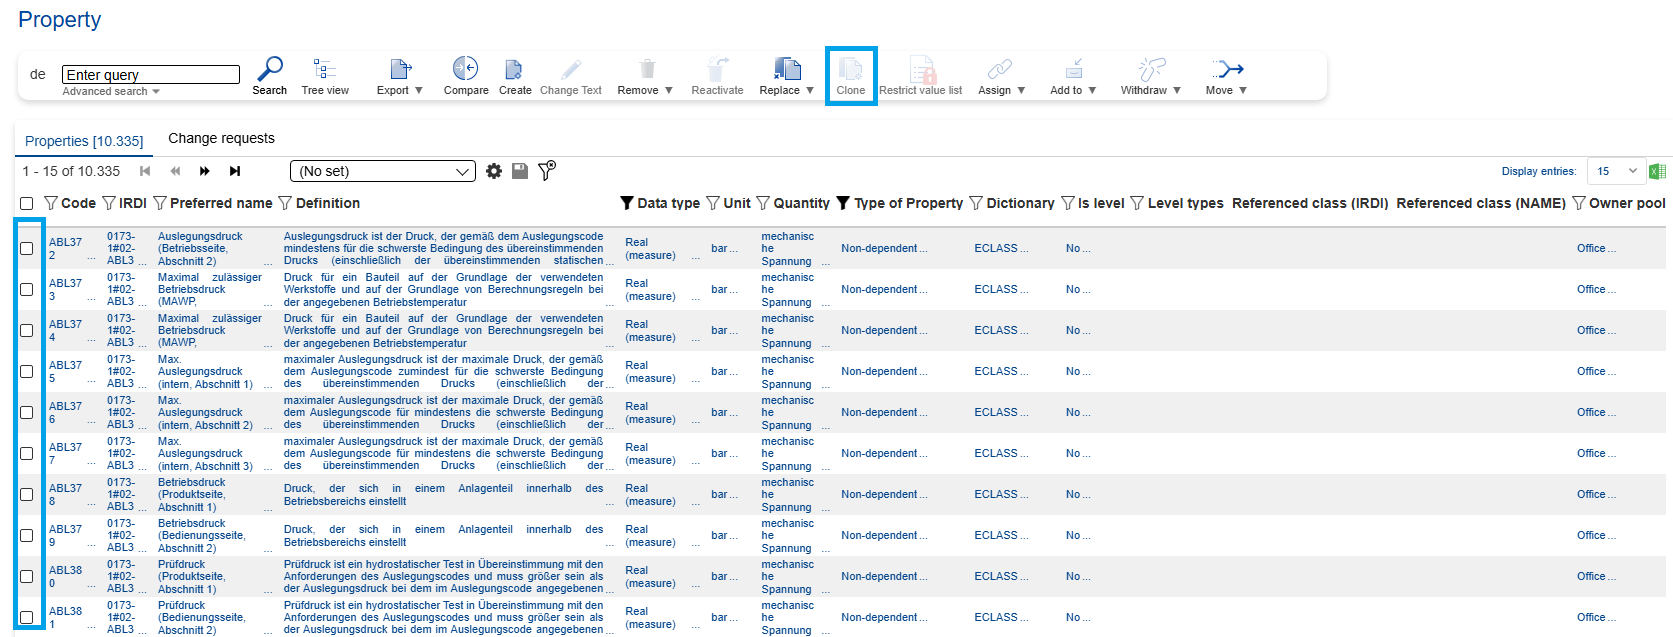
Figure 17: Selecting Property to clone
3. Change the displayed information of the existing Property in fields of Clone Property dialog in order to create the clone and press "Save".
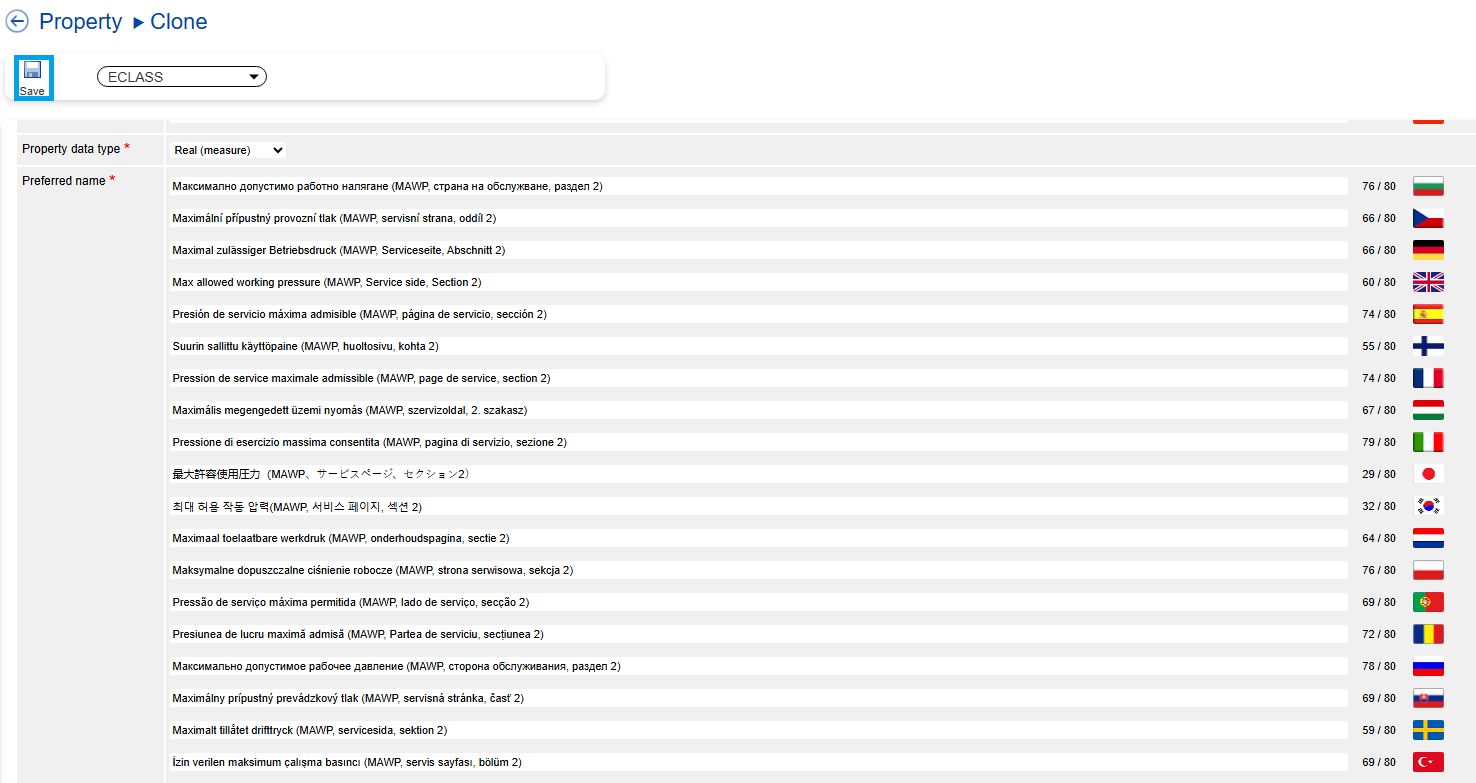
Figure 18: Dialog Clone Property
4. Fill in all mandatory fields and - depending on choice of data type - more relevant fields such as quantity and unit.
Assign
Assign Synonym
One or many Synonym(s) can be assigned to a Property (new or existing). In order to create a Change Request (CR) to assign a Synonym to a Property (PR) proceed as follows:
- Browse and search through which Property to assign a Synonym to and then select “Assign synonym..”
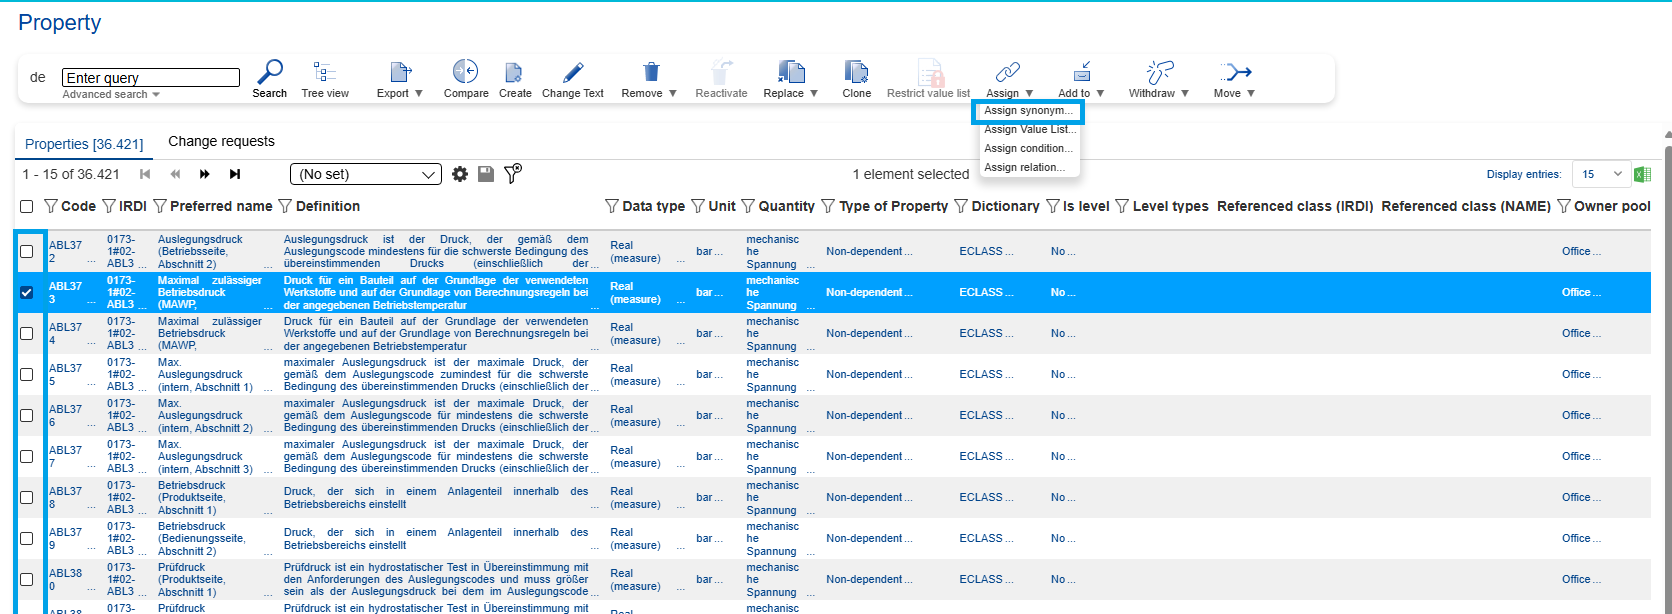
Figure 19: Select Property to assign a Synonym to
2. Click on “search”. Then browse and search through existing and new Synonyms (as CR) to select the Synonym(s) that shall be assigned to the Property. If only one Synonym is chosen, simply click on the select-button. If many Synonyms are chosen mark them first and then click on select:
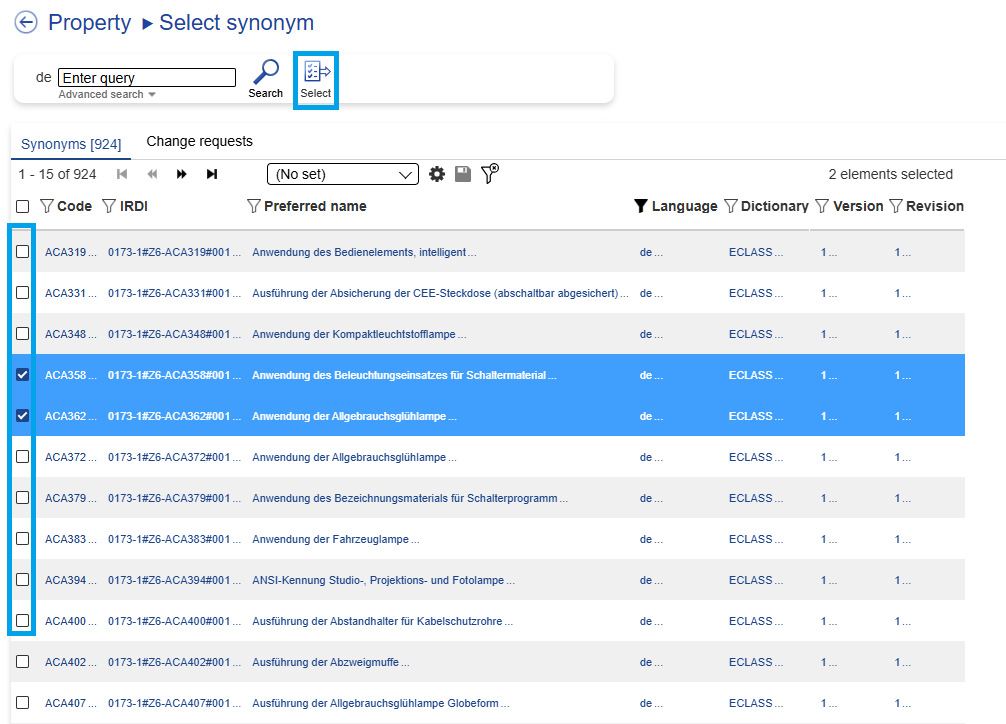
Figure 20: Select Synonym
3. Fill in the reason for the Change Request and press "Save".

Figure 21: Dialog Assign Synonym
Result: Change Requests for assign synonym will be saved and may be retrieved for further editing/submittal under menu entry “My change request”.
Assign Value List
A value list is assigned to a Property (new or existing). In order to create a change request (CR) to assign a value list (VL) to a property (PR) proceed as follows:
1. Select the Property that needs a Value List to be assigned and click on "assign Value List" in toolbar.
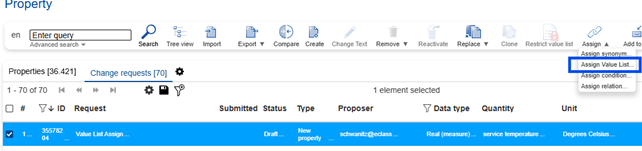
Figure 22: Select Value List
2. Select the Value List to be assigned and click on "Select".
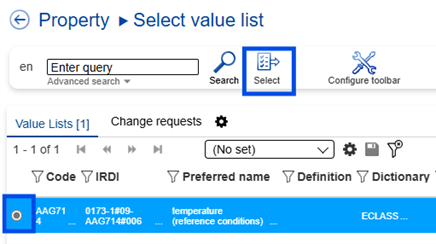
Figure 23: Select Value List
3. Type in a reason in the next dialog and press "Save" button.
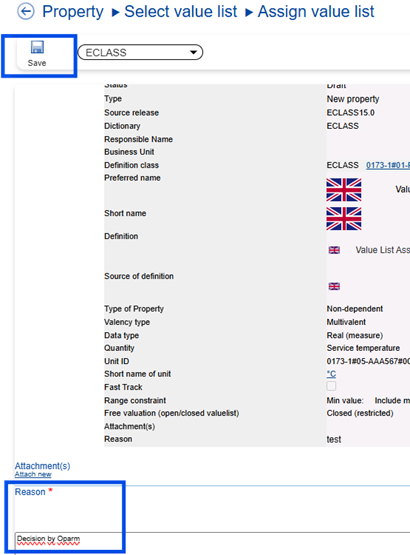
Figure 24: Dialog Assign Value List
Assign Condition
Note 1: A Property condition is only necessary when modeling a Cardinality!
Note 2: Assigning a condition is only possible for dependent Properties.
Proceed as follows to assign a condition:
- Select a Property of type “Reference” that is dependent
- Click on “Assign condition” in toolbar.
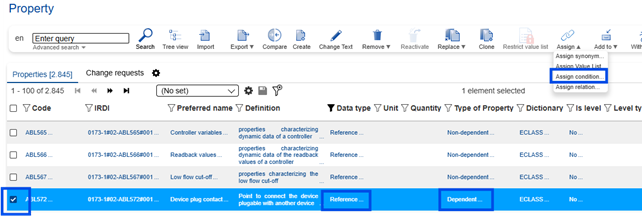
Figure 25: Select Property to assign Condition
3. In the next dialog, select a condition Property for the dependent Property. This conditional Property has the role of controlling Property in cardinality.
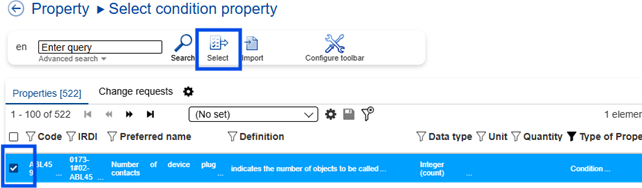
Figure 26: Select condition Property
4. Type in a reason and save.
Withdraw Synonym
An existing Value List is withdrawn from an existing Property. In order to create a Change Request to withdraw a Value List from a Property proceed as follows:
- Select the Property where the Value List shall be withdrawn from and select “Withdraw Value List.
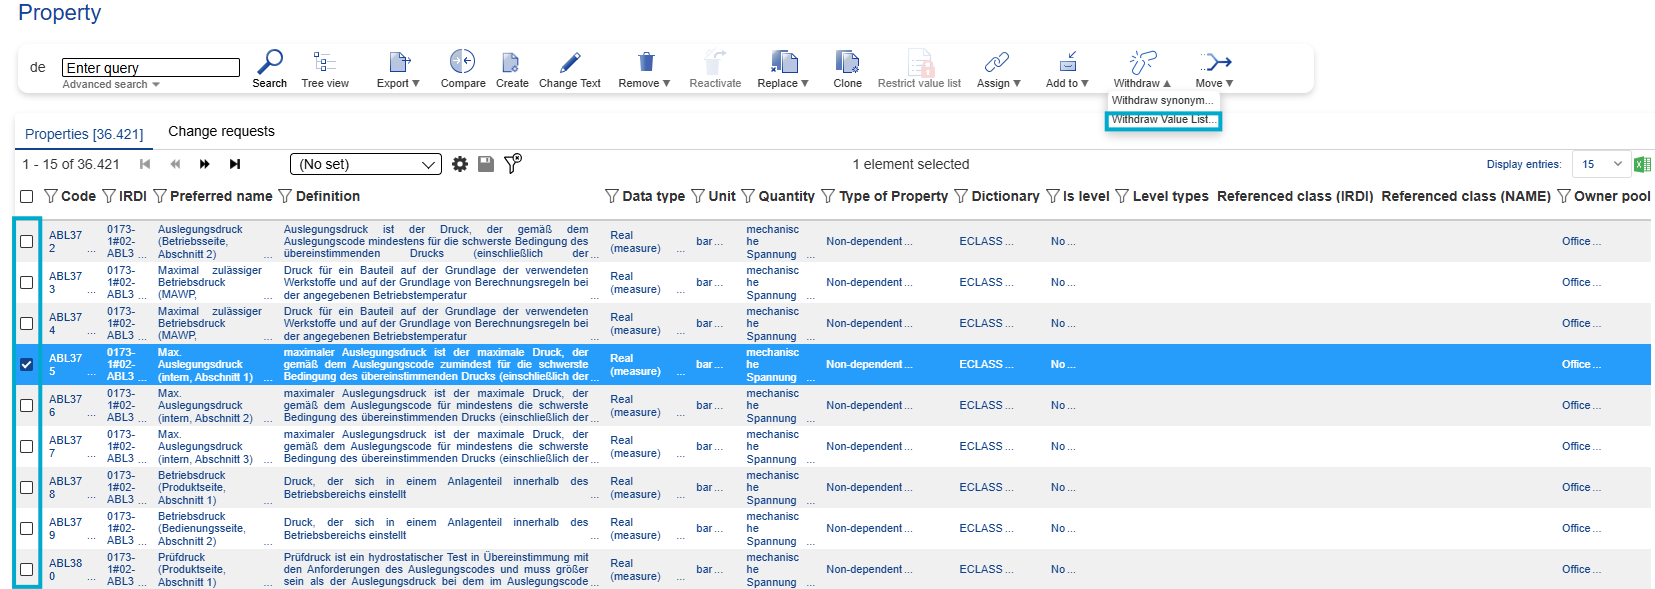
Figure 27: Select Withdraw Value List in toolbar
2. Select the Synonym to be withdrawn and press "Select"
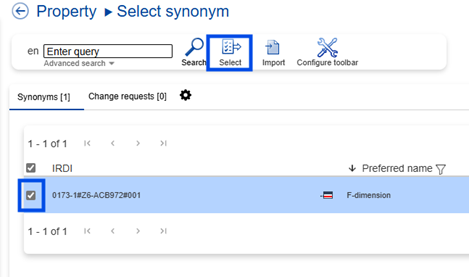
Figure 28: Select Synonym
3. type in a reason and save.
Add to
Add to Block
In order to create a Change Request to add a Property to a Block proceed as follows:
- Select a Property and click on “Add to block”.
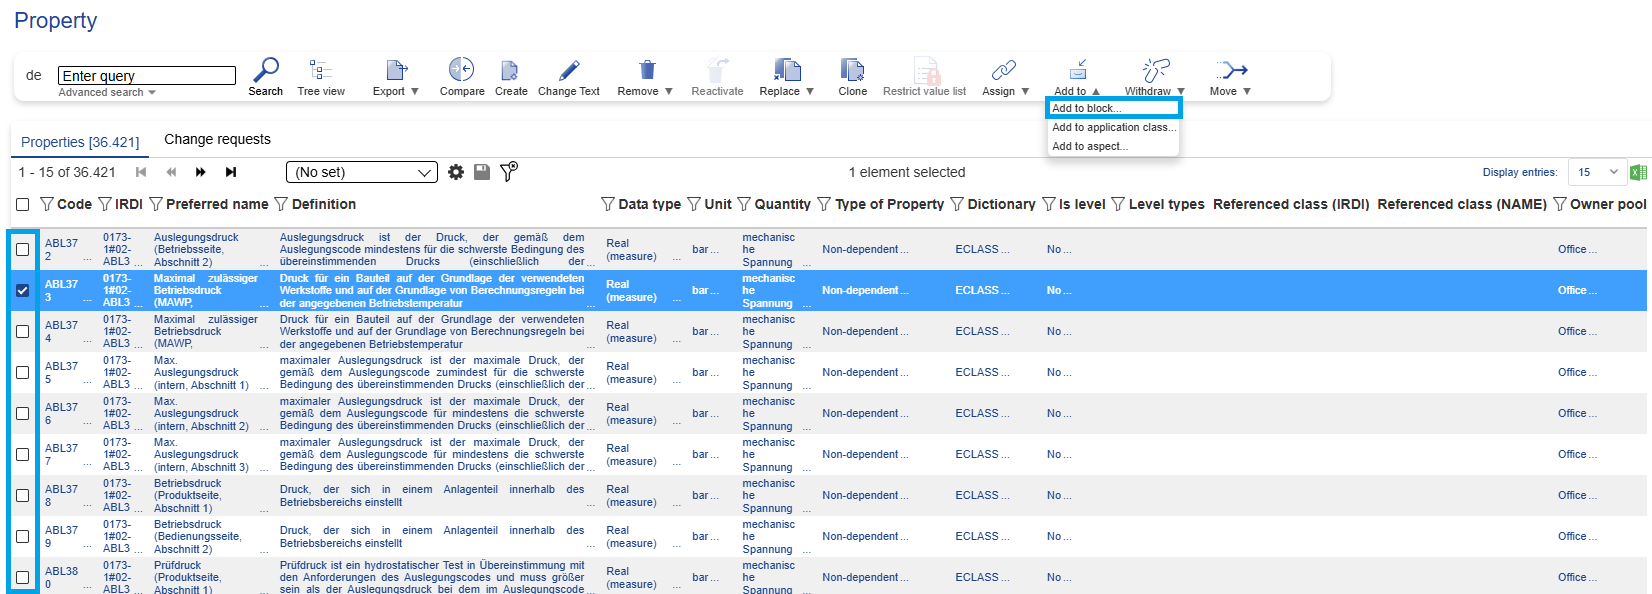
Figure 32: Select Add to Block
2. Select a Block and click on "Select"
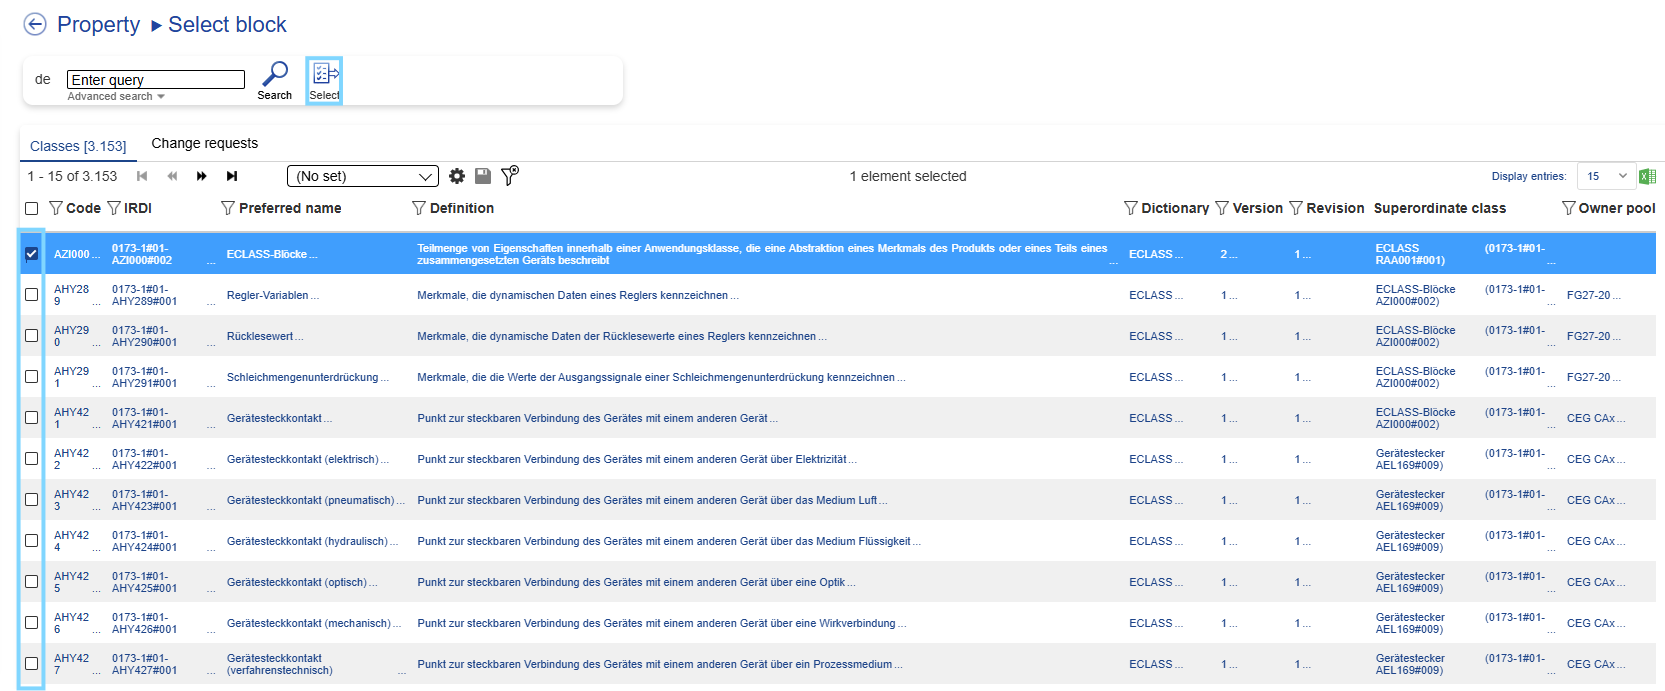
Figure 33: Select Block
3. Fill in the reason and select "Save"
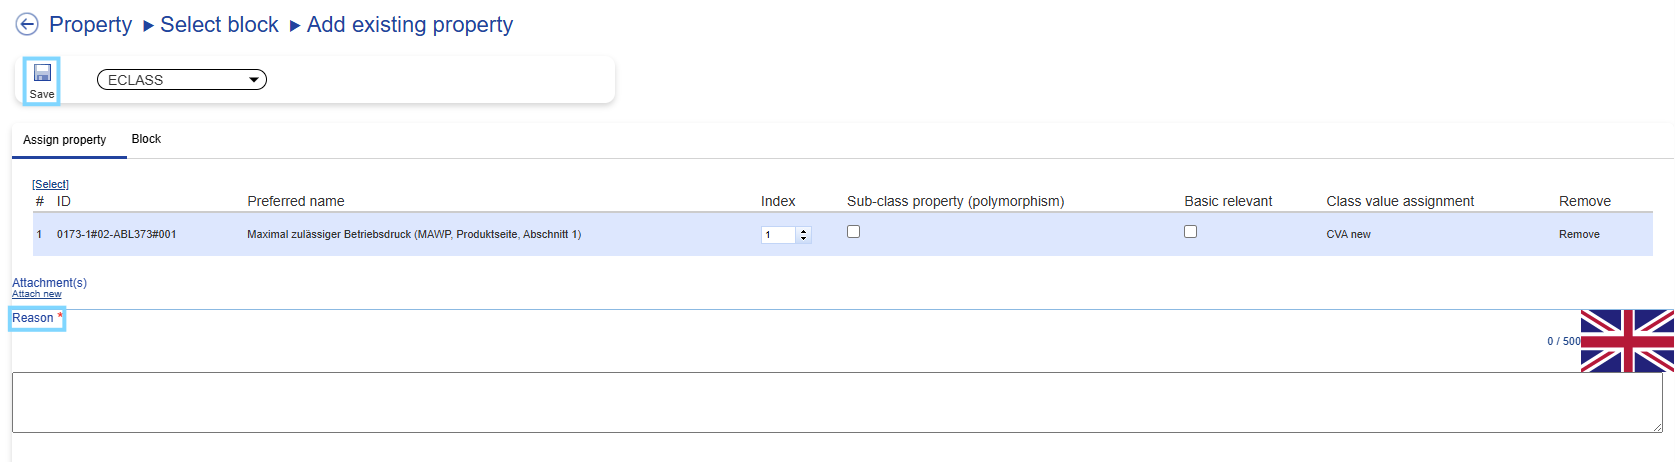
Figure 34: Dialog Add to Block
Result: Change Request add to block will be saved under menu entry "My change request".
Add to Application Class
In order to create a Change Request to add a Property to an Application Class proceed as follows:
- Select a Property and click on “Add to Application Class”
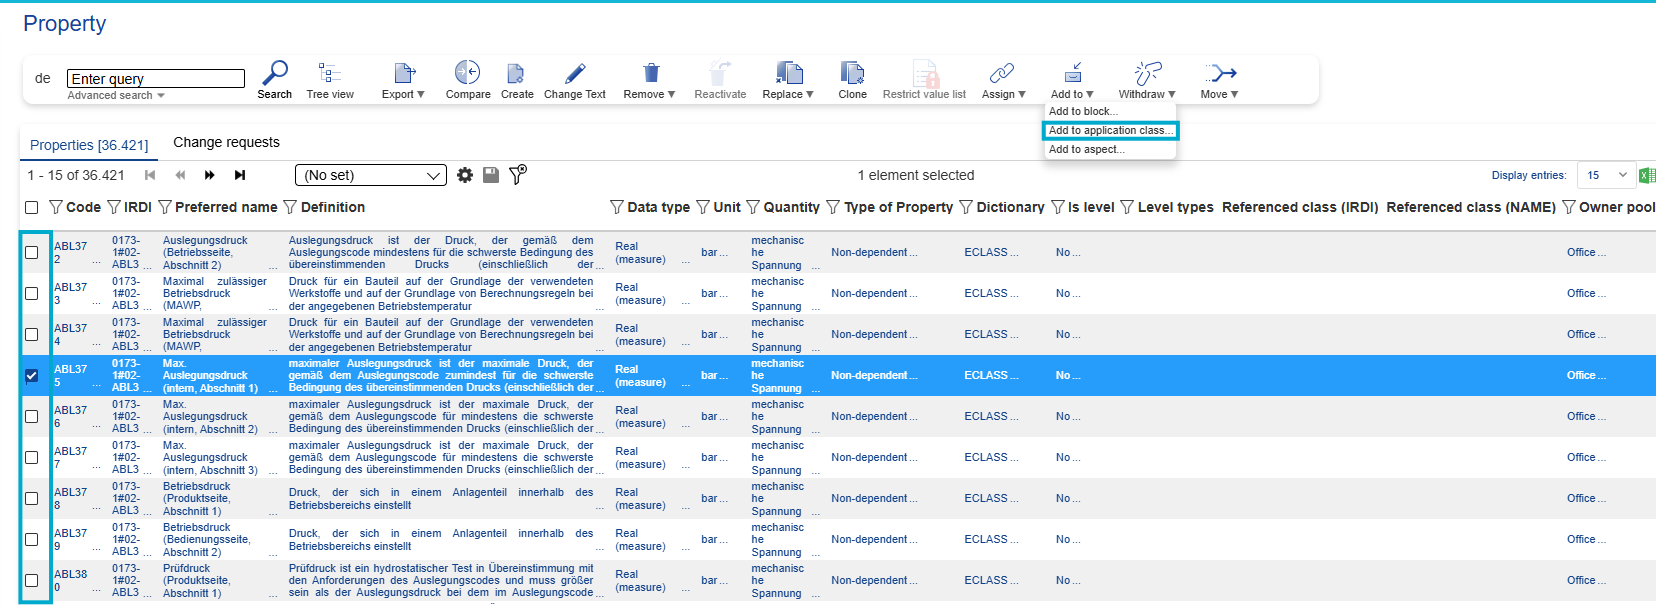
Figure 35: Select Add to Application Class
2. Click on search and choose an Application Class, then click on "Select"
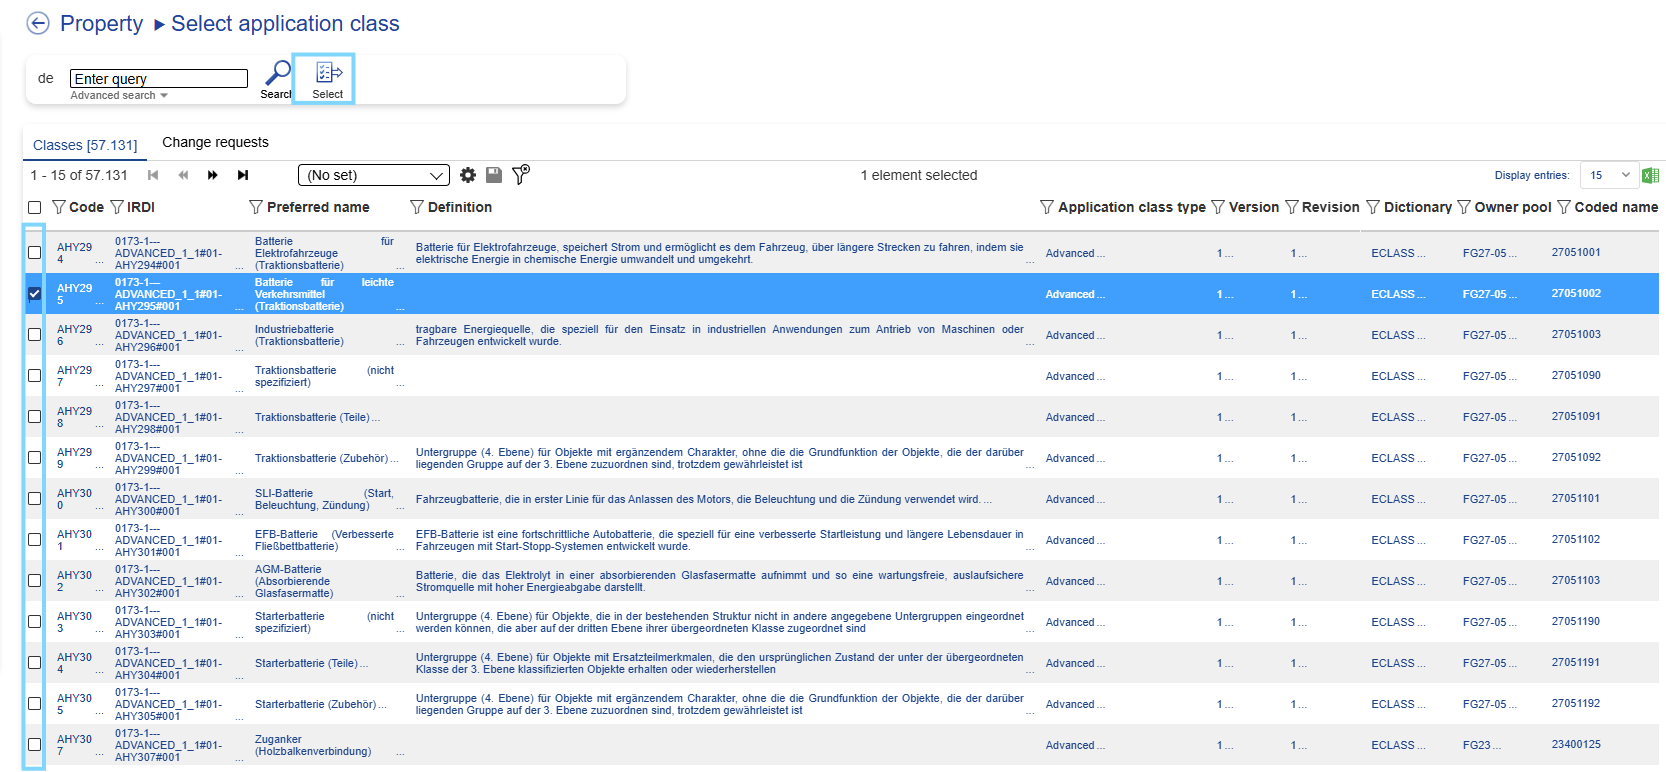
Figure 36: Select Application Class
3. Fill in the reason and select "Save"
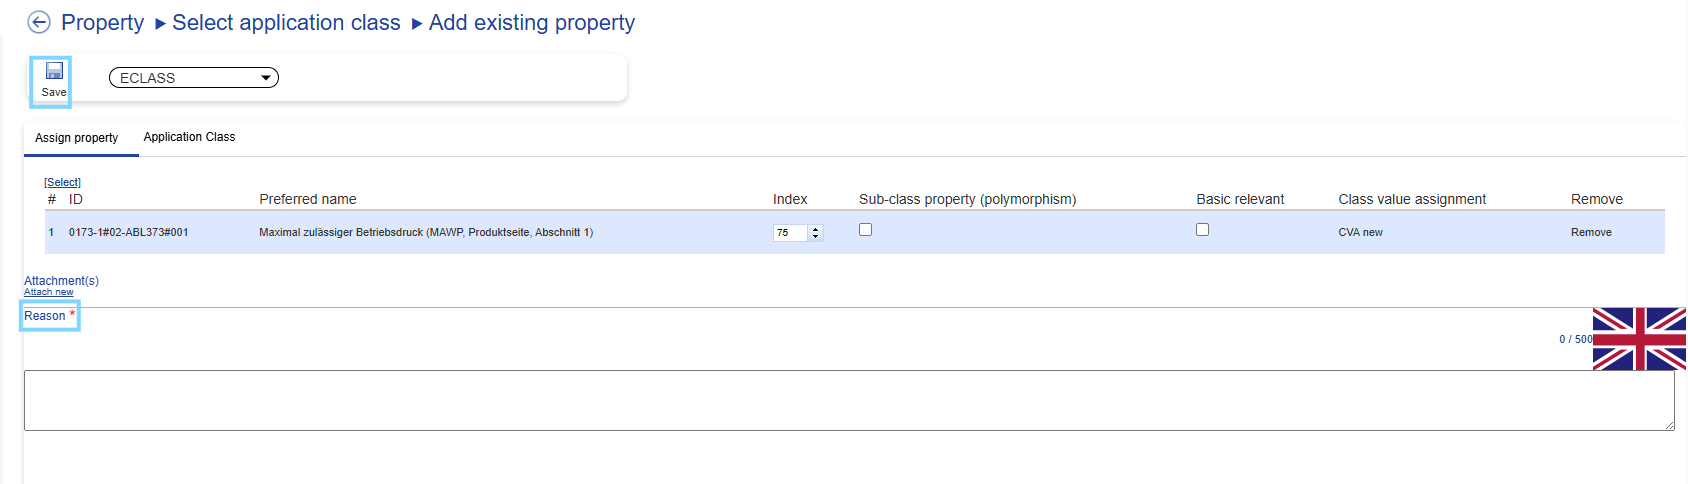
Figure 37: Dialog Add to Application Class
Add to Aspect
In order to create a Change Request to add a Property to an Aspect proceed as follows:
- Select a Property and click on “Add to Aspect”
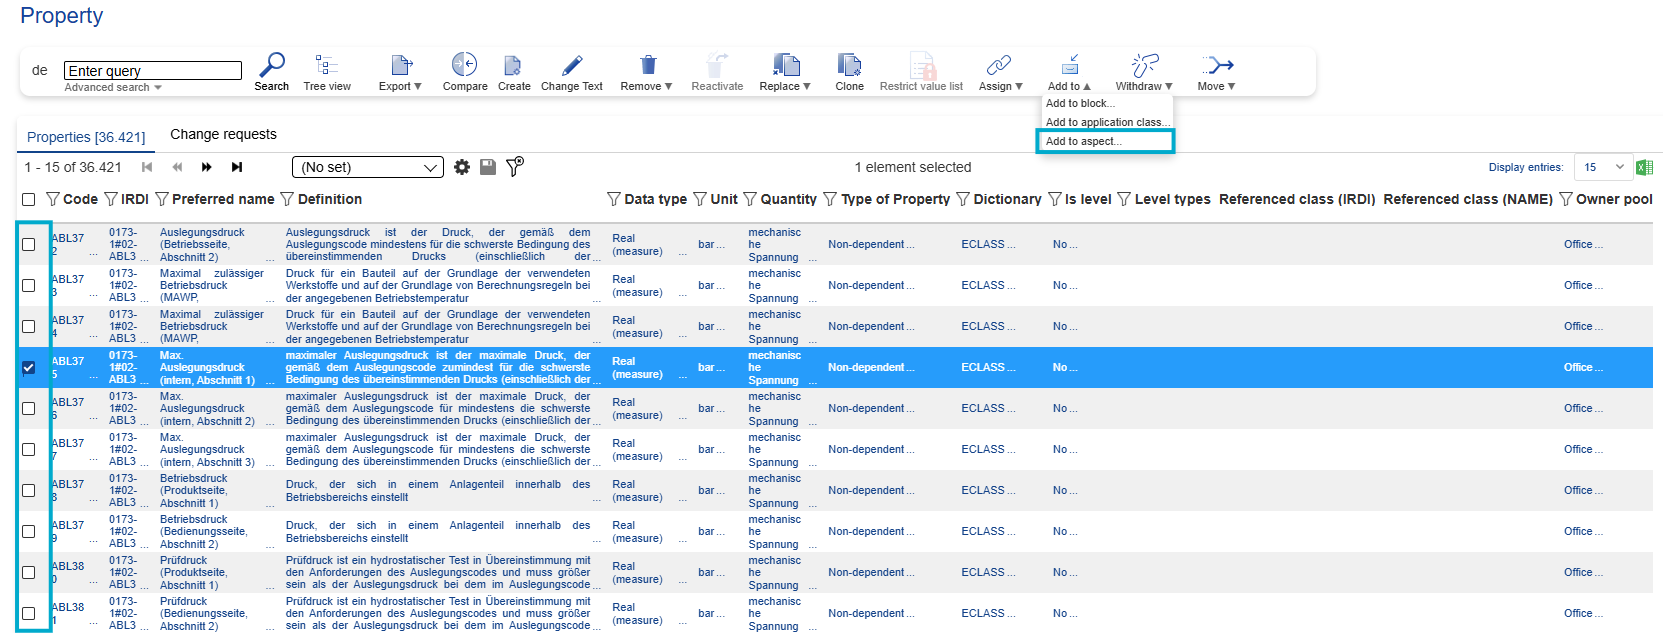
Figure 38: Select Add to Aspect
2. Click on search and select an Aspect, then click on "Select"
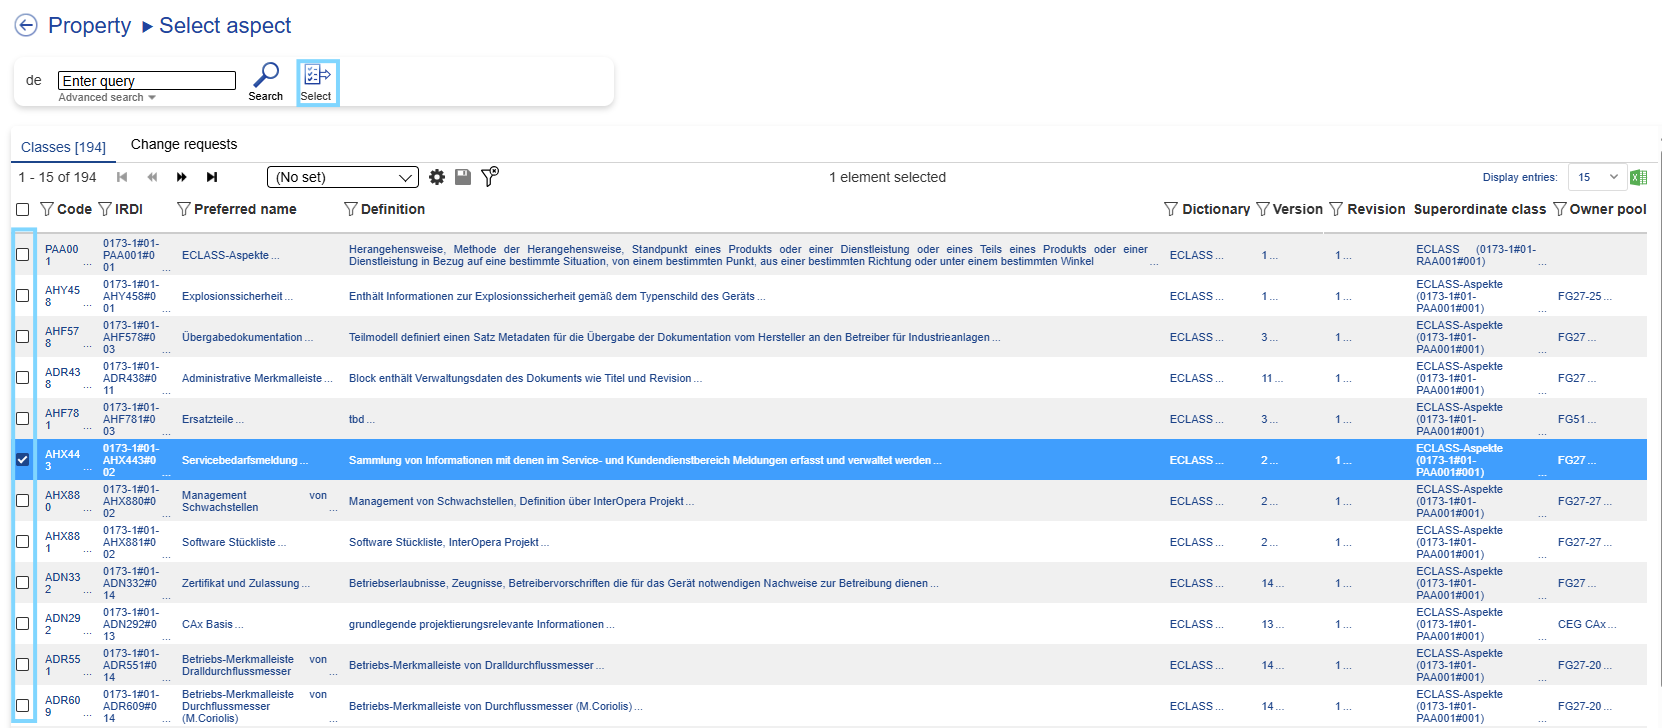
Figure 39: Select Aspect
3. Fill in the reason and select "Save"
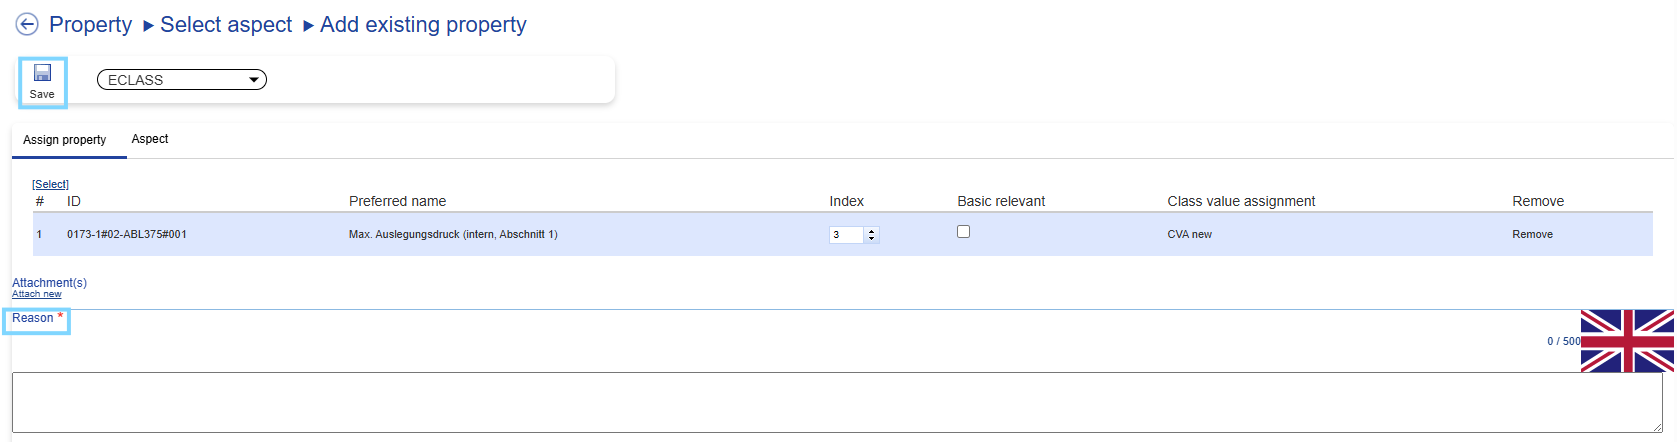
Figure 40: Dialog Add to Aspect