Polymorphism (Help Page)
Creation of a Polymorphic Structure
General Information
User wants to create a polymorphic structure.
The structure below represents an example of Super Block “Signal Channel” with its property “Signal Channel Type” pointing to one of the 3 specializations of block “Signal Channel”

Figure 1: Polymorphic Structure Example
Step 1: Create CR for New Block „Signal Channel“
Under menu entry Block, select function Create Block. System opens the hierarchical structure of blocks. Select node and press button Select.

Figure 2: Hierarchical Structure of Blocks
In the Create Block Dialog, fill in the fields and Press button Save.
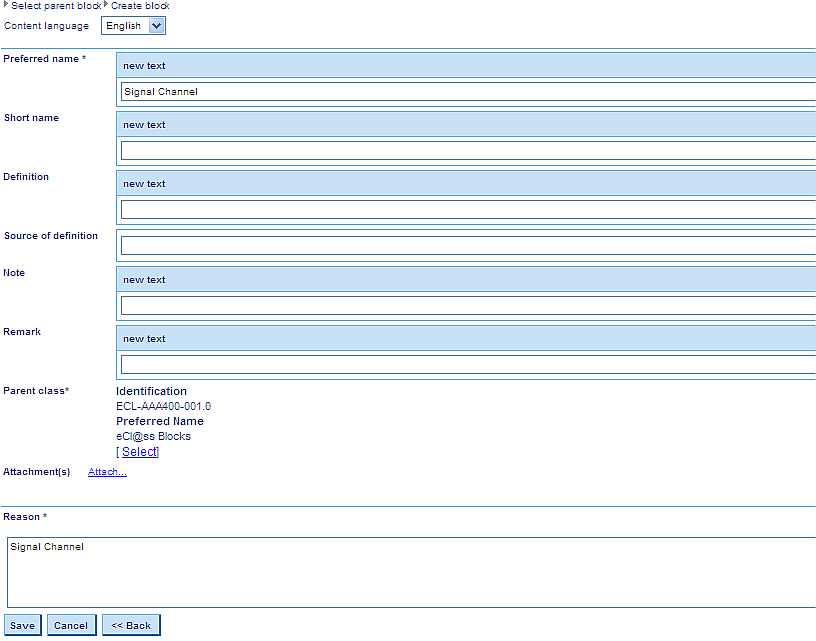
Figure 3: Create Block Dialog
The CR for new block “Signal Channel” will be saved.
Step 2: Create CRs for Specialized Blocks
Change requests for new specialized Blocks will be created by setting as parent the block “Signal channel”.
Under menu entry Block, select function Create Block. System opens the hierarchical structure of blocks. Select new created block “Signal Channel” as parent block

Figure 4: Select Parent Block
and then create CRs for the following specialized blocks (sub-blocks):
- Analog Signal Channel
- Binary Signal Channel
- Hybrid Signal Channel
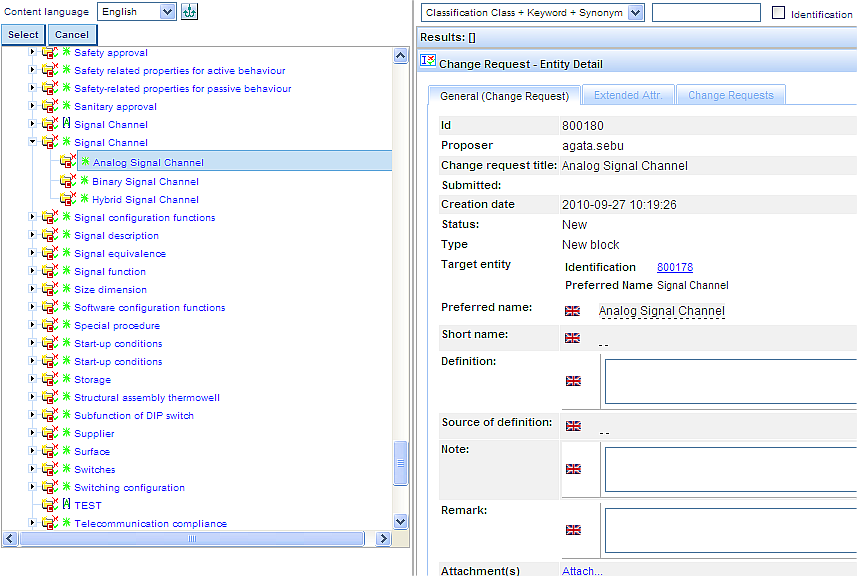
Figure 5: Created Specialized Blocks
Step 3: Create CR for New String Property Type
Under menu entry Property, select function Create Property and then button “Create Property”. In the Create New Property Dialog, select data type of property “String”, fill in the fields and press “Save”. The CR for the new Property “Signal Channel Type” will be saved.

Figure 6: Create New Property Dialog for creation of String Property “Signal Channel Type”
Step 4: Create CR for New Coded Value List
Under Value List, select function Create Value List, press button Create Value List in order to create a CR for a new coded value list (“Signal Channel Type”). Under Value Specification select entry “Coded”, fill in the fields and then press button Add in order to perform Step 5: Create CRs for New Coded String Values “Analog”, “Binary”, “Hybrid”
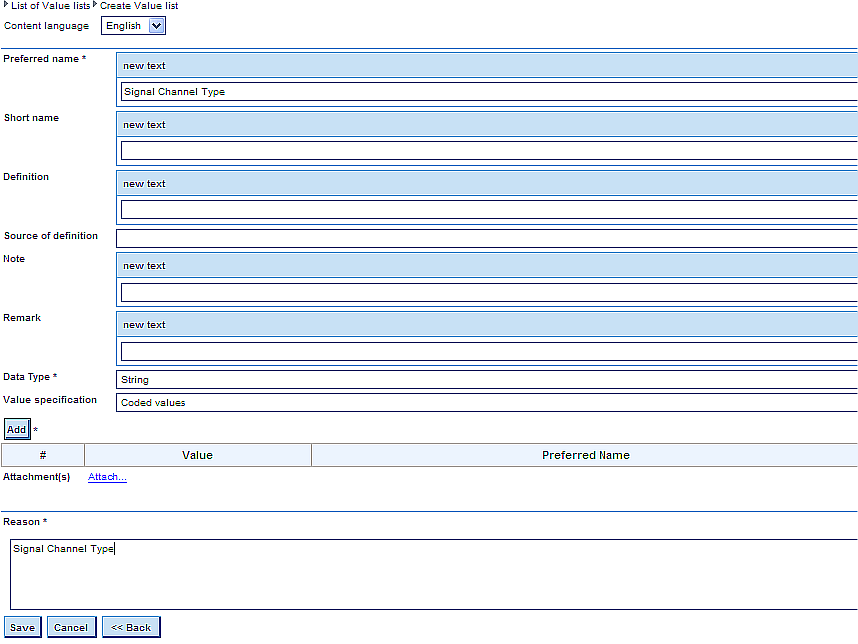
Figure 7: Dialog for Creation of CR for New Coded Value List “Signal Channel Type” and button “Add”
Step 5: Create CRs for New Coded String
In the Create Value List Dialog, press button Add. In the next dialog, press button Create Value in order to create the 3 specified values: Analog, Binary and Hybrid of type “String”.
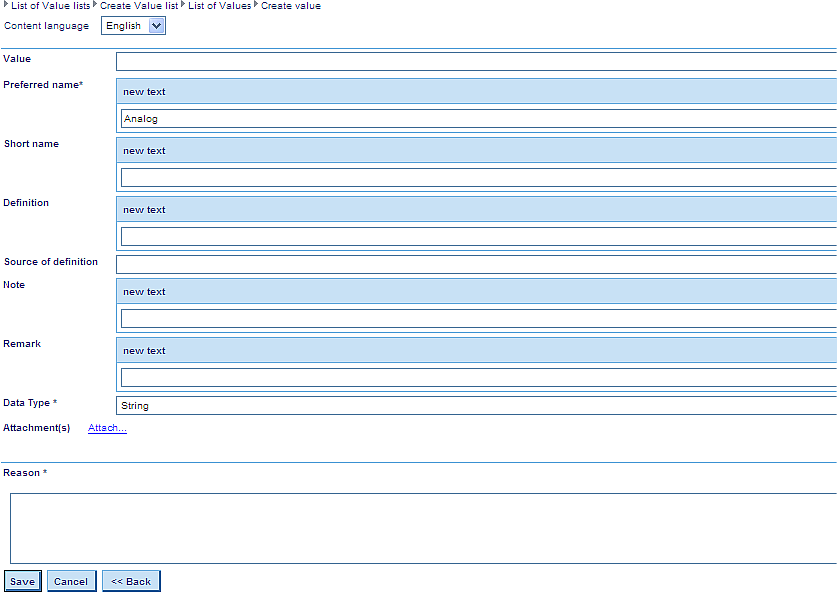
Figure 8: Create Value Dialog
After entering the data for the fist value (Analog), press Save. The CR for the new value (Analog) will be saved and the New Value List Dialog will be displayed again.
Press again button Add and proceed as described above in order to create the next value (Binary) and then the last value “Hybrid”.
After all 3 values were created, press button Save in order to save the coded value list “Signal Channel Type”.

Figure 9: Coded Value List with Coded Values
Step 6: Create CR to Assign Created Coded Value List to the String Property “… Type”
Under menu entry Property, select function Assign Value List. In the next screen, select CR for new String Property “Signal Channel Type” by clicking on it and then the CR for new Value List “Signal Channel Type” and then press Save.

Figure 10: Dialog Assign Value List to Property
Step 7: Create CR to Assign String Property “… Type” as Sub-Class Property of Main Block
Under menu entry Block, select function Assign Property. In the hierarchical structure, select block Signal Channel and press button Select. In the next screen, select CR for new string property “Signal Channel Type”. The system will display the Assign Property to Block dialog:
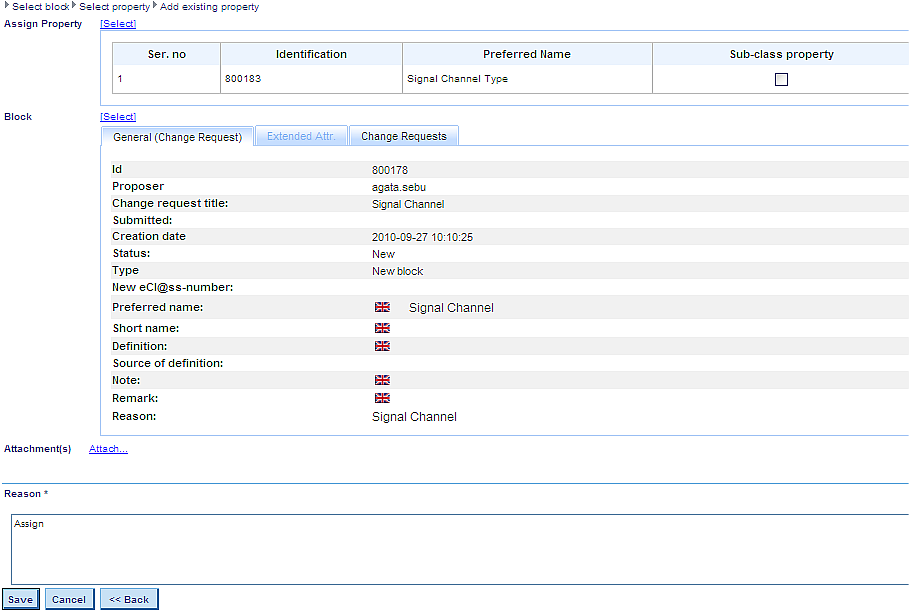
Figure 11: Assign Property to Block Dialog
Step 8: Set Sub-class Property in CR for Assignment Property to Block
Create CR to Assign String Property “… Type” and set it to Sub-Class Property of Main Block.
In the above dialog, select check box Sub-class property in order to set the property Signal Channel Type as sub-class property -> by doing these, the property will be inherited in all sub-blocks of the parent block “Signal Channel”.
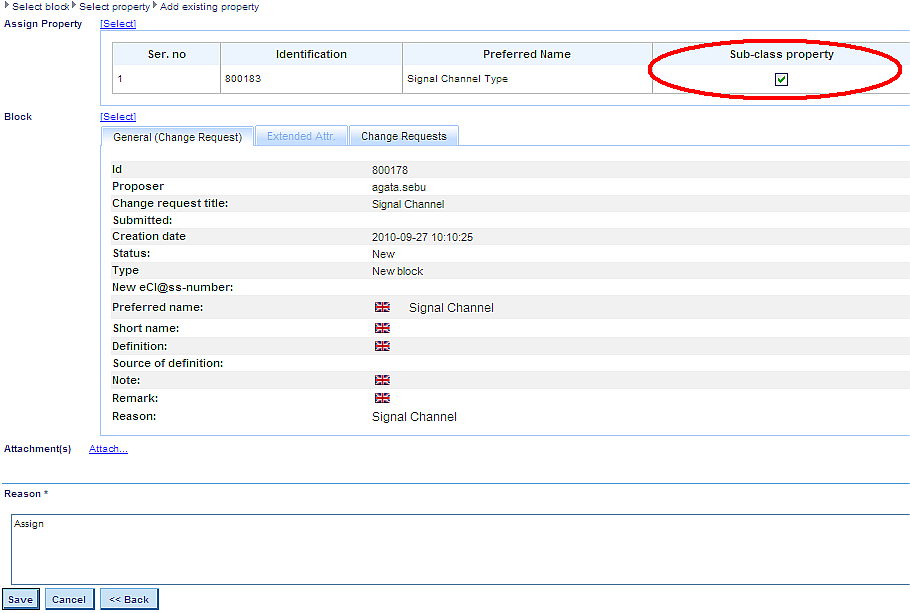
Figure 12: Set Sub-Class Property
Afterwards, press Save in order to save the CR. In the hierarchical structure, the property “Signal Channel Type” will be displayed under the specialized blocks of the parent block “Signal Channel”.
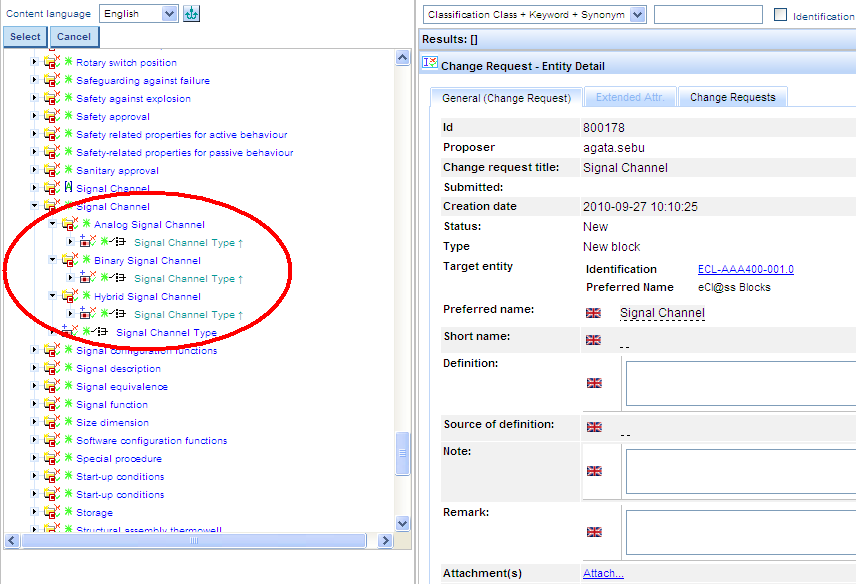
Figure 13: Property Signal Channel Type Displayed as Sub-Class Property under Specialized Blocks
Step 9: Create CRs for new CVAs
Create CR for new CVA for Block “Analog Signal Channel”, Property “Signal Channel Type”, Value “Analog”.
Under menu entry Value, select function Create CVA. In the hierarchical structure, select property “Signal Channel Type” displayed under Block “Analog Signal Channel” and press button Select. In the New CVA dialog, select Value „Analog“ as class-constant value by checking the check-box in front of it:
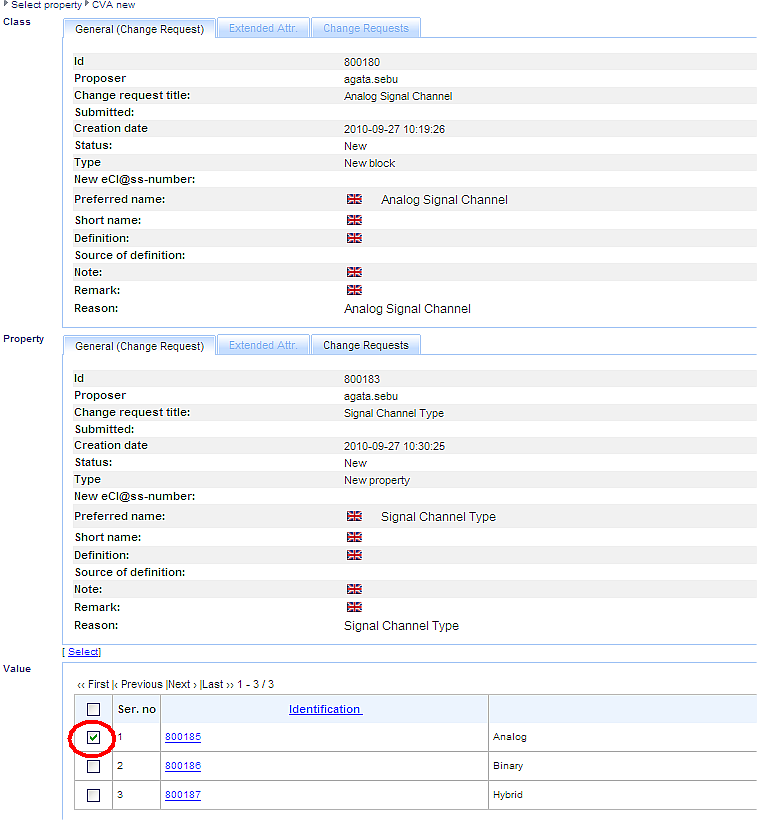
Figure 14: New CVA Dialog
Fill in the mandatory field “Reason” and press button “Save”.
A. Create CR for New CVA for Block “Binary Signal Channel”, Property “Signal Channel Type”, Value “Binary”
Under menu entry Value, select function Create CVA. In the hierarchical structure, select property “Signal Channel Type” displayed under Block “Binary Signal Channel” and press button Select. In the New CVA dialog, select Value „Binary“ as class-constant value by checking the check-box in front of it.
Fill in the mandatory field “Reason” and press button “Save”.
B. Create CR for New CVA for Block “Hybrid Signal Channel”, Property “Signal Channel Type”, Value “Hybrid”
Under menu entry Value, select function Create CVA. In the hierarchical structure, select property “Signal Channel Type” displayed under Block “Hybrid Signal Channel” and press button Select. In the New CVA dialog, select Value „Hybrid“ as class-constant value by checking the check-box in front of it.
Fill in the mandatory field “Reason” and press button “Save”.

Figure 15: Display of CVAs in the Hierarchical Structure
Step 10: Create Reference Property Pointing to the Polymorphic Block
Under menu entry Property, select function Create Property. In the Create Property Dialog, fill in mandatory fields, select property data type „Reference“ and then select CR for new block „Signal Channel“ as referenced block. Press Save to save the CR for new reference property.

Figure 16: Create Reference Property Dialog Pointing to Block „Signal Channel“
Via the created reference property „Signal Channel“, the polymorphic block „Signal Channel“ can be assigned wherever desired.
Creation of Advanced Polymorphic Structures
General Information
In the example above property “Signal Channel” can reference (using polymorphism) any specialization of “Signal Channel” block when products are created.
Suppose we would like to:
- restrict number of specializations for property “Signal Channel” in products to Analog and Binary Signal Channels;
- Make another property that can have only Analog and Hybrid Signal Channel when products are created out of the structure.
To achieve this we have to define list of values for reference properties and create values of type reference pointing only to the specializations that we want to make them available in products.
The modified structure will look like below:

In order to achieve the above structure, follow the following steps:
Step 1: Create One or More Values with Data Type “Reference” Pointing to Specialized Block(s)
Select menu entry Value, function Create Value and press button “Create Value”.
In the Create Value Dialog, fill in the mandatory fields and select data type “Reference”.
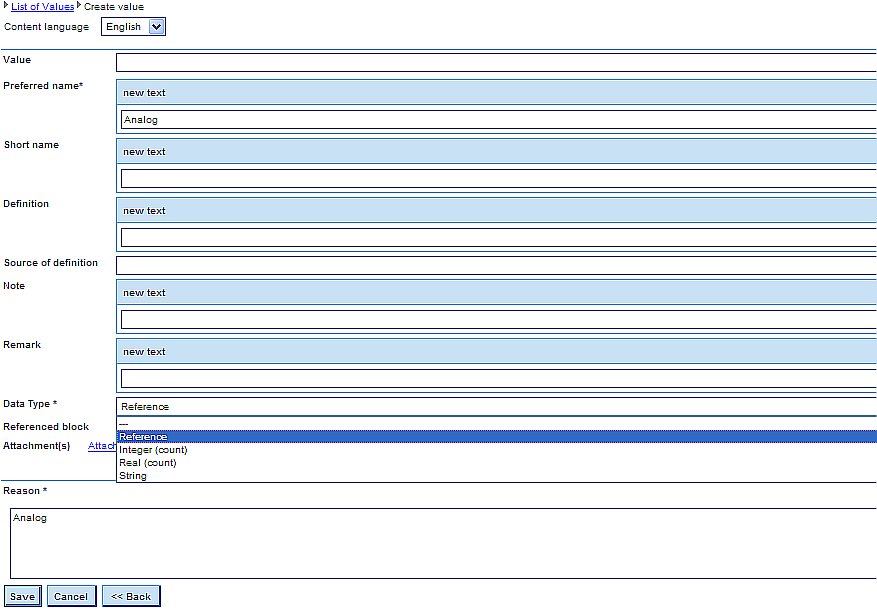
Figure 17: Create Reference Value Dialog
Click link “Select referenced block” in order to select the specialized block to which the reference value points and press “Save” to save the CR.
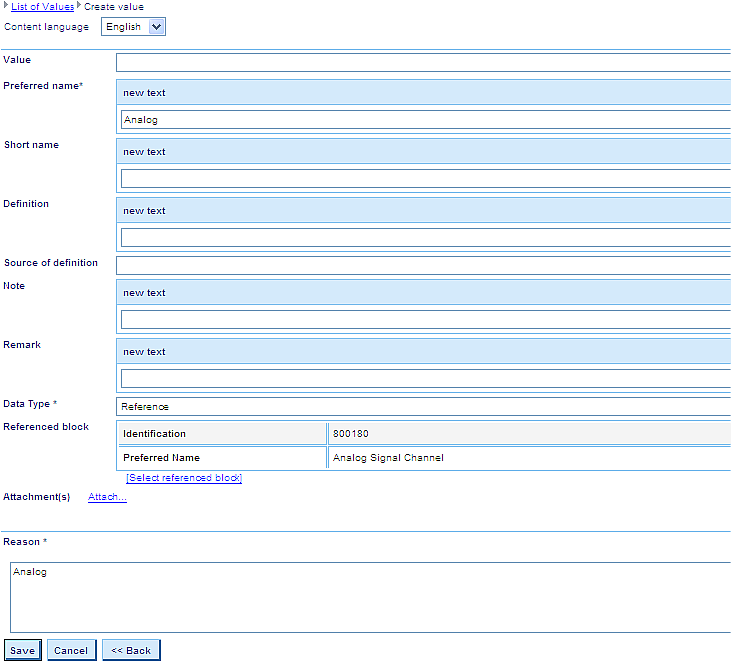
Figure 18: Press „Save“ to save the CR
The above steps should be performed in order to create further values with data type reference.
Step 2: Create Value List of Data Type Reference
Select menu entry Value List, function Create Value List and press button Create Value List.
In the Create Value List Dialog, fill in the mandatory fields, select data type “Reference” and value specification “Coded values”.
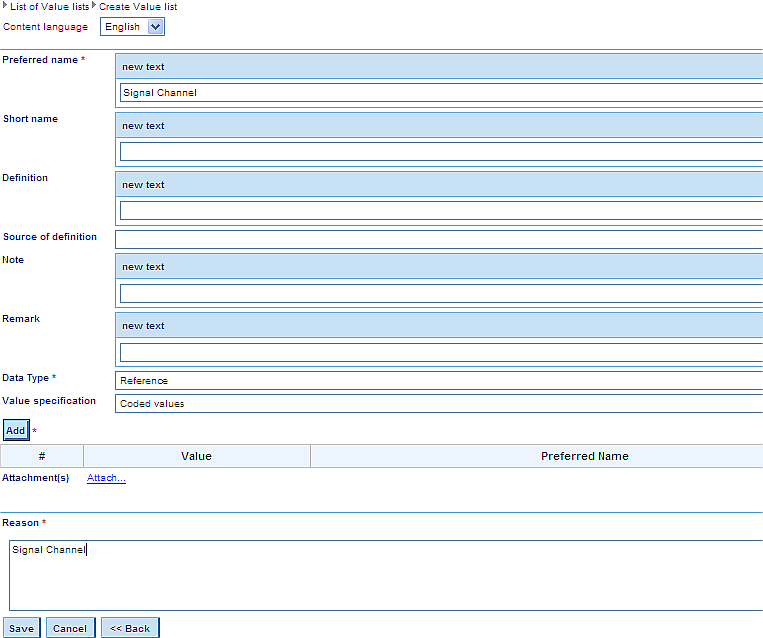
Figure 19: Create Value List Dialog
In order to save the Value List, the user has to add at least one value to the value list. For this, press button „Add“ and in the next dialog select one of the reference values created before:
Figure 20: Select Reference Value
Press button „Save“ to save the CR.
Assign Reference Value(s) to Reference Value List
Select menu entry Value List, function Assing Value. In the next dialog, select the created Reference Value List by clicking on it and afterwards the created reference value(s) pointing to the specialized blocks to which the polymorphic structure will be restricted to.
Press Save to save the assignment.

Figure 21: Press Save to save the assignment CR
Assing Reference Value List to Reference Property
Select menu entry Property, function Assign Value List. In the next dialog, select the created reference property (in our case “Signal Channel”) and afterwards the created reference value list.
As final step, press Save in order to save the assignment.
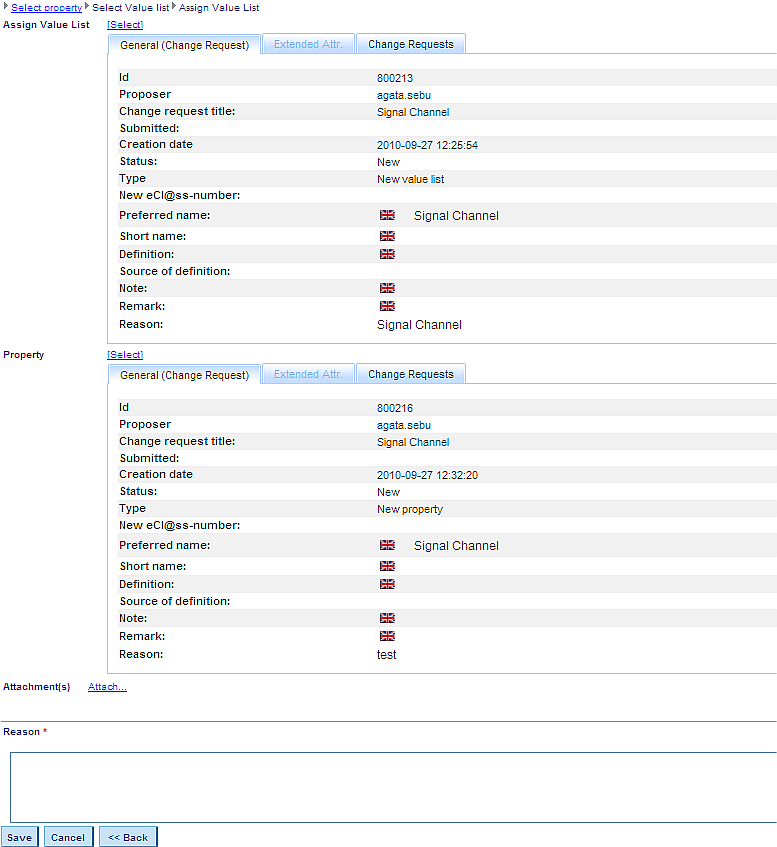
Figure 22: Press Save to save the assignment CR
Assign Reference Property to Block
Select menu entry Block, function Assign Reference of Block. System displays the hierarchical structure of elements. Select the block to which you want to assign the reference property (having a reference value list which restricts the polymorphic structure). In the next dialog select the reference property and save the CR. The advanced polymorphic structure will look as follows in the hierarchy:

Figure 23: Advanced polymorphic structure displayed in hierarchy